Best Miter Saws for Beginners
A miter saw can make repeatable crosscuts and angled cuts easier to learn than cutting each board by hand. It can also take up valuable space, cost more than a basic circular saw, and create serious injury risk if a new user treats it like a harmless chop tool. The best miter saws for beginners are therefore not automatically the biggest, most powerful, or most feature-packed models. They are saws whose cut capacity, adjustments, support, and safeguards fit the work you actually expect to do, and whose manual you are willing to follow.
This guide is for someone choosing a first stationary miter saw for home woodworking, trim, shelving, small repairs, or DIY projects. It explains the decisions that matter before shopping, describes what the common features mean, and gives a careful workflow for learning. It is not a laboratory ranking: we have not performed hands-on testing or measured the current accuracy, noise, durability, or price of individual models. Product details change, and model names sometimes conceal different versions. Check the exact manufacturer listing and current manual before buying.
A miter saw is designed for crosscutting material placed on its table against its fence. It is not a substitute for a table saw when you need to rip a board lengthwise, nor is it a universal cutter for every material. If your first projects need long rip cuts, compare a table saw buying guide. For portable straight cuts in sheet goods, a track saw guide may be more relevant. For a broader feature comparison, see our general miter saw guide; if you already know that bevel cuts are central to your work, consult the compound miter saw guide.
Affiliate disclosure: This article may contain affiliate links. If you buy through one, the site may earn a commission at no extra cost to you. Recommendations should still be based on project fit, safety, and verifiable product information.
Amazon product examples to compare
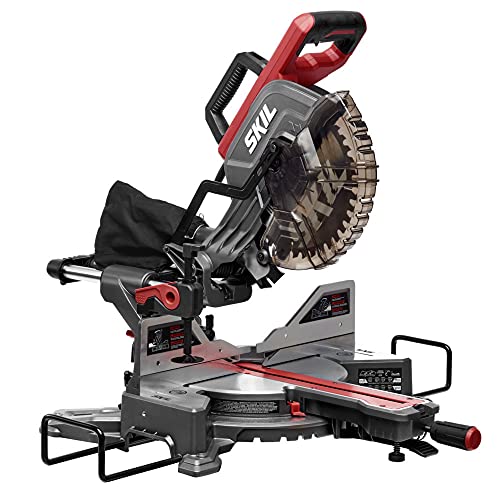
ASIN: B08J7N3VYW

ASIN: B07P7LX9DF

ASIN: B0FCHG4YJL

ASIN: B0DHS3PP4J
Certain content that appears on this site comes from Amazon. This content is provided “as is” and is subject to change or removal at any time. Product examples and images are supplied through Amazon Creators API; confirm specifications and availability on the current listing.
Quick answer: buy for the cuts you will repeat
For many first-time owners, a compact, non-sliding saw or a straightforward single-bevel compound saw is easier to understand and store than a large sliding dual-bevel machine. That is a starting point, not a universal recommendation. Choose the smallest type that safely supports the widest and thickest material your real projects require. If you routinely cut wide trim or boards, a sliding mechanism may be useful. If you expect to make bevels in both directions, a dual-bevel head can reduce repositioning. If almost every task is a square crosscut, paying extra for those movements may not make the work easier.
Before comparing models, write down three likely projects and the stock dimensions they use. Look at the product’s stated crosscut capacity at the angles you need, not only at its maximum square-cut width. Plan for a stable bench or stand and outfeed supports. Finally, read the manual for blade compatibility, guard operation, adjustments, and material limits. A saw that cannot be supported or operated safely in your space is a poor first purchase even if its specifications look impressive.
What a miter saw does—and what it does not
The saw head pivots down through material supported by a table and fence. Rotating the table changes the miter angle, which angles the cut across the board’s face. Tilting the head changes the bevel angle, which tilts the cut through the board’s thickness. A compound cut combines both. A sliding saw adds a rail movement that can increase crosscut width, but it also requires room for the rails and a correct cutting motion defined by that model’s manual.
This geometry makes the tool useful for picture frames, trim, framing pieces, shelving parts, and repeated board lengths. It does not make it a precision guarantee. A saw can be out of adjustment, a board can move, and a measured angle can be wrong. Accuracy comes from sound setup, verified settings, secure work, a suitable blade, and a test cut. Even expensive tools need calibration checks after transport or adjustment.
A miter saw is primarily for crosscuts. Do not try to use it as a handheld saw, make a cut with the work unsupported, or invent a cutting technique based on a video that differs from the manual. If the task requires ripping, cutting large sheets, or making a cut the tool’s manual does not authorize, choose a more appropriate tool or ask an experienced woodworker for help.
Start with the first projects you expect to make
Trim, casing, and small molding
Trim work often involves repeated square cuts, miters at corners, and sometimes bevels or compound angles. A fence with a useful height and a table that supports the piece help keep stock aligned. Crown molding can require careful orientation and compound settings; it is rarely the best first practice cut. Start with simple scrap, learn how the saw’s angle scales work, and confirm the fit with test pieces before cutting finished material.
Shelving, furniture parts, and boards
For shelf pieces or small furniture parts, the main needs may be square crosscuts, repeatable stops, and support for longer boards. A miter saw can cut boards to length but cannot cut a board narrower along its length. A stop block can make multiple pieces consistent, but it must be placed so cutoffs cannot bind or become trapped between the blade and stop. Follow the saw maker’s instructions for repetitive cuts and never hold a small cutoff near the blade by hand.
Framing and home repair
Framing and repair work can involve dimensional lumber longer than the saw table. A stand or stable side supports help keep the stock level, but supports must not interfere with the saw’s travel or create a pinch point. Identify the actual width and thickness of the pieces you plan to cut. A model’s capacity can change at angled settings, so do not assume that its largest advertised cut applies to every miter angle.
Small crafts and short pieces
Small pieces are not automatically easier or safer. They can be difficult to hold securely and may be thrown if they shift. Use the manufacturer’s clamp or an appropriate fixture where the manual permits. If a workpiece is too small to hold outside the no-hands area and cannot be clamped safely, do not cut it on the saw. Consider a hand saw, a different fixture, or a different method.
Blade size: capacity, availability, and control
Residential miter saws commonly use 7-1/4-inch, 10-inch, or 12-inch blades, but sizes and compatibility vary by tool. The saw’s manual specifies the permitted blade diameter, arbor, thickness, and speed rating. Never select a blade simply because its diameter seems close. The guard, arbor, and machine are designed around approved dimensions. A blade that does not match those requirements can create a hazard or damage the tool.
A larger blade may provide more cutting capacity in a compatible saw, while the overall tool may be heavier and the replacement blade may cost more. A smaller saw may be easier to carry or store and can be enough for narrow trim and common small projects. Actual capacity depends on saw design, head travel, fence shape, and angle setting—not only diameter. Read the capacity chart in the product specification or manual and compare it with the material list for your projects.
Tooth count and tooth geometry influence cut quality and suitability. A blade marketed for fine crosscutting may leave a cleaner edge in some wood than a general-purpose blade, while a framing-oriented blade may emphasize speed. The correct choice depends on material and saw limits. More teeth alone do not guarantee a better result: material, blade sharpness, feed technique, and support matter. For plywood or veneered panels, use a blade designed for clean crosscuts and make a test cut on scrap to check tear-out.
Inspect the blade before use. Do not use a cracked, damaged, incorrectly mounted, or unsuitable blade. Disconnect power or remove the battery before changing it, and follow the exact manual procedure, including direction, washers, and guard handling. A new owner should not improvise blade changes from memory; use the instructions for the particular saw.
Miter, compound, sliding, and cordless: what the labels mean
Basic miter saw
A basic miter saw makes crosscuts and miter cuts by rotating the table. It does not tilt the blade for bevel cuts. If your work is mostly square and angled crosscuts in narrow stock, this simpler format may be sufficient. Fewer adjustments can make learning less complicated, though the model still needs a guard, stable support, and suitable capacity.
Single-bevel compound saw
A compound saw tilts the head to make bevel cuts as well as miter cuts. A single-bevel model tilts in one direction. For bevels on both sides of a workpiece, you may need to flip or reposition the material and carefully preserve its reference face. This is manageable for many users, but it adds setup steps and the chance of reversing a measurement.
Dual-bevel compound saw
A dual-bevel head tilts to either side, which can reduce the need to flip a long workpiece for paired bevel cuts. This can help with trim runs or repeated compound cuts. It adds features and can increase cost, weight, and adjustment complexity. Do not buy it only because it sounds more professional; buy it if your work actually benefits from the two-direction tilt.
Sliding compound saw
A sliding saw moves the head along rails to cut wider stock than a comparable non-sliding design may handle. It can be useful for wider boards and trim, but it requires additional workspace behind or around the saw, depending on the rail design. Sliding technique differs across models. Some manuals direct a specific order for pulling or pushing the head; follow the maker’s method and do not generalize from another saw.
Corded versus cordless
Corded saws provide power while plugged into an appropriate outlet and avoid battery runtime planning. Cordless saws can be easier to move to a jobsite and may fit a battery platform you already own. Battery, charger, and bare-tool bundles vary, so compare the complete system cost and check compatibility. Cutting dense stock repeatedly can draw energy quickly, but runtime depends on the tool, battery, material, blade, and technique. Do not trust a runtime claim without understanding its test conditions.
Beginner-friendly features worth comparing
Clear, readable angle scales
Look for controls that are easy to identify and a scale you can read from your normal working position. Positive stops at common angles can make setup faster, but the stops are not proof that the cut is perfectly accurate. Dust, wear, adjustment, or transport can affect alignment. Verify important settings with a reliable square or test cut and follow the manual’s calibration guidance.
Accessible locks and bevel adjustments
Make sure you can reach the miter lock and bevel lock without putting your hand near the blade path. Controls should engage securely and be understandable from the manual. Some designs use front controls or bevel detents; other designs use rear controls. Ease of use is personal, so if possible inspect the exact model in a store while it is unplugged. Confirm that every lock is tightened before operation.
Blade visibility and work lights
Lasers and shadow lines can help indicate a cut location, but they do not replace a careful layout mark or a test cut. A laser can shift, be hard to see in bright light, or show the blade edge differently depending on the system. A shadow line may show the blade’s kerf more intuitively, though this also depends on lighting and blade condition. Treat either as an aid and verify which side of the line will be removed.
Electric brake and soft start
An electric brake is designed to stop blade rotation after the trigger is released; soft-start features can reduce the initial jolt on some saws. These features may improve the operating experience, but they do not make it safe to reach toward the blade or move the workpiece before the blade stops. Wait for a complete stop before raising or repositioning the head as instructed by the manual.
Dust collection
Miter saws can create substantial airborne dust. A dust bag may catch some debris but is not equivalent to effective extraction. A vacuum port or compatible extractor can help manage dust, but connection sizes and performance vary. Use suitable respiratory protection and ventilation for the material and task. Follow the manufacturer’s advice for dust collection, and avoid assuming that a bag eliminates exposure.
Included clamp and accessories
A workpiece clamp is useful only when installed in an approved position and when it does not obstruct the blade or head. Some saws include a clamp; others may not. Side extensions, a stand, and stop accessories can support longer material and repeated lengths. Check what is included in the exact package and whether the accessories are compatible. A stand does not compensate for an unstable floor or an incorrectly balanced load.
Fence, table, and material support
The table and fence keep the workpiece aligned. A tall fence can support taller stock, but it must not interfere with bevel settings. A fence with sliding sections may need repositioning for bevel cuts; verify the manual procedure and lock it securely. Look for a firm fence, a flat table, and enough usable support for the stock you expect to cut. Product photos alone may not show how the fence behaves at compound angles.
Long boards can tip or sag if only the saw base supports them. Use stable supports on both sides as appropriate, set to keep the board level with the table. Support the whole length where practical; a sagging end can twist or pinch during a cut. The supports must allow the cut piece to separate freely without trapping it against the blade. Never let a helper hold a long board in a position that places their hands near the cutting area.
Some stock is bowed, warped, or irregular. The user must assess whether it can sit flat and firmly against both table and fence. If not, do not force it into position or cut it freehand. Select straight stock, use a safe fixture approved by the manufacturer, or use another tool and setup. The Makita miter saw manual emphasizes securing the workpiece and supporting long material to reduce pinch and kickback risk.
A simple buying framework for a first saw
- List real cuts. Record the materials, maximum width and thickness, angles, and number of repeated pieces in your likely first projects.
- Check the capacity chart. Compare the listed capacity at the exact angle and bevel settings you need. Leave some practical margin rather than buying exactly at the stated limit.
- Choose the simplest suitable mechanism. Consider a basic, compound, or sliding design based on project needs, not on the longest feature list.
- Match the power system. A corded saw suits a stable workshop with an appropriate circuit; cordless may be practical if you move between locations and already use compatible batteries.
- Inspect controls and support. Check fence height, table extension options, clamp arrangement, lock accessibility, dust port, and stand compatibility.
- Budget for the full setup. Include an appropriate blade, stable support, extraction or dust control, eye and hearing protection, and room for safe work. A tool-only price is not the full cost of ownership.
- Read the manual before buying if possible. Confirm material limits, safe operating steps, blade specifications, adjustment procedures, and whether the saw fits your workspace.
These steps make comparisons more useful than chasing one universal “best” model. A beginner making occasional cuts in short trim has different needs from someone building furniture every weekend. The right purchase is one that covers the work, can be set up properly, and will remain understandable as your skill improves.
How we researched this guide
This is a research-based buying guide, not a hands-on product test. We reviewed official safety guidance and manufacturer documentation to describe general miter-saw operation, workpiece support, guard expectations, and model-specific cautions. We did not test candidate saws, rank current inventory, measure cut accuracy, or verify prices. Any future product recommendations should be checked against current manufacturer specifications and manuals before publication.
OSHA’s Miter Saws machine-guarding guidance describes the point-of-operation hazards and the need for guards, safe hand placement, and eye or face protection. OSHA describes the guard as protecting the portion of the blade above the table and notes the importance of maintaining sharp blades. This is general workplace guidance; a home user should also read the operating manual and follow local requirements.
The DEWALT DWS713 instruction manual provides a concrete example of model-specific warnings: keep guards in place, do not perform freehand operations, clamp small pieces, wait for the blade to stop before moving material or adjusting, and disconnect power before service. These instructions apply to that model and are not a substitute for the manual of another saw.
For portability and model setup, manufacturers publish support materials that may help prospective buyers understand controls before purchase. DEWALT’s miter saw setup and maintenance video index covers topics such as setup, calibration, feature controls, accessories, and blade changes for listed products. Availability and applicability can vary by model. Always use the documentation for the exact tool you own.
Setup and a careful first-cut workflow
Prepare the workspace
Place the saw on a stable, level surface or a properly assembled stand. Secure the saw as the manual directs. Leave room for the head and rails to travel and for long stock to be supported. Keep cords away from the blade path and arrange extraction before switching on. Clear the area of offcuts, packaging, loose tools, and people who are not involved in the task. Wear eye protection and hearing protection; select additional personal protective equipment based on the saw manual and material.
Inspect the saw while disconnected
Before connecting power or installing a battery, confirm that the blade is correct and secure, guards move and return as intended, adjustments lock, and the table and fence are clear. Do not use the saw if the guard sticks, a part is damaged, or a control does not behave normally. Ask the manufacturer or a qualified service provider about repairs. Never defeat or remove a guard to make a cut easier.
Support and mark the stock
Choose sound material that can lie flat against the table and fence. Mark the cut clearly and identify the waste side of the line. Place the workpiece so the cut-off piece is free to move after separation and cannot be trapped. Support long sections on the same plane as the saw table. Use the manual’s clamp arrangement when suitable, and keep hands outside the marked no-hands zone.
Set, check, and test
Set the miter and bevel angles with the saw disconnected if the manual directs. Tighten locks, reposition any adjustable fence section, and make sure the blade path clears the clamp and fence. For an important angle, make a test cut on scrap and check the result with an appropriate square or mating test pieces. If the cut is wrong, stop, disconnect power, and troubleshoot the adjustment rather than compensating by holding the work differently.
Make the cut without rushing
Stand in a balanced position with both feet planted, and grip the operating handle as instructed. Start the saw and let the blade reach operating speed before entering material if the manual describes that sequence. Use the exact head movement prescribed for the saw. Keep hands clear, do not reach across the blade, and do not force the tool through stock. When the cut is complete, maintain control of the head and wait for the blade to stop before moving the workpiece. Disconnect power before clearing a jam or making an adjustment.
Safety rules that matter most to a beginner
A miter saw blade can cause severe injury in a fraction of a second. Learning the tool means building a routine before the motor starts, not trying to react faster once something goes wrong. Read the entire manual, understand the controls, and practice on scrap only after a competent review of setup and safe operation. If you are unfamiliar with power tools, get in-person instruction from a qualified person or woodworking class.
- Keep the guard installed and in working order. Stop using the tool if it sticks, fails to cover the blade, or has been damaged.
- Never cut freehand. Keep the stock supported against the table and fence, and clamp it where appropriate.
- Keep hands outside the manufacturer’s no-hands zone and away from the blade path. Do not hold tiny offcuts near the blade.
- Wait for the blade to stop before lifting, moving, or repositioning stock, changing settings, or reaching near the cutting area.
- Disconnect the plug or remove the battery before blade changes, cleaning, service, or adjustments that the manual says to perform with power isolated.
- Use only blade types and sizes approved for the saw and the material. Do not cut metal, masonry, or other material unless the saw and blade manufacturers specifically authorize that use.
- Keep bystanders away, especially children. Never allow another person to support material with hands near the blade.
- Use eye and hearing protection and address dust according to the material and task.
OSHA’s guidance is not a home-training course, and the manufacturer’s manual is not a substitute for sound judgment. Both reinforce the essential habits: keep guards working, keep hands back, support the material, and avoid freehand cutting. For any operation that is not clearly covered by the manual, stop and seek qualified instruction rather than improvising.
Maintenance, calibration, and storage
Unplug the saw or remove its battery before cleaning or service. Clear dust from the table, fence, vents, and adjustment points using the method allowed by the manual. Do not use compressed air or liquids unless the manufacturer permits them; either can move debris into bearings or electrical parts. Keep the blade clean and sharp, and replace it when damaged or unsuitable. A dull blade can make cutting harder and may encourage unsafe force.
Check that the fence remains aligned to the table and that miter and bevel settings behave as described in the manual. Calibration can be affected by transport, repeated use, or a bump. Use the maker’s adjustment instructions rather than assuming a scale is exact. Keep all adjustment knobs tight for operation and restore the saw to its specified transport position before moving it.
Store the saw dry and protect it from impact. Secure the head and rails as instructed before carrying. Keep blades in a safe case and disconnect power when the tool is stored. Before the next use, inspect guards, cords, battery contacts, locks, clamp, and supports. If anything is damaged or unusual, do not operate until it has been checked and repaired.
Frequently asked questions
What type of miter saw is easiest for a beginner?
The easiest saw is the simplest one that safely handles your materials and cuts. A basic saw can suit mostly square and miter crosscuts. A compound model adds bevel capability. A sliding model handles wider material but takes more space and requires learning the model’s slide method. A simple control layout and good documentation matter more than a feature count.
Should a beginner buy a 10-inch or 12-inch miter saw?
There is no single best size. Compare the actual cut capacity in the manual with your project’s material dimensions, including capacity at angled settings. A smaller blade may be enough for narrow trim and boards, while a larger model may cover wider or thicker cuts depending on design. Consider weight, storage, blade cost, and the stand you need as well.
Do beginners need a sliding miter saw?
Only if the wider crosscut capacity is useful for the work. Sliding saws can cut wider stock, but they are often larger and require additional rail clearance. If your work uses narrow trim and ordinary short boards, a non-sliding model may be adequate. Check capacity charts and workspace before choosing.
Is a dual-bevel miter saw worth it for a first-time owner?
It can be convenient when you make many bevel cuts in both directions, because you may avoid flipping the workpiece. For occasional bevels, a single-bevel saw can be enough if you carefully preserve the reference face and follow the manual. The added convenience should match your planned work.
Can I cut metal or plastic with a miter saw?
Do not assume that you can. Use only material and blade combinations explicitly allowed by the tool and blade manufacturers. Some saws are intended for wood and wood-like products; other materials can create hazards, damage guards, or require a dedicated saw. Check the manual before making any non-wood cut.
Do I need a stand?
You need a stable, secure work surface and a way to support material so it stays level. A compatible stand can make setup and long-stock support easier, especially when working away from a bench. A stand is not mandatory if you have a suitable stable bench and safe supports, but an unstable makeshift surface is not acceptable.
Are laser guides accurate enough to cut from?
Treat a laser or shadow line as a visual aid, not a measurement system. Check alignment, account for the blade kerf, and make a test cut when accuracy matters. Follow the manual for calibration and do not put a hand near the blade to adjust the work while the tool is running.
What should I learn before using my first miter saw?
Learn the controls, guard operation, workpiece support, clamping method, no-hands zone, approved blade, and the manual’s start-to-stop sequence. Practice measuring, setting, and checking simple cuts on scrap under appropriate supervision. Do not begin with tiny pieces, compound crown cuts, or unfamiliar materials.
How do I choose among the best miter saws for beginners?
Make a short project list, check capacity at the needed angles, choose the least complex saw that covers those cuts, and compare support, guard, control, dust, power, and storage requirements. Then read the exact manual and verify the current manufacturer’s specifications. A model is a good fit only when it suits both the work and the space where you will use it.
Final buying perspective
The best miter saws for beginners make common crosscuts manageable while encouraging a safe, repeatable routine. Start with intended projects, confirm capacity, decide whether bevel and slide functions will be used, and account for the support system around the tool. Then give equal attention to the manual, guard, clamp, blade compatibility, and workspace. No feature removes the need for careful setup. If the saw cannot securely support a piece or the cut is outside the manual’s intended use, choose another method.