Best Miter Saws: How to Choose the Right Saw for Accurate Trim and Crosscuts
The best miter saws make repeated crosscuts easier to measure, set, and reproduce. They are especially useful for baseboards, door and window casing, picture frames, shelving parts, deck trim, and other projects that need square or angled ends. A miter saw can save time when a project calls for many pieces of the same length, but the right choice depends on the material, width of the boards, how often you move the tool, and the room available in your shop.
There is no single miter saw that suits every workshop. A compact non-sliding saw can be a sensible choice for narrow trim and limited storage. A sliding compound saw can handle wider stock, yet needs more space and may cost more. Corded and cordless models also suit different work patterns. The goal is not to buy the largest saw or the one with the longest feature list. It is to match the saw’s real capacity and controls to the cuts you actually make.
This guide explains the main miter saw types, how to compare capacity and accuracy, what to check before ordering, and how to set up and use the saw safely. It also covers blade selection, dust collection, common mistakes, and care. If your project involves rough limb cutting rather than finish crosscuts, a different tool may fit better; see our guide to battery chainsaws for homeowners. For small pruning and hand-cut work, compare hand saws for gardening.
Affiliate disclosure: DailyHomeDecorating.com may earn a commission from qualifying purchases through links in this article. This does not change the price you pay.
Amazon product examples to compare
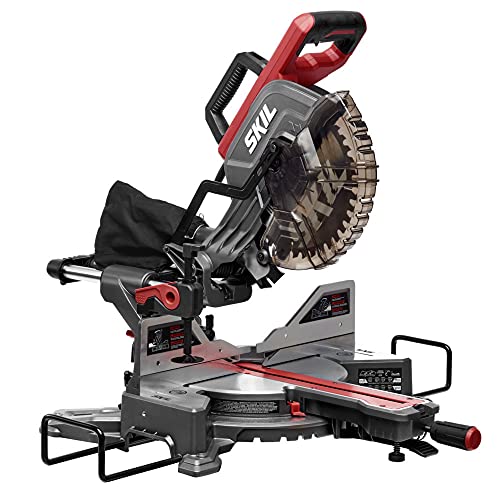
ASIN: B08J7N3VYWView on Amazon

ASIN: B07P8QTFRCView on Amazon

ASIN: B0F9KL8F96View on Amazon

ASIN: B073K99HWJView on Amazon
Certain content that appears on this site comes from Amazon. This content is provided “as is” and is subject to change or removal at any time. Product examples and images are supplied through Amazon Creators API; confirm specifications and availability on the current listing.
What a miter saw does well
A miter saw is designed primarily to crosscut a board: the blade travels down through material held against a fence. The table supports the workpiece, and the fence gives it a reference edge. The saw head pivots left or right to make a miter angle. On compound models, the blade also tilts to bevel the cut. Sliding models allow the head to travel forward and back, increasing the width of material that can be cut in one pass.
That guided motion makes a miter saw useful for repeated work. If you are cutting a set of casing pieces, chair rails, deck boards, or framing components, you can establish a stop and make many pieces to the same length. The saw is also convenient for cutting modest-length boards without laying out a large table-saw station. It does not replace every other saw: it is less suited to ripping long boards lengthwise, cutting sheet goods, or breaking down large panels. For those jobs, evaluate a table saw or track-guided circular saw instead.
Common projects
- Square crosscuts on lumber, trim, and molding.
- Mitered corners for frames, casings, and some furniture parts.
- Beveled ends and compound-angle cuts for trim assemblies.
- Repeated cuts to a consistent length when paired with a secure stop.
- Occasional angled cuts on flooring, decking, or small project stock when the material fits the saw’s rated capacity.
Material dimensions, support, and the exact cut angle matter. A saw’s published capacity is not a promise that every board can be cut in every orientation. Check the manual’s capacity chart for the specific angle and setup you plan to use.
Miter saw types and how they differ
Non-sliding miter saw
A basic non-sliding saw pivots for miter cuts and may tilt for bevels. Its head moves down through the board but does not slide along rails. This design is usually compact and straightforward. It can suit narrow trim, small shop work, and projects in which the stock width is within the saw’s fixed crosscut capacity. Because there are fewer moving parts, it may be easier to place on a small bench or store between uses.
The tradeoff is width. A non-sliding model may not crosscut a wide board in one pass. Never try to extend its capacity by twisting or repositioning a board while the blade is moving. If the board exceeds the manual’s limits, choose a suitable saw or use another approved method.
Sliding miter saw
A sliding saw has rails that let the motor and blade move through a wider board. That extra reach can be valuable for wider trim, shelves, and some dimensional lumber. Sliding motion may use rails that extend behind the saw, so the machine needs more depth on a bench. Some designs use a forward-rail arrangement that can sit closer to a wall, but the exact footprint depends on the model.
More capacity can mean more weight, complexity, and cost. Consider whether you regularly cut wide stock or whether a smaller saw plus a different cutting approach would cover your work. Sliding rails also need to remain clean and move smoothly. Before buying, verify how much space the saw needs with the head fully extended, not just the dimensions of its base.
Compound and dual-bevel saws
A compound saw tilts the blade to make bevel cuts as well as miter cuts. A dual-bevel model tilts in both directions, which can reduce the need to flip a workpiece when making matching bevels on opposite sides. This can save setup time on trim and furniture projects. A single-bevel saw can still complete many of the same assemblies, but may require more careful repositioning and attention to the reference face.
Dual bevel is most useful when you make compound cuts often. If your work is mostly square cuts and simple miters, it may add complexity without much benefit. Compare the bevel range, stops, scales, and lock controls in the manual rather than relying on a broad label such as “compound.”
Corded and cordless models
A corded saw provides continuous power while connected to an appropriate outlet and is common in stationary workshops. A cordless saw can be easier to move around a renovation site or yard, especially where extension cords would be inconvenient. Cordless runtime depends on the battery platform, battery condition, material, blade, and workload. A heavy cutting session can drain a battery faster than occasional trim work.
If you already own compatible batteries, staying within that system may simplify charging and storage. Confirm what is included: some listings sell the saw as a bare tool. Do not assume that a battery, charger, stand, or blade is included. For either type, use the electrical supply and cord or battery configuration specified by the manufacturer.
Choose by the cuts you expect to make
Before comparing models, write down several typical projects. Note the material, its actual width and thickness, the angles required, how many repeated cuts you expect, and whether you need to move the saw. This simple list will reveal which features matter. A homeowner fitting a few narrow door casings has different needs from a carpenter cutting wide boards throughout the day.
Start with capacity
Crosscut capacity is often the first comparison shoppers notice, but the number must match the cut. Look up the saw’s published maximum width and thickness for a square cut. Then check the capacity chart for mitered and beveled positions, which can be smaller. A board may fit at 90 degrees but not at a steep angle, or it may require a particular orientation. Use the manual’s chart, not a guess based on the blade diameter.
Also consider the stock you can handle safely. A very wide board may be difficult to support even if the saw technically accepts it. Long stock needs support on both sides of the cutting area, with the supports level with the saw table. Short pieces can require special care because hands must stay clear of the blade. The manufacturer’s manual describes minimum workpiece sizes and safe clamping methods.
Estimate your typical workload
For occasional DIY work, ease of setup, clear controls, and a stable base may matter more than maximum production capacity. For frequent trim installation, a repeatable fence, accessible stops, and a quick, readable adjustment system may save time. For work that moves among rooms or job sites, weight and a compatible stand can matter. Do not choose based on a theoretical future project if it would force you to store and transport a tool that is too large for regular use.
Think about your workspace
Measure the bench or stand area, including room behind the saw for sliding rails, room at the sides for long stock, and a safe path to move the saw. A saw placed too close to a wall may not complete its slide. A saw with no side support can allow a long board to tip. Dust collection also needs space for a bag, hose, or extractor. Portable stands can help outdoors or on site, but check that the stand is level, locked, and rated for the tool and workpieces.
Blade selection affects the cut
The blade influences cut quality, noise, tear-out, and the kind of material the saw can handle. A blade’s tooth count and geometry should suit the material and finish. A general-purpose blade may be adequate for framing and mixed cuts, while a finer-tooth blade can produce cleaner edges in trim and finished lumber. More teeth do not automatically mean a better result for every material; tooth shape, blade quality, sharpness, and feed technique matter too.
Match the blade to the material
Use blades intended for the material being cut. Wood blades are not automatically appropriate for metal, plastic, or composite stock. Follow the saw manufacturer’s guidance for approved blade types, diameter, arbor, and maximum speed. Never install a blade that is too large, has the wrong arbor opening, or exceeds the saw’s rated speed. Check the manual for whether a dado, abrasive, or specialty blade is prohibited; many miter saws are not designed for those attachments.
For coated or veneered boards, a suitable fine-finish blade and a steady, controlled cut can help reduce chipping. Support the material, keep the fence clean, and test on scrap from the same stock. If edge quality remains poor, inspect the blade for dullness, pitch buildup, damage, or incorrect installation. Do not diagnose a poor cut by forcing the saw through the material faster.
Inspect and change blades carefully
Disconnect the cord or remove the battery before changing a blade. Wait for the machine to be fully stopped and follow the manual’s locking and guard instructions. Use the specified wrench and orientation. The blade’s rotation direction must match the saw’s arrow. Refit all flanges and fasteners as described, then rotate the blade by hand only when the manual allows and the saw remains disconnected. Do not operate the saw with a missing guard or loose fastener.
Accuracy features worth comparing
Fence and table support
A stable fence helps keep the workpiece in a consistent position. Look for a fence that is tall enough for the material you commonly cut and that aligns as the manual specifies. Sliding or removable fence sections may be needed for bevel cuts. Inspect whether the table provides useful support around the cut and whether extensions are included or sold separately.
Angle scales and stops
Clear miter and bevel scales make adjustment easier, but a printed scale alone does not guarantee a precise cut. Positive stops can help you return to common angles. Confirm that locks engage firmly and that the controls are accessible without placing a hand near the blade. If precision matters, verify angles with a reliable square or angle gauge and make a test cut in scrap. Read the manual’s calibration procedure rather than forcing a stop into alignment.
Laser, shadow line, and work lights
A cut-line indicator can show where the blade will meet the stock. Some saws use a laser and others cast a shadow from the blade. These aids can be useful, but they should be checked against the actual kerf and may need adjustment. Lighting can improve visibility in a dim shop. None of these features replaces a clear layout mark, a properly positioned workpiece, or a test cut.
Soft start, brakes, and controls
Some models include features intended to smooth startup or stop the blade after the trigger is released. The exact behavior varies, so read the manual and do not assume the blade stops instantly. The trigger, safety switch, lock, and handle should feel predictable and be reachable while maintaining a balanced stance. If you are left-handed or have limited grip strength, check whether the controls can be used comfortably and safely before purchase.
Dust collection and work area
Miter saws can scatter fine dust, especially when cutting dry lumber or composite materials. A small collection bag may catch some chips, while a properly fitted extractor can collect more. Performance depends on the saw’s dust port, hose, airflow, blade, and material. Check the port size and whether an adapter is required. Keep the collection system clear and do not let a hose interfere with the saw’s slide or blade guard.
Work in a well-ventilated space and use appropriate respiratory protection and eye protection as described by the tool maker and material manufacturer. Avoid cutting unknown reclaimed wood that may contain nails, screws, coatings, or contaminants. Locate embedded metal before cutting and use a blade intended for the task if the material requires it. Keep bystanders, pets, and children away from the cutting area.
Position the saw so offcuts can fall or be removed without trapping the blade. Support long boards at the same height as the saw table. Keep the floor free of cords, scraps, and sawdust so you can stand steadily. If using a stand outdoors, place it on stable ground and protect the tool from rain and excessive moisture.
How to set up a miter saw
- Read the manual. Learn the tool’s capacity, approved blades, guard behavior, and specific lock and adjustment steps.
- Inspect the saw. Check the cord or battery, blade, guard, table, fence, and controls. Do not use a damaged or incomplete saw.
- Mount it securely. Attach it to a stable bench or compatible stand using the recommended hardware. Confirm that the surface is level and cannot shift.
- Provide support. Use stable extensions or supports for long stock, aligned with the saw table. Keep support rollers from pushing the board upward or downward.
- Check the fence and angles. Follow the manufacturer’s procedure to verify alignment. Make a test cut on scrap when accuracy is important.
- Plan the cut. Mark the waste side, identify the reference face, and confirm that the material fits the capacity chart at the chosen angle.
- Manage dust and power. Connect collection equipment without interfering with the saw’s movement. Use the correct outlet, cord, or battery specified by the manufacturer.
A miter saw stand can make a portable setup more comfortable, but the saw must be locked to the stand and the supports adjusted correctly. Do not use improvised blocks that can move during a cut. If you will use the saw for a single project, take time to establish a stable station rather than rushing into the first cut.
Safe cutting habits
Read and follow the full safety instructions supplied with the saw. Wear eye and hearing protection and keep loose clothing, jewelry, hair, and gloves away from moving parts. Gloves can snag on a rotating blade, so follow the manufacturer’s advice about hand protection. Use the saw only when you are alert, have stable footing, and can hold the stock securely.
- Clamp or hold the material against the table and fence using the method described in the manual. Keep hands outside the marked hazard area.
- Do not reach behind or around the blade while it is moving. Wait until the blade stops before clearing scraps.
- Allow the saw to reach its operating speed before cutting, and use a controlled motion that matches the manual’s instructions.
- On sliding models, follow the specified direction of travel. Manuals may direct the operator to bring the head forward, start the saw, and push it through the work, but follow your model’s instructions.
- Do not cross your arms or stand where a kickback or thrown offcut could strike you. Keep your body balanced and hands positioned safely.
- Never cut freehand, twist a board into the blade, or hold a small offcut where it can be pinched.
- Keep guards in place and functioning. Disconnect power before adjustments, blade changes, cleaning, or maintenance.
Small pieces can be especially hazardous because they may shift or become trapped between the blade and fence. If the part is too small to clamp or hold safely as described by the manual, use a different method, make the piece oversize and trim it later when safe, or redesign the sequence. Never remove a guard to make a cut easier.
Making accurate repeat cuts
Accurate cuts begin with measurement and consistent references. Use the same face of the board against the fence, mark a clear cut line, and distinguish the waste side. A stop block can help with repeated lengths, but it must be positioned so the offcut cannot bind between the stop and blade. The stop should support the workpiece without interfering with the blade’s path.
For matching mitered parts, label each piece and mark the direction of the angle. Test the setup on scrap before cutting finished stock. If two pieces need to meet at a corner, cut a sample pair, assemble them, and adjust only after identifying whether the error comes from the angle, the stock edge, or the measurement. A small error can be compounded across multiple pieces, so avoid changing several settings at once.
When a cut is not square, first check that the board sits flat against the table and fence. Confirm that the saw is locked at the correct detent and that no dust or chips are trapped under the stock. Then verify the blade and fence alignment using the manual. Do not assume that an electronic readout or laser is calibrated just because it lights up.
Common buying mistakes
Choosing capacity you will rarely use
A large sliding saw can be useful, but it takes more space and can be harder to move. If most of your work is narrow trim, a smaller machine may be easier to set up accurately. Conversely, choosing a compact saw without checking board widths can lead to frustrating workarounds. Make a list of actual stock dimensions and compare it to the capacity chart.
Assuming accessories are included
Product listings may show a stand, battery, charger, clamp, dust bag, or extra blade that is not part of the package. Verify the exact included items and model number. If you need a stand, compare its weight rating, mounting method, support length, and portability. Include accessories in the budget rather than judging the saw by its bare-tool price.
Buying by blade size alone
Blade diameter is only one part of the selection. The saw’s design, travel, fence, and capacity determine what it can cut. Two saws with the same diameter can differ in maximum width, angle range, weight, and dust control. Check capacities and features together.
Ignoring the footprint
A sliding saw may need more room behind the rails than expected. Measure the complete operating envelope, including stock support and the movement of the head. Check whether the saw can be placed near a wall or needs clearance behind it. A tool that cannot slide fully in the available space may not deliver its advertised capacity.
Expecting a perfect finish from any blade
A stock blade may be designed for general use rather than fine trim. Material quality, sharpness, tooth geometry, feed technique, and support all affect the result. Keep an appropriate blade available and replace a damaged or dull blade instead of forcing it to make a clean cut.
Care and maintenance
Unplug the saw or remove its battery before cleaning or maintenance. Follow the manual’s schedule for checking fasteners, guards, rails, table surfaces, and electrical parts. Remove dust and pitch with products approved for the saw and blade. Do not spray liquid into the motor or controls. Keep the fence and table clean so stock can sit flat.
Inspect the blade for cracks, missing teeth, warping, or buildup. A damaged blade should be replaced. Keep sliding rails clean and free of debris, and use only lubrication specified by the manufacturer. Check that the guard returns correctly and that safety switches work as intended. If the saw has been dropped, exposed to water, or shows unusual vibration, noise, burning smell, or inconsistent cuts, stop using it and have it inspected by a qualified service provider.
Store the saw in a dry, protected location with the head secured as directed. For a portable model, secure it before transporting and keep the blade covered. Store spare blades in a case so teeth are protected and cutting edges remain clean. Good care helps a tool stay predictable, but it does not remove the need to inspect it before each use.
When a different saw may be better
A miter saw is a crosscut tool. If you need to rip long boards, a table saw or circular saw with a guide may be more suitable. If you need to cut sheet goods, consider a track saw, panel saw, or supported circular-saw method. If you are cutting tree limbs or brush, a pruning saw or chainsaw is designed for that work; do not place round branches on a miter saw unless the manufacturer specifically permits the material and provides an approved secure setup. Our battery chainsaw guide covers a separate category of outdoor cutting tools.
For finishing the rest of a room project, other tools may become useful after the cuts are complete. For example, a painted cabinet project may call for a finish sprayer; see our guide to paint sprayers for cabinets. A hand saw can also handle small adjustments where a powered saw is not convenient; review our guide to hand saws for gardening for basic hand-saw types, while recognizing that garden pruning models are not a substitute for a woodworking backsaw.
A simple decision framework
Use these questions to narrow the field:
- What material and width do you cut most? Compare your actual stock to the manual’s capacity chart at the angles you use.
- Do you need bevels? If not, a basic miter saw may be enough. If so, compare single- and dual-bevel adjustment needs.
- How often do you move the tool? Frequent relocation may favor a lighter saw or a suitable stand; a fixed shop can prioritize capacity and support.
- How much space is available? Include rail travel, side support, and dust collection in your measurements.
- How many repeated cuts do you make? Look for clear stops, a stable fence, and a workflow for safely supporting offcuts.
- What is included? Confirm the blade, clamp, dust equipment, stand, battery, and charger rather than relying on product photos.
- Can you use the controls safely? Consider grip, visibility, handle position, trigger access, and the location of adjustment locks.
If two models both meet your capacity needs, compare setup, service support, ergonomics, and the accessories you already own. A reliable, accurately adjusted saw that fits your workspace can be more useful than a larger machine with features you seldom need.
Frequently asked questions
What is the difference between a miter saw and a chop saw?
The terms are sometimes used loosely, but they are not always interchangeable. A miter saw is designed to crosscut wood and adjust for miter and, on compound models, bevel angles. “Chop saw” often describes a tool for straight cuts in metal using an abrasive or metal-cutting blade. Always use the tool, blade, and material combination approved by the manufacturer.
Do I need a sliding miter saw?
You need sliding travel only if your typical stock is wider than a non-sliding saw’s approved capacity. A slide can expand crosscut width, but it increases the tool’s footprint and may add weight and cost. Check the capacity chart against the materials you actually use.
Is a dual-bevel saw worth it?
Dual bevel is convenient when you make compound cuts in both directions and want to avoid turning the workpiece. For occasional square cuts and simple miters, it may not provide enough benefit to justify a higher price. Compare your project list with the adjustment steps you would perform on a single-bevel saw.
Can I cut metal with a miter saw?
Only if the saw manufacturer approves the specific material and a compatible blade for that model. Many wood miter saws are not designed for metal cutting, and installing an abrasive wheel or unapproved blade can create serious hazards. Read the manual and blade instructions before cutting any non-wood material.
How do I prevent tear-out?
Use a sharp blade designed for the material and finish, support the workpiece fully, keep it tight against the fence, and use a controlled cut. A sacrificial backing board may help for some setups if permitted by the manual. Test on scrap from the same material and do not put hands near the blade to hold a small piece in place.
Can a miter saw cut long boards?
It can crosscut long boards if the board is supported on both sides and fits within the saw’s width and thickness limits. The saw does not support the entire length by itself. Use a stable bench, stand, or level extensions, and make sure the board cannot tip, bind, or move during the cut.
How often should I replace a miter saw blade?
Replace a blade when it is damaged or no longer cuts safely and cleanly after appropriate cleaning and inspection. There is no universal number of hours because use, material, blade quality, and maintenance differ. Follow the blade maker’s guidance and do not continue using a cracked, missing-tooth, or warped blade.
Do I need a miter saw stand?
A stand can make setup more stable and provide support for long stock, especially when working away from a permanent bench. It is not mandatory if you have a secure, level work surface with adequate support. Confirm that the stand is compatible with the saw, properly locked, and rated for the load.
Final thoughts
The best miter saws for your work are the ones whose capacity, angle controls, portability, and support match your actual projects. Start with the width and thickness of the material, decide whether sliding and bevel capability matter, and measure the available workspace. Check the manual’s capacity chart, confirm what the package includes, and plan for a safe stand, dust control, and an appropriate blade.
Accuracy comes from a stable setup, consistent references, careful measurement, and test cuts—not from any one feature on the spec sheet. Use the saw only as directed, keep guards in place, and choose another tool when the material or cut falls outside the saw’s intended use. With those checks, you can select a miter saw that supports clean, repeatable work without paying for capacity you do not need.