Best Track Saws: A Practical Guide to Choosing a Guide-Rail Saw
The best track saws help make long, straight cuts in sheet goods and boards by guiding a circular-style saw along a rail. The rail registers against the material and helps limit sideways movement, which can make it easier to break down plywood, trim panels, or cut a countertop blank with a clean, controlled path. For a home shop without room for a large table saw, a track saw can be a flexible way to prepare large stock.
Many buyers use “plunge saw” to mean a plunge-style track saw. When comparing the best plunge saws, look at the compatible rail, plunge control, cut depth, blade, and dust system as one setup rather than choosing by the saw body alone.
Track saws are not simply ordinary circular saws with a straightedge nearby. A purpose-built track saw is designed to engage a compatible guide rail, often with a plunge-style action that allows the blade to enter the work at a chosen point. Its base, riving components, depth control, dust port, and rail interface are engineered as a system. Compatibility matters: rails and saws that look similar may not fit or perform together as intended.
This guide explains how track saws work, what to compare in the rail and saw, how blade diameter relates to capacity, which materials and projects suit the tool, and how to set up safe, repeatable cuts. It is a practical buying guide, not a lab-tested ranking. Product configurations, rail bundles, and specifications can change, so confirm dimensions, compatibility, included parts, and safety instructions in the current manufacturer documentation before buying.
Affiliate disclosure: DailyHomeDecorating.com may earn a commission from qualifying purchases through links in this article. This does not change the price you pay.
Amazon product examples to compare

ASIN: B09Y7PC5LT
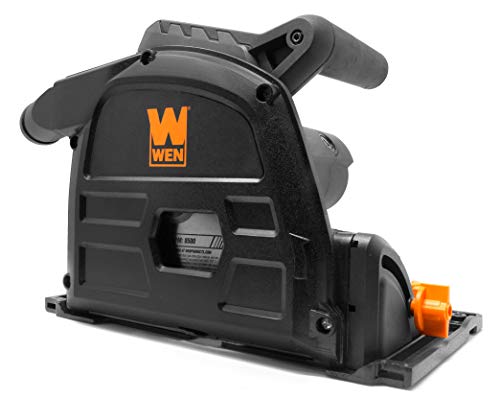
ASIN: B07VFXFTVP

ASIN: B00CHN6L74

ASIN: B00CHN6LCE
Certain content that appears on this site comes from Amazon. This content is provided “as is” and is subject to change or removal at any time. Product examples and images are supplied through Amazon Creators API; confirm specifications and availability on the current listing.
What a track saw does
A track saw uses a powered circular blade mounted in a base that rides on a guide rail. The rail is positioned along a marked line and held against the workpiece by friction strips, clamps, or other methods recommended by the maker. The saw moves along the track while the operator keeps the base engaged. A plunge mechanism allows the blade to lower into the material at the start of a cut and retract afterward, depending on the model.
The system is designed to make long, straight cuts without needing the workpiece to pass across a stationary table saw blade. This is useful for large panels that would be awkward to lift, balance, and feed alone. The rail can stay on top of the sheet while the saw travels across it, so the operator can support the panel on a work surface and guide the tool in place.
A track saw can also be used for straight cuts in solid wood, flooring, and some other materials when the saw and blade are approved for the application. The rail helps maintain the cut path; it does not make the saw suitable for every material or eliminate the need to support the work properly. Use the exact instructions for the tool, blade, and stock.
Track saws are most useful when the cut is long, straight, and difficult to manage by hand. They are not the natural tool for curves, repeated short miters, or rough demolition. A circular saw guide explains portable straight-cut saws, while a table saw guide covers a stationary approach for repeated rips. For trim crosscuts, a miter saw guide describes a different setup. Choose the system based on the stock size, cut geometry, and space available.
Start with the work you need to do
Before choosing a model, list the types of cuts you make most often. Consider sheet dimensions, stock thickness, cut length, material, work location, and how much repeatability matters. A hobbyist breaking down plywood for cabinets may value a long rail and effective dust management. Someone trimming doors or panels may want a shorter rail that stores easily. A contractor working across multiple sites may prioritize portability, rail connectors, and a battery system already used on other tools.
- Breaking down sheet goods: Look for a rail length or connector system that spans the cuts you plan, plus a stable work surface.
- Cabinet and furniture parts: Prioritize repeatable rail placement, clear scales, blade choice, and a reliable method for checking square.
- Door trimming: Check the maximum cut length, ability to clamp the rail, and safe support of the door.
- Remodeling on site: Consider portability, rail storage, dust extraction, power availability, and protection during transport.
- Occasional home use: A simple kit may suffice if its included rail and blade fit the projects you actually have.
Track saw systems are sold in different bundles. One listing may include only the saw, while another may include one or more rails, connectors, clamps, a case, dust adapters, or batteries. A tool-only price can look attractive but may not let you make a long cut without buying the rail separately. Compare the complete working setup, including rail sections, joining hardware, clamps, a suitable blade, batteries and charger if needed, and a stable surface for the workpiece.
Choose a rail system carefully
The rail is the reference surface for every guided cut, so its design and condition matter. Check the usable length, how it joins to another rail, what stops the saw from lifting or twisting, and whether the saw base is designed to engage it. A long cut may require connected sections; the joint needs to stay aligned so the saw does not catch or deviate as it passes over the seam. Follow the manufacturer’s joining procedure and test the connection on scrap or an unimportant workpiece.
Many rails use a splinter guard along one edge that can be aligned to the blade’s cut line. The guard may be trimmed or set up for a particular saw and blade. It can help indicate where the blade will cut and reduce tear-out at the supported edge, but it is not a substitute for measuring, proper blade selection, or careful material support. If the blade or saw configuration changes, confirm whether the splinter strip still matches the cut.
Rail undersides may include grip strips that resist movement on the panel. Their effectiveness depends on the surface condition, material, dust, and how the saw is used. Do not rely on friction alone if the instructions call for clamps or if the workpiece could move. Clamps must fit without interfering with the saw’s travel. Check that the rail is straight, undamaged, and clean; a bent rail or damaged edge can affect accuracy.
Length, connectors, and storage
Choose a rail length that covers common cuts but can also be carried and stored. One long rail may be convenient for full-sheet rips but cumbersome in a small shop or vehicle. Two shorter rails can be more versatile if their connector holds alignment and the joint does not interrupt the saw’s path. If a project requires a cut longer than one rail, measure the total run and make sure connected sections provide sufficient length at both ends for the saw to engage before and after the cut.
Consider how the rail will be protected. Guide edges and splinter guards can be damaged by impact, and grit on the strip can scratch a finished surface. Use a rack or case that supports the rail without bending it. If the rail is stored leaning against a wall, secure it so it cannot fall or warp. Keep clamps, connectors, and replacement splinter strips together with the system so a missing small part does not stop a job.
Interchangeability and accessories
Do not assume that guide rails from different brands are interchangeable just because their shapes look alike. The saw base, anti-tip features, clamps, connectors, and rail profile can differ. Confirm compatibility from the manufacturer or an authorized seller. Also check whether a rail accepts accessories such as angle guides, parallel guides, stops, or square-cut fixtures that are useful for your workflow.
Accessories should solve a real problem. A parallel guide can help set repeatable widths, while a square guide may simplify certain crosscuts. A connector can extend a rail but must maintain alignment. A clamp may secure the track but take time to reposition. Before investing in a large accessory set, identify your frequent operations and whether a simpler guide or measuring method already works. Compatibility charts and current manuals are more reliable than assumptions based on appearance.
Blade choice and cut capacity
Blade diameter influences the saw’s available cutting depth, but the capacity at a bevel or with a specific rail can differ from a nominal maximum. Check the manufacturer’s depth specifications at 90 degrees and at common bevel angles. The maximum stock thickness may also depend on the saw, blade, and setup. Do not select a blade or attempt a cut beyond the tool’s stated limits.
Track saws commonly use blades intended for clean cuts in sheet goods and wood, but the right tooth count and geometry depend on material, thickness, grain, and edge quality. A fine-tooth blade may leave a smoother edge in an appropriate panel but cut more slowly. A general-purpose blade can be convenient for varied stock. Specialty blades must be explicitly rated for the material and saw. Confirm the diameter, arbor, rotation direction, and maximum speed requirements before installation.
| Blade decision | Why it matters | What to confirm |
|---|---|---|
| Diameter and arbor | Fit, guard clearance, and cutting depth | Use only the sizes approved for the saw. |
| Tooth pattern | Edge quality and cut behavior | Match to stock and desired finish. |
| Kerf width | Amount of material removed and alignment with the splinter guard | Check whether the rail strip is configured for that blade. |
| Material rating | Safe speed, heat, and dust behavior | Follow both saw and blade maker instructions. |
Blade sharpness affects more than speed. A dull blade can increase heat, make the saw harder to guide, and produce a poor edge. Inspect teeth for damage and buildup, and replace or service the blade according to its maker. Disconnect power or remove the battery before changing it. Use the specified wrench and washer orientation. Do not improvise spacers or use a blade that does not fit the guard and arbor correctly.
The kerf is the width of material removed by the blade. Some rail systems use a splinter guard that is cut to the blade’s path during setup. If you change blade kerf or use a different saw on that rail, the guard may no longer show the exact cut location. Recheck the setup and use a test cut before relying on the edge for a finished panel.
Plunge action, depth control, and bevel settings
A plunge mechanism allows the blade to enter the work at a selected point rather than starting from an edge. This can help make openings or stop cuts when the saw and project permit them. The procedure is model-specific. Some saws include a riving knife or other components designed to reduce binding after the blade enters the material. Never remove or defeat a safety part to reach a desired cut. Follow the manual for plunge operation, guard behavior, and supported applications.
Depth controls should be clear and secure. For a through cut, set the blade to pass through the stock and any intended sacrificial layer by only the amount recommended by the maker. Too much exposure increases the blade below the work; too little may leave fibers connected or cause the saw to bind. When cutting into an existing surface, make sure the path is clear of hidden wires, pipes, fasteners, or other hazards before setting the depth.
Bevel cuts tilt the blade relative to the base. The available angle and cutting depth vary by model. A track can guide a bevel cut, but the saw base may engage the rail differently at an angle. Confirm the manual’s instructions and test the setup on scrap. Verify the actual angle with an appropriate gauge when fit matters; a scale marking is only a reference unless confirmed.
Materials and projects that suit a track saw
Track saws are commonly used for plywood, cabinet panels, doors, solid boards, and other materials approved by the saw and blade makers. They can be useful when a large panel is difficult to move across a stationary machine. A track saw also makes long straight cuts on stock already resting on a work surface, which can simplify workshop or jobsite preparation.
For cabinet carcasses, the rail can help establish straight panel edges and reduce the need to push a full sheet through a table saw. Accurate cabinet work still depends on careful measurements, square reference edges, consistent setup, and the correct blade. A saw track cannot correct a panel that is warped, poorly supported, or measured from an inconsistent edge. Make a test cut before preparing a batch of parts.
For doors and panels, consider the size and weight of the work. The rail should be secured, and the door or panel should be supported so both the retained section and offcut remain stable as the cut progresses. Removing material from a door can affect its structure, fire rating, warranty, or fit; confirm the manufacturer’s guidance before trimming. A track saw is not permission to cut any door by an arbitrary amount.
Flooring and composite products may have specific requirements for blade type, dust management, and cutting direction. Read the product instructions. Some materials produce fine or hazardous dust, so plan extraction, ventilation, and protective equipment before starting. Do not cut metal, masonry, plastics, fiber cement, or unknown stock unless both tool and blade documentation expressly approve the use.
When another saw is the better choice
A track saw is optimized for guided straight cuts. A table saw can be more efficient for repeated narrow rips when the stock and operator can be supported safely. A miter saw is usually convenient for repeated short crosscuts at known angles. A jigsaw or bandsaw handles curves. A handheld circular saw with a straightedge may be adequate for occasional rough breakdown, although it does not provide the same rail engagement or plunge features as a dedicated track system.
For the differences among saw categories, see the site’s circular saw guide, table saw guide, and miter saw guide. Each tool has a different working method and set of risks. Do not transfer a technique from one machine to another without understanding its manual and support requirements.
Set up for accurate cuts
Begin with a clean, flat work surface. Use a sacrificial cutting surface or a support system designed for the job so the blade will not strike the floor, bench, or a hidden object below. Arrange supports so the panel is stable on both sides of the planned cut and the kerf will not close around the blade. Large sheets may require several supports or help from another person. Do not cut a panel that shifts under light pressure.
Measure from a consistent reference edge and mark the intended cut. Account for the blade kerf and confirm which side is the retained piece. Align the rail using its splinter guard only after the guard has been correctly configured for the saw and blade. If the rail is positioned by measuring from the edge of the saw rather than the blade, calculate the offset for that exact setup. Test the alignment on scrap first.
Secure the rail as directed. Friction strips may help hold it, but use clamps when required or when the material surface is dusty, slick, textured, or at an angle. Ensure clamps do not interfere with the saw’s travel. Check that rail connectors are fully seated and aligned. A joined rail should not have a step or gap that catches the saw base.
Inspect the blade, guard, riving components, power cord or battery, rail, and clamps before use. Set depth and bevel with the saw disconnected. Confirm that the saw engages and moves smoothly along the rail over the complete path without power. Keep the cord or dust hose behind the machine and out of the cutting route. Start with the blade clear of the work if the manual calls for it, then make the cut with a steady pace and no sideways force.
Dust collection and cut quality
Many track saws include a dust port or shroud intended to work with an extractor. Efficient collection can help keep the cut line visible and reduce cleanup, but it rarely captures every particle. Use a compatible dust extractor and hose, and make sure the hose does not pull the saw away from the rail or snag as the tool travels. Wear eye protection and respiratory protection suited to the material and environment. Ventilate the workspace, especially indoors.
Cut quality depends on blade condition, feed, rail alignment, stock support, and material. A clean blade and steady feed can reduce burning and chipping. If the saw bogs down or the edge looks rough, stop and review the blade and setup rather than forcing the tool. Verify that the rail is straight and clean, the splinter guard is intact, and the panel is not vibrating or moving.
For visible edges, test the blade and rail configuration on an offcut from the same material. Different core construction, veneer, grain, and finish can respond differently to a cut. A sacrificial backing or alternate cut direction may help in some situations, but follow the material maker’s recommendations. Do not assume that tape, scoring, or another trick is appropriate for every surface coating.
Safe operation and common hazards
Read the manual for the exact saw, rail, blade, and accessories. Wear eye and hearing protection and appropriate respiratory protection. Tie back hair, secure loose sleeves, remove jewelry, and keep bystanders clear. Use a stable stance and keep both hands on the handles where the tool design expects them. Never place a hand under the panel or in front of the blade path.
- Disconnect power or remove the battery before changing blades, adjusting depth, or clearing a jam.
- Keep the guard and any riving or anti-kickback components installed and functioning.
- Support the material so the cut remains open and the offcut cannot fall or pinch the blade.
- Secure the rail against movement; do not depend on a dusty or slippery surface for grip.
- Keep the cord and extractor hose away from the blade and operator’s path.
- Start and plunge only as described by the manual; do not force the saw through stock.
- Wait for the blade to stop before lifting, removing offcuts, or setting the saw down.
Kickback can occur if the blade binds, the kerf closes, the rail shifts, or the saw is twisted. A riving knife or anti-kickback feature may reduce some risks, but it does not make an unstable cut safe. If the blade stops in the material, release the trigger, maintain control, wait for a complete stop, disconnect power, and identify the cause. Do not pull a running blade backward through the kerf or restart it while trapped.
Plunge cuts deserve extra care because the blade enters the material within the panel. Verify the cut path, depth, support below, and absence of hidden utilities before proceeding. Keep hands outside the entry area and follow the manufacturer’s plunge sequence. If you cannot secure the panel or understand the guard and riving mechanism, use an edge-starting cut or another method.
Do not cut overhead, from an unstable ladder, or while holding the rail with one hand and the saw with the other if that compromises control. A large sheet can move unexpectedly when the offcut separates. Plan where both pieces will rest, and ask for assistance when needed. Helpers should stay clear of the blade path and should not pull the offcut in a way that closes the kerf. Stop if a helper’s position is unsafe.
Some materials contain coatings, adhesives, fibers, or treatments that require special handling. Identify them before cutting. Do not assume a dust extractor or mask makes every material safe. Follow material-specific instructions, maintain ventilation, and dispose of waste as directed. If the task involves concealed electrical wiring, plumbing, or other hazards, locate and address those before cutting.
How to compare track-saw models
Compare the saw and rail as one system. Verify blade size and depth at 90 degrees and bevel, plunge operation, rail compatibility, splinter-guard availability, dust port compatibility, and the exact parts included. Check whether the saw can join to the rails you already own. If the system requires proprietary accessories, price them before committing. An inexpensive bare tool may become costly once the required rails and clamps are added.
Consider handling and controls. Test whether the plunge lock and depth stop are easy to reach, whether the saw remains engaged with the rail, and whether the handles allow a secure grip. Look at where the cord or battery sits and whether it interferes with the rail or workpiece. On cordless models, include battery weight, runtime planning, charger, and compatibility with your existing tools.
Read reviews for specific evidence about the same model and version, not only star averages. Listings can combine kits, generations, or rail lengths. Check the manufacturer’s manual, parts diagram, warranty, service network, and return terms. For a precision tool, setup and serviceability are part of the purchase decision because rails, splinter strips, and blades are consumable or wear items over time.
Maintenance and storage
Disconnect the saw before cleaning or inspection. Remove sawdust from the base, blade area, rail interface, vents, and dust port with a brush or vacuum as allowed by the manual. Keep the rail’s guiding surfaces and grip strips clean. Resin or adhesive can make the saw bind or move unpredictably. Do not apply lubricants or cleaners unless the manufacturer recommends them; a product that damages a grip strip can undermine rail stability.
Inspect the blade for chipped teeth, damage, buildup, and correct installation. Check the guard for free movement, the riving components for secure attachment, the base for damage, and the cord, plug, battery contacts, and switch for wear. Confirm that rail connectors and clamps hold securely. Replace damaged or worn parts with approved components. Stop using the saw if a guard sticks, a rail is bent, or the tool vibrates unexpectedly.
Store rails flat or supported at several points so they do not bend. Protect splinter guards from impact and keep grit from scratching the reference surface. Store the saw in a case or on a shelf where it cannot fall. Keep blades in protective packaging and separate clamps, connectors, and track accessories. A quick pre-cut inspection of the rail and blade helps prevent a small maintenance issue from ruining a panel.
Frequently asked questions
What is the main benefit of a track saw?
It guides a circular-style saw along a rail for long, straight cuts, particularly in large panels that may be difficult to move across a stationary saw. The rail can improve repeatability, but accuracy still depends on alignment, a stable work surface, the blade, and correct technique.
Is a track saw the same as a circular saw?
They share a circular blade, but a track saw is designed to ride on a compatible rail and often uses a plunge mechanism. A standard circular saw can sometimes follow a straightedge, but its base and guard may not engage a dedicated rail the same way. Verify accessories and procedures for the exact tool.
Can I use rails from different brands?
Do not assume compatibility based on appearance. Rail profiles, connectors, anti-tip features, and saw-base interfaces vary. Check the tool and rail makers’ compatibility information. An ill-fitting system can bind, shift, or fail to guide the saw securely.
How long should my track be?
Choose a length that covers your common cuts with room for the saw to engage the rail before and after the cut. Measure typical panels and consider storage and transport. If you use connected sections, confirm that the connector maintains alignment and that the joint does not catch the saw.
Can a track saw replace a table saw?
Not for every workflow. A track saw can break down large panels and make long guided cuts without feeding the sheet across a stationary blade. A table saw may be more convenient for repeated narrow rips or certain shop operations. Choose based on stock handling, available space, cut type, and your experience.
What blade should I use for plywood?
Use a blade approved for the saw and suited to the plywood, thickness, and edge quality you want. Tooth pattern and kerf affect the result, and a rail’s splinter guard may be configured to a particular blade. Confirm specifications in the blade and tool manuals and make a test cut in scrap from the same panel.
How do I prevent tear-out?
Use a suitable sharp blade, align the rail and splinter guard correctly, support the panel, and feed steadily. Test the visible face and cut direction on scrap. Different veneers and panel cores behave differently, so one method will not guarantee a clean edge for every sheet.
Do track saws need dust extraction?
Extraction can improve visibility and reduce cleanup, but it does not capture all dust. Use a compatible extractor and hose that do not interfere with the saw’s movement, and wear protection appropriate to the material. Follow the panel maker’s safety guidance.
Can a track saw make bevel cuts?
Some models support bevel adjustments, but usable depth and rail engagement can change at an angle. Check the manual and test the setup on scrap. Verify the angle with an appropriate gauge when the cut must fit another part.
What is the splinter guard for?
A splinter guard can help show the blade’s path and support material fibers at the cut edge. It may need to be configured for a saw and blade, and a new blade kerf can change the alignment. It does not eliminate tear-out or replace accurate measuring and panel support.
How do I make a plunge cut safely?
Use only a saw whose manual describes plunge operation. Check the cut path, depth, panel support, hidden utilities, guard, and riving components. Keep hands clear of the entry zone and follow the prescribed sequence. If you cannot secure the work or understand the mechanism, choose an edge-starting method or another tool.
Why does my track saw bind?
Possible causes include a closing kerf, misaligned rail joint, dull or unsuitable blade, excessive feed, a shifted panel, or a saw base that is not properly engaged. Stop, release the trigger, wait for the blade to stop, disconnect power, and inspect the setup. Do not restart a trapped blade.
Can I cut solid wood with a track saw?
Often, if the saw and blade are rated for the stock and cut. Secure the board, avoid cuts beyond the capacity, and follow the grain and material guidance. A track helps guide a straight path; it does not compensate for an unstable or twisted board.
Conclusion: choose the complete rail and saw system
The best track saws combine a stable rail interface, adequate cut capacity, compatible blades, predictable plunge controls, effective dust management, and accessories that fit the work you actually do. The guide rail is not an optional afterthought; its length, connectors, clamps, grip, and condition help determine whether a long cut is practical and repeatable.
Before buying, compare the complete system cost and confirm that the saw, rail, blade, clamps, connectors, and extractor work together. Measure your common panels, plan support under the whole cut, and test alignment on scrap. Follow the manual for depth, bevel, plunge, and safety features. A careful setup makes a track saw useful for accurate panel work, while another saw may be safer or more efficient when the cut is short, curved, repeated, or outside the system’s capacity.