Best Compound Miter Saws: How to Choose the Right Bevel and Capacity
The best compound miter saws help make repeatable crosscuts when a project needs both an angled miter and a beveled edge. That combination is useful for crown molding, trim returns, picture frames, furniture parts, and some built-ins. Compared with a basic miter saw, a compound model can tilt its blade to make a bevel. Compared with a sliding compound saw, a non-sliding compound model does not travel forward and back on rails to increase crosscut width. These differences affect cut range, workspace, setup, and price, so they are worth understanding before you compare individual models.
A compound miter saw is not automatically the right choice for every project. If you mostly make square cuts in narrow stock, a simpler miter saw may be enough. If you need to cut wider boards, a sliding compound design may provide the required reach, but it needs more room and has additional moving parts. If you rip long boards or break down sheet goods, a table saw or circular saw is generally a better tool category. The goal is to choose the least complicated saw that safely handles the material and cuts you expect to make.
This guide focuses on compound miter saws: their bevel mechanisms, capacity, accuracy, accessories, and safety. It uses manufacturer documentation and occupational safety guidance to explain what to verify; it does not claim hands-on rankings or laboratory testing. For a broader comparison of crosscut saw types, start with our guide to miter saws. For panel breakdown and ripping, see table saws and circular saws.
Affiliate disclosure: DailyHomeDecorating.com may earn a commission from qualifying purchases through links in this article. This does not change the price you pay.
Amazon product examples to compare
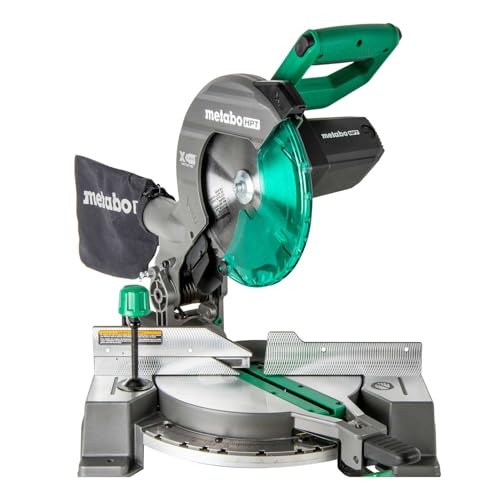
ASIN: B0FBPB1MJ8

ASIN: B00540JS7C

ASIN: B07P8QTFRC

ASIN: B0CPF54P1T
Certain content that appears on this site comes from Amazon. This content is provided “as is” and is subject to change or removal at any time. Product examples and images are supplied through Amazon Creators API; confirm specifications and availability on the current listing.
Table of contents
- What makes a miter saw compound
- Single-bevel versus dual-bevel
- Sliding compound versus non-sliding compound
- How to choose a compound miter saw
- Accuracy, repeat cuts, and calibration
- Blade and material choices
- Setup and safe use
- Care and maintenance
- Research-based selection method
- Frequently asked questions
What makes a miter saw compound?
A miter saw pivots its head or table to crosscut a board at an angle across the board’s width. The miter setting changes the angle in the horizontal plane. A compound miter saw adds a bevel adjustment, which tilts the blade assembly away from vertical. When both settings are used together, the saw makes a compound angle: the cut is angled across the face and tilted through the thickness.
That combined angle is useful when two pieces meet along a corner that is not simply square, or when a molding profile needs to sit against both a wall and ceiling. It can also help make angled furniture parts and frame components. However, compound cuts are more sensitive to stock orientation, reference faces, and adjustment errors. A small mistake in either the miter or bevel setting can create a visible gap where parts meet.
Basic miter saw
A basic miter saw can pivot for a miter cut but does not bevel the blade. It may be adequate for square crosscuts, simple picture-frame corners, and ordinary trim when no bevel is required. Its mechanism is generally simpler, and some models are more compact. If you never need a sloped cut through the board’s thickness, paying for compound movement may not add much value.
Compound miter saw
A compound saw combines miter and bevel adjustment. The bevel may tilt in one direction only or in both directions. This is the main distinction shoppers need to make before considering slide travel, lights, or blade size. Check how the bevel is released, how far it can tilt, whether common stops are provided, and whether the fence has to be moved or adjusted for certain cuts.
Sliding compound miter saw
A sliding compound saw has rails or another travel system that lets the head move across a wider workpiece. It still makes miter and bevel cuts, but adds crosscut width. The slide can be helpful for wider trim, boards, or shelving material. It also requires clearance for the head’s movement. Some designs use forward-positioned rails and others project behind the saw; confirm the exact operating footprint in the manufacturer’s manual.
For a given project, compare the published capacity chart rather than assuming that a slide is always necessary. A wider cut can be useful, but the larger saw may take more room, weigh more, and have more adjustments to maintain. If the stock fits a non-sliding saw’s approved capacity, the simpler option may be easier to set up and store.
Single-bevel versus dual-bevel compound saws
What single bevel means
A single-bevel compound saw tilts the blade in one direction. It can still make bevel cuts to either side of a finished assembly if you turn or reposition the workpiece as appropriate. That can be sufficient for occasional molding, furniture, and trim work. It may require more planning because the reference face and cut direction change as pieces are repositioned.
Before assuming a single-bevel saw cannot handle a project, examine the cut sequence. Many users can make matching parts by turning the stock while keeping the same reference edge against the fence. The safe orientation depends on the workpiece, fence, and saw manual. Do not flip or reposition stock while the blade is moving, and do not use a setup that leaves an unstable part unsupported.
What dual bevel adds
A dual-bevel compound saw tilts both left and right. This can reduce how often you need to turn a board to make opposing bevels. It can save setup time when cutting repeated crown molding, matched trim returns, frames, or assemblies with a sequence of alternating bevels. A readable bevel scale and positive stops can make common settings easier to repeat, though every critical cut still deserves verification.
Dual bevel is most valuable when beveling is frequent. For a project that needs only one or two beveled pieces, a single-bevel design may be simpler and less expensive. Consider how often you will change direction and whether turning the stock is safe and convenient. If your stock is long or has an asymmetrical profile, keeping the same face orientation may help avoid layout errors.
Bevel stops and controls
Look for a bevel lock that can be released and secured without reaching near the blade path. Stops may help return to commonly used angles, but their labels and mechanisms vary. Review the manual to see how the stop override works and whether the saw requires a fence adjustment at certain bevel settings. Do not assume that a number on a scale guarantees accuracy; test the setup on scrap and calibrate according to the maker’s procedure.
Some saws offer bevel stops or detents that can be bypassed for less common settings. A bypass is useful only if it is easy to understand and does not accidentally engage. Practice adjustments with the tool disconnected before first use. That helps you learn where the controls are without placing your hands near an energized blade.
Sliding compound versus non-sliding compound
Non-sliding compound models
A non-sliding compound saw lowers through the material without traveling along rails. It can be a good fit for narrower stock and a compact workspace. Because the head does not slide, the saw may be easier to place on a shallow bench and simpler to move. The main limit is crosscut width: a board wider than the saw’s approved capacity may require another method or a different saw.
Do not use an unsupported workaround to cut wider stock. Repositioning a board after a partial cut can create alignment and kickback hazards. If the manual permits a particular two-step procedure, follow it exactly and use stable support. Otherwise choose a saw with the required capacity or a different tool intended for that cut.
Sliding compound models
Sliding models expand crosscut capacity by moving the head through the material. The additional reach can make them more versatile for wider boards, but slide design and capacity differ. A larger headline capacity may apply only at a square cut and may decrease at miter or bevel angles. Use the manual’s chart to verify the exact cut orientation.
Slide rails need clearance and should remain clean. Dust, resin, or debris can affect smooth movement. A slide lock may let you secure the head when making a non-sliding cut or transporting the saw. Learn which direction the manual requires for cutting. Many sliding saw instructions describe pulling the head toward the operator before lowering and then pushing it through the stock, but the correct method is model-specific. Never apply a generic technique against the instruction manual.
Workspace and footprint
Measure more than the base. A sliding saw may need room behind or in front of its rails, along with side clearance for long workpieces. Include the handle arc, bevel travel, dust bag or hose, and support stands. A saw that fits the bench when parked may hit a wall when its head is fully extended or tilted.
Some rail arrangements are designed to sit close to a wall, while others need more rear clearance. Do not infer this from product photos. Check the manufacturer’s footprint diagram, manual, or installation instructions. Also check whether the saw’s carrying handle and lock allow safe storage without straining the rails.
How to choose a compound miter saw
Start with your cut list
Write down the actual projects you expect to do: casing, baseboard, crown molding, deck trim, picture frames, furniture, or shelving. For each, note the material width and thickness, cut angles, number of repeated pieces, and whether the work is finished or rough. A few narrow trim cuts do not call for the same machine as frequent wide-board crosscuts or large molding assemblies.
Be realistic about future use. A saw that can handle nearly every cut may also be heavy, costly, and difficult to store. The best fit is usually the smallest class that safely and consistently covers your regular work. Rent or borrow a larger tool for a one-off project if that is more practical and safe.
Check capacity at the exact angle
Manufacturers publish maximum cut capacities for particular positions, such as square crosscuts, mitered cuts, bevel cuts, or compound cuts. These numbers can differ substantially. A board may fit at 90 degrees but not at a steep miter with the bevel engaged. A tall molding piece may fit in one orientation but not another.
Use the manual’s capacity table, not just a product headline. Measure the stock yourself and include the exact profile. If cutting crown molding nested against the fence, check the permitted nested capacity and any required fence position. If laying molding flat, verify the horizontal and vertical dimensions supported by the saw. Never remove a fence section or alter a guard unless the manual describes the adjustment.
Choose bevel direction from your work
If your normal work includes repeated left- and right-facing bevels, dual bevel can simplify the sequence. If bevels are occasional, a single-bevel saw can be adequate when you can reposition the stock safely. Consider whether the work is long, delicate, or asymmetric. Maintaining a consistent reference face can be more important than avoiding every stock flip.
Try the bevel control before buying if possible. Some controls are at the rear of the saw; others are on the front or side. Consider whether you can release, set, and lock the bevel without awkwardly reaching behind the tool. The control should be clear and secure, especially if you have limited reach or will work in a crowded shop.
Pick fixed or sliding capacity
If your typical stock is narrow enough for a non-sliding saw, fixed-head compound models can offer a compact setup. If you routinely crosscut wider boards, a slide may be needed. Compare the cutting chart for common workpieces and remember that capacity often drops at angle extremes. The slide adds width, but not necessarily a better fit for every material or workspace.
Consider how often you will use the full capacity. A large slider can be useful in a cabinet shop or remodeling project, but it needs more support and may be harder to transport. If the stock is long, a saw extension or stable support system is important. Never let an unsupported end sag into the blade or pull the workpiece away from the fence.
Evaluate table and fence support
The table and fence support the workpiece and act as repeatable references. Look for a flat table, a fence that is sturdy and suitably tall for your common stock, and extensions that can support longer material. Split or adjustable fence sections may be needed at bevel angles. Confirm how they lock and how much support remains near the cut when adjusted.
For long boards, use level supports that do not push the stock up or down. A roller stand can help, but it must be aligned to the saw table and cannot allow the stock to roll or twist. A stop block can help produce repeat lengths, but it must be positioned so an offcut cannot become trapped between the stop and blade. Follow the saw maker’s safe-work instructions.
Consider detents and scales
Clear scales, positive stops, and a secure miter lock can reduce setup time. Common angle detents may be useful for framing and trim, but not every project uses standard angles. Check whether the detent can be bypassed and how the table locks at an intermediate angle. A scale is a reference, not a guarantee of perfect calibration.
For precision work, verify settings with a reliable square or angle gauge and make a test cut. Adjust according to the manual. Avoid calibrating by loosening or forcing parts that are not intended to move. If a saw cannot hold its settings, contact the manufacturer or a qualified service provider rather than accepting inaccurate cuts.
Consider blade size and type
Blade diameter affects capacity only in combination with the saw’s geometry and travel. Two saws with the same diameter can have different capacities, fence arrangements, weights, and bevel ranges. Check the required arbor size, maximum speed, blade guard clearance, and recommended tooth design. Do not install a blade larger than specified or a blade with the wrong arbor just to increase capacity.
The stock blade supplied with a saw may be a general-purpose option. A finer-tooth blade can help with clean cuts in finish material, while a blade designed for rough framing may prioritize speed and durability. The right choice depends on material, finish, tooth geometry, sharpness, and setup. If a cut tears out, test on scrap and inspect blade condition before applying more force.
Dust collection and lighting
Miter saws can spread fine dust around a shop. Compare the dust port, bag, and compatibility with an extractor. A bag may catch some chips but is not a complete dust-control system. A hose should not interfere with the slide, bevel movement, or blade guard. Keep the work area ventilated and use protection suitable for the material.
LED lights and cut-line indicators can improve visibility, but they do not replace a clear layout mark. Some saws use a laser; others use a shadow cast by the blade. Verify the indicator against the actual kerf and adjust it according to the manual if needed. Do not assume that a laser is aligned from the factory after transport or blade changes.
Weight, portability, and stand
A compound saw’s weight affects how easily it can be moved and mounted. A sliding model may be substantially harder to lift than a compact non-sliding saw. If you work on site, review the carrying handles, head lock, and stand compatibility. A compatible stand can support long stock and raise the saw to a comfortable height, but it must lock securely and be stable on the ground.
Check the total weight with the blade and accessories, not only the bare tool figure. Think about where the saw will be stored and whether you can carry it safely without twisting. If a saw is too heavy to position securely, leave it on a permanent bench or choose a more manageable tool rather than lifting it alone.
Accuracy, repeat cuts, and calibration
Keep a consistent reference face
When a board has one face or edge that matters visually, mark it and use the same orientation for each piece. Keep the reference face against the fence and the reference edge on the table as the project plan specifies. This makes it easier to spot a flipped piece before the cut and reduces cumulative layout errors.
For compound cuts, write down the miter and bevel settings for each part, identify which face is up, and label the waste side. The same numerical angle can create different outcomes when the board is flipped or rotated. A simple cut list with an orientation sketch can prevent costly mistakes in crown molding or trim returns.
Test the saw with scrap
Before cutting expensive material, use scrap of the same thickness and profile. Make a test cut, check the angle, and assemble the pieces if they form a joint. If the joint opens, determine whether the cause is miter, bevel, stock alignment, or measurement. Change one variable at a time so you can identify the source.
Do not assume that a perfect-looking scale or laser proves the result. Verify the cut with a reliable reference tool. A saw may shift during transport, a blade may not seat flat, or a workpiece may not be held against the fence. Calibration should follow the manufacturer’s process, with the tool disconnected from power when adjustments require access near the blade.
Manage repeated cuts safely
A stop block can improve repeatability for multiple pieces. Set it so the stock contacts the stop without trapping the offcut. Never place a hand close to the blade to hold a small piece. For parts below the manual’s minimum length, use a different method. Allow the blade to stop before removing offcuts or clearing a jam.
Long stock needs support on both sides of the saw. The supports should be level with the table, and the board should not tip or rotate. If the material is heavy, get help or use suitable supports. A repeatable stop is useful only when the entire workpiece remains stable through the cut.
Blade and material choices
Use blades intended for the miter saw and the material you are cutting. Verify diameter, arbor, tooth type, and maximum speed. Wood blades are not interchangeable with blades for metal or masonry. The manual and blade labeling determine what the saw can use. Never remove a guard or install an accessory that changes the saw outside the maker’s approved configuration.
Fine finish versus general-purpose blades
A general-purpose blade can handle many everyday cuts, but finish material may benefit from a blade designed for cleaner edges. More teeth are not automatically better for every material. Tooth geometry, plate quality, sharpness, feed, and support all matter. A dull blade can burn or tear material and may make the saw harder to control.
For veneered or coated stock, test on a scrap piece from the same board. Support the material fully and follow the manual’s cut direction. A sacrificial backing or zero-clearance accessory can help in certain setups only when approved and compatible. Do not improvise an insert that could contact the blade.
Composite and non-wood materials
Some miter saws and blades are approved for specific plastics, aluminum, or composite materials. That does not mean every saw can safely cut those materials. Check the manufacturer’s instructions for blade type, speed, clamping, and dust or chip concerns. Thin sections can shift or deform, while metal can create hot chips. Secure the material and wear appropriate protection.
Never cut unknown material. Reclaimed boards may contain nails, screws, coatings, or other contaminants. Locate embedded metal before cutting and use only a blade intended for the verified material. If the manual prohibits the material, choose another tool or process.
Setup and safe use
Read the saw’s manual before use. OSHA’s miter-saw guidance explains that the blade guard must protect the blade and that hands must remain a safe distance from the point of operation; it also recommends sharp blades and eye and face protection. Review the official OSHA miter saw safety guidance alongside the exact saw manual. An official manufacturer example, the DEWALT double-bevel compound miter saw manual, illustrates model-specific controls and safety instructions; use the manual for the model you actually own.
- Mount the saw securely. Use a stable, level bench or compatible stand and the mounting method specified by the maker.
- Measure the full operating space. Include the slide, bevel, handle, dust hose, and stock supports.
- Inspect the blade and guard. Disconnect power before changes; check that the blade is installed in the correct direction and the guard moves as designed.
- Set the fence and bevel. Move or adjust fence sections only as the manual describes, then lock them before cutting.
- Support the stock. Keep long material level and stable on both sides. Clamp when required and keep hands outside the marked hazard zone.
- Plan the offcut. Ensure it cannot bind, fall into the blade, or be thrown toward another person.
- Control dust and cord. Connect extraction without restricting movement and route the cord away from the blade and walkways.
- Make a test cut. Confirm angle and fit on scrap before committing finished material.
Wear eye and hearing protection and material-appropriate respiratory protection. Secure loose clothing, jewelry, and hair. Keep children, pets, and bystanders away. Do not operate the saw when tired, distracted, or impaired. Keep the blade guard in place, and wait for the blade to stop before adjusting a workpiece, removing offcuts, or cleaning the table.
Keep hands out of the blade path and never reach around a moving blade. Use clamps or hold-downs approved for the saw when the stock needs extra restraint. Short pieces are particularly risky because they encourage hands to approach the blade. If a piece is too small to secure and hold safely, use another method or change the cut sequence.
Sliding saw technique
Sliding saws have a specific cutting method in the manual. Many instructions call for pulling the head toward the operator before lowering and then pushing the saw through the work, but that is not universal. Read the exact procedure before use. Do not start the saw with the blade touching the stock or pull a blade toward your body if the manual directs a different motion.
Lock the slide for cuts that do not require travel if the manual calls for it. A loose or uncontrolled slide can affect the cut and increase the risk of movement. Keep the rails clean and do not force the head if it binds. Disconnect power before cleaning or adjusting the slide mechanism.
Common buying mistakes
Paying for dual bevel without needing it
Dual bevel is convenient for repeated opposing bevels, but it may not justify extra cost if most cuts are square or simple miters. Review your cut list first. A single-bevel saw can complete many projects when parts can be turned and supported safely.
Assuming a slider is always better
A sliding mechanism expands crosscut capacity, but it also increases footprint and setup complexity. If your stock is narrow, a non-sliding compound saw may be easier to place and store. Check exact cut capacities and required clearance before choosing.
Using the headline capacity for every cut
Capacity depends on angle, bevel, and stock orientation. A headline number may describe a square cut only. Verify the exact configuration in the manual and do not force oversize stock into an unsafe position.
Trusting a laser more than a test cut
A laser can help locate the blade path but may need adjustment and may show a line wider or narrower than the kerf. Verify with a test cut and keep a clear mark on the stock. Good setup is more reliable than relying on a single indicator.
Ignoring fence adjustments
Beveling may require moving a fence section. If you forget to move or lock the fence, the blade could contact it or the workpiece may not be supported. Follow the manual’s order for fence and bevel settings, and check clearance with the saw disconnected before powering on.
Care and maintenance
Unplug the saw or remove its battery before cleaning, changing blades, or inspecting moving parts. Remove dust and resin from the table, fence, and rails with products approved by the manufacturer. Do not spray liquid into the motor or switches. Keep slide rails clean, use only specified lubrication, and avoid abrasive cleaners that damage scales or surfaces.
Inspect the blade for cracks, missing teeth, warping, or buildup. Replace a damaged blade and follow the specified mounting direction and fastener procedure. Check that the guard returns correctly, the slide lock engages, and bevel and miter locks hold their settings. A blade brake, if present, does not replace the guard or safe attention; DEWALT’s manual explicitly cautions that a brake is not a substitute for safeguards.
After a move or blade change, verify the fence and angle settings using the manufacturer’s process. If the saw has been dropped or exposed to water, or if it vibrates, sounds, smells, or cuts unusually, stop using it and have it inspected by qualified service personnel. Store the saw dry with the head secured and blade covered. Keep the manual with the tool so a future user can find the approved blade and adjustment procedures.
Research-based selection method
This guide compares compound miter saws by design and documented use rather than claiming hands-on tests. The research method is to distinguish basic, single-bevel, dual-bevel, and sliding compound configurations; compare capacity charts at the angles a project requires; and verify blade, fence, bevel, and slide instructions against official manuals. For example, manufacturer manuals explain how to adjust a bevel, when fence sections must be repositioned, and what direction to move a sliding head. Those instructions vary by model and should not be generalized into a product-specific recommendation.
Safety criteria are cross-checked against OSHA’s official miter saw guidance, which addresses guarding, hand distance, blade sharpness, and eye/face protection. A product listing is not enough to establish capacity or safe use. We recommend confirming the full model number and manual, checking what is included, and matching the tool to the workpiece dimensions and available workspace. No current price or hands-on performance claim is made here; prices, stock, and specifications can change.
For your own shortlist, record the model number, bevel direction, fixed or sliding design, published capacities at square/miter/bevel positions, fence clearance, slide footprint, blade compatibility, weight, dust connection, stand requirements, and included accessories. Compare each point with a real project. If a detail is unclear or conflicting, contact the manufacturer or dealer before purchase rather than assuming a broad label answers it.
Frequently asked questions
What is a compound miter saw used for?
It makes crosscuts with a miter angle and a blade bevel, either separately or together. Common uses include trim, molding, frames, and angled furniture parts. It is not intended for ripping long boards or breaking down large sheet goods.
What is the difference between compound and sliding compound?
A compound saw tilts the blade to bevel and pivots for miter cuts. A sliding compound saw adds travel along rails to cut wider stock. Sliding capacity and required clearance vary by model, so check the manual’s chart and footprint diagram.
Should I buy a single- or dual-bevel saw?
Choose dual bevel if you regularly make opposing bevels and want to keep the same reference face without turning stock. A single-bevel saw can be sufficient for occasional compound cuts when you can reposition the material safely. Compare actual projects, not just feature lists.
Do I need a sliding compound miter saw?
You need sliding travel only if your typical workpiece exceeds the approved width of a non-sliding saw. Check capacity at the exact miter and bevel combination. A slider needs more space and is not automatically the best choice for narrow trim.
Can a compound miter saw cut metal?
Only if the saw maker approves that material and a compatible blade for the specific model. A wood blade and metal blade are not interchangeable, and some saws are not designed for metal. Read the manual and blade instructions before cutting any non-wood material.
How do I get accurate compound cuts?
Use a consistent reference face, support and clamp the work as instructed, verify both angle settings, and make a test cut on scrap. Check the fit of a matching pair and adjust one setting at a time. Do not assume a scale or laser is calibrated without verification.
Are lasers necessary on a miter saw?
No. A laser or shadow line can help show the blade path, but it does not replace a layout mark, test cut, or correct setup. Verify the indicator against the actual kerf and follow the manual for adjustment.
How much room does a sliding saw need?
It depends on the rail design and model. Measure the entire operating envelope, including the head travel, handle, bevel movement, dust hose, and long stock. Use the manufacturer’s diagram rather than the base dimensions alone.
When should I replace the blade?
Replace it if damaged, cracked, missing teeth, warped, or no longer cutting safely after proper cleaning and inspection. Use only a blade with the specified diameter, arbor, and speed rating. There is no universal number of cuts because material and use differ.
Final thoughts
The best compound miter saws match bevel needs, cut width, workspace, and frequency of use. Start with whether you need bevels in one or both directions, then decide whether sliding capacity is necessary. Verify the exact capacity at your intended angle, how fences move, what clearance the slide needs, and which blades and accessories are approved.
Compound cuts reward careful layout and test fitting. Use a consistent reference face, support long material, keep guards in place, and follow the exact manual for blade motion and bevel adjustment. A basic compound saw can be a capable trim tool when it fits your work; a dual-bevel slider can save setup time for wider and more complex cuts. Choose based on the cuts you actually make and the safe space you can provide.