Best Circular Saws for Beginners
A first circular saw can make sheet goods, shelving, trim stock, and ordinary project lumber much easier to cut. It is also a handheld power tool with a fast, exposed cutting edge, so the right choice is not simply the most powerful saw or the one with the longest feature list. Beginners benefit most from a model that fits the work they actually plan to do, feels controllable in their hands, has clear adjustments, and comes with a manual they can understand and follow.
This guide explains how to choose a beginner-friendly circular saw without claiming to have tested products in a workshop. It covers corded and cordless formats, blade diameter and real cutting capacity, bevel adjustments, shoe stability, cut-line visibility, blade choice, work support, safe setup, and care. The goal is to help a first-time buyer compare saws accurately and recognize when a different tool would be easier or safer for the job.
Affiliate disclosure: DailyHomeDecorating.com may earn a commission if you buy through qualifying links. This does not change the price you pay or the criteria discussed in this guide. Product availability and specifications can change, so confirm the current listing and the manufacturer’s manual before buying or using a tool.
Amazon product examples to compare
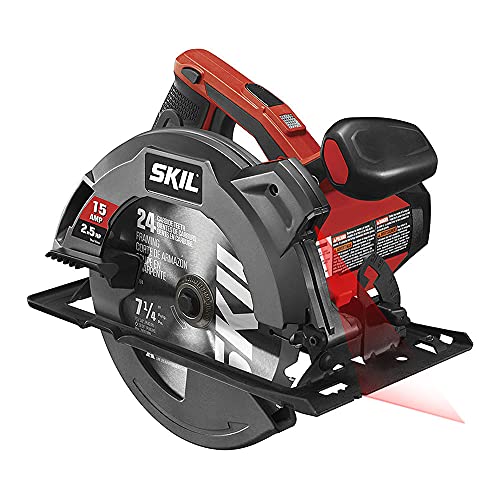
ASIN: B01BD81BLO
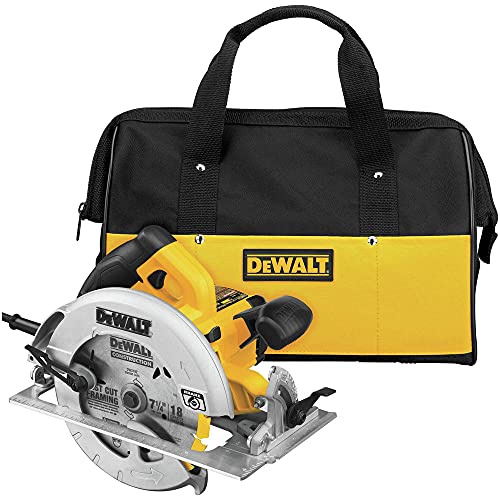
ASIN: B007QUZ16A

ASIN: B0DDDW9GWK

ASIN: B07J1RXG8V
Certain content that appears on this site comes from Amazon. This content is provided “as is” and is subject to change or removal at any time. Product examples and images are supplied through Amazon Creators API; confirm specifications and availability on the current listing.
Quick answer: what should a beginner look for?
Start with a conventional, full-size circular saw that has a sound upper guard, a lower guard that moves freely and returns by itself, an easy-to-read depth scale, a bevel adjustment you can lock securely, and a flat shoe that slides smoothly over the work. Choose corded if you will work near an outlet and want to avoid battery-platform cost or runtime planning. Choose cordless if mobility and freedom from a trailing cord matter more, and budget for the compatible battery and charger if they are not included.
Do not decide from blade diameter alone. Read the manufacturer’s stated cutting capacity at both 90 degrees and common bevel settings, then compare it with the thickness of the material you expect to cut. A saw that is manageable in your hands, with adjustments you can set confidently, is often a better beginner choice than a heavier model with features you will rarely use. If you are comparing saw types, our broader circular saw guide covers the general category; this page narrows the question to first-time buyers.
What beginners need from a circular saw
A circular saw is a portable tool for straight cuts. It can make crosscuts across the grain and rip cuts with the grain when the blade, work support, and guiding method suit the job. It can also make bevel cuts by tilting the blade relative to the shoe. Compared with a stationary table saw, the handheld saw moves across material that is supported on a stable surface. Compared with a miter saw, it is easier to take to large panels or long stock, but it does not have a fixed fence and pivoting head to repeat precise crosscuts. For stationary rip work, read our table saw selection guide; for repeatable angled crosscuts on shorter boards, see our miter saw guide.
Control is a feature
Beginners often focus on motor power because it sounds like a direct measure of performance. But control depends on several things: the saw’s weight and balance, handle shape, grip position, whether the shoe stays flat, how easily the blade path can be seen, and whether the user can reach the controls without changing grip. A powerful saw can still be a poor match if it feels awkward or the user cannot maintain a steady feed. Whenever possible, hold a display model with both hands in the intended stance. Check that you can operate the trigger and safety control without stretching or shifting your wrist.
Understand the work before selecting the tool
Write down the materials and cuts you plan to make. Plywood panels, framing lumber, shelving boards, and occasional trim cuts can often be handled by one general-purpose saw with a suitable blade. Very thick stock, repeated bevel cuts, very fine furniture work, masonry, metal, or long production runs can call for a different blade, a different saw, or a more specialized setup. Beginners should not assume that one saw and one blade are suited to every material. The manual and blade labeling determine compatibility.
Corded or cordless: choose around your work area
When a corded saw makes sense
A corded saw is a practical option for a home workshop, garage, or project location with a suitable outlet. It avoids battery runtime planning and the added cost of buying into a battery platform. It can be a sensible choice if most cuts happen at a bench or on a driveway and the cord can be routed safely. The tradeoff is that the cord limits range, can snag on stock or supports, and must be kept away from the cut path and blade. Use an appropriate extension cord only when the manufacturer permits it and specifies the required rating and length. Route it so neither the saw nor the workpiece can pull it into the blade.
When a cordless saw makes sense
A cordless model is easier to carry between rooms, outdoors, and around a site where outlets are inconvenient. It eliminates the trailing power cord, which can simplify movement, but the battery adds weight and needs charging. Buyers should compare the saw’s platform, battery compatibility, kit contents, and battery cost. A bare tool may look inexpensive but require a battery and charger that are not included. Runtime depends on the battery, material, blade condition, cut depth, and how the saw is used; do not treat a broad runtime claim as a guarantee for your project.
Consider whether you already own compatible batteries. If you do, using the same platform can reduce cost and simplify charging. If this is your first cordless tool, compare the cost of a complete kit with a corded saw and remember that a battery system may affect future tool purchases. Do not select solely by nominal voltage or marketing language; look at the specific tool’s manual, included equipment, warranty, and your planned workload.
Beginner decision
Pick corded when continuous availability and lower system complexity matter more than moving freely. Pick cordless when you will cut in multiple locations or genuinely need to work away from outlets. In either case, balance and handling still matter. A cordless saw is not automatically easier to use just because it has no cord, and a corded saw is not automatically more accurate because it plugs into a wall.
Blade size and actual cutting capacity
Blade diameter indicates the family of blades a saw is designed to accept, but it does not tell the whole story about what the saw can cut. The shoe geometry, arbor, blade position, and bevel angle all affect capacity. Manufacturers commonly list maximum cut depth at 90 degrees and at a bevel angle such as 45 degrees. The bevel capacity is usually less than the straight-cut capacity because tilting the blade changes its reach through the material.
Before buying, compare the published capacity with the material thickness. If you plan to cut a board in one pass, the listed capacity at the intended angle must accommodate that thickness. Do not infer capacity from a photograph or from another saw using a blade of the same diameter. Check the specification sheet and the instruction manual for the exact model and market version. If a cut would require rotating the stock and making a second pass, that approach may be possible in some circumstances, but it introduces alignment and support challenges. A first-time user should prefer a tool and method that complete the task as the manual describes.
Common full-size and compact formats
Many conventional circular saws use a blade around 7-1/4 inches, while smaller compact saws use smaller blades. Those labels describe common formats, not a universal ranking. A compact model can be lighter or easier to maneuver for some users, but may have less cutting depth or a different blade ecosystem. A full-size saw may handle thicker stock but feel heavier. Compare measured weight, grip and balance, blade compatibility, and the cut depths you actually need. Our compact circular saw overview discusses smaller-format tools separately from this beginner-focused buying framework.
Check blade compatibility carefully
Every saw is designed for a specific blade diameter and arbor arrangement, and may have direction, thickness, or speed requirements. Buy a blade expressly compatible with the saw and material. Never force a blade that does not fit, use a reducer ring unless the manufacturer permits it, or install a blade whose maximum rated speed is below the saw’s speed. Read the manual before changing a blade. Unplug a corded saw or remove the battery before adjustments, and use the prescribed blade-lock and wrench procedure.
Bevel and depth adjustments
Depth adjustment sets how far the blade extends below the shoe. The correct setting depends on the material and the manufacturer’s instructions. Some manuals describe a small amount of blade projection below the work for a through-cut, but users should follow the manual for their particular saw and task. Too much exposed blade increases the amount of blade outside the stock; too little may affect cutting performance or cause binding. Do not rely on a rule of thumb in place of the manual.
Depth controls often use a lever, knob, or clamp and a printed scale. A beginner should be able to loosen the adjustment, move the shoe or blade assembly, read the scale, and lock it without straining. After setting it, confirm that the adjustment is secure and that the blade clears the support beneath the work. For a bevel cut, tilt the saw’s base to the desired angle and lock the bevel mechanism. Bevel scales and stops help repeat settings, but the user must verify the angle against the actual task; printed marks are not a substitute for a square or test cut when accuracy matters.
Bevel capacity versus useful bevel control
A marketing specification may advertise a maximum bevel angle, but beginners should also inspect how the bevel adjustment works. Does the lock engage securely? Are the scale markings visible? Can the saw be adjusted without putting fingers near the blade? Does the shoe remain stable at the angle? A model with an extreme maximum angle may be less useful than one with straightforward, repeatable controls at the angles you need. Most household projects use square cuts and occasional common-angle cuts; buy for those real needs rather than an impressive maximum number.
Shoe, handling, and cut-line visibility
The shoe should stay flat
The shoe, also called the base plate or foot plate, rides on the top face of the work. It should sit flat without rocking and should slide without catching on the material. A stiff, well-finished shoe helps the saw track predictably along a guide. Inspect it for damage, loose components, or a bent edge. If buying in person, check whether the shoe is broad enough to feel stable and whether the adjustment hardware interferes with a straightedge. Tool manuals explain inspection and adjustment for the particular model.
Line-of-sight features can help, but do not steer the cut for you
Saws may have a sight notch, blade-view opening, LED, dust blower, or laser. These are aids for seeing a pencil line, not guarantees of accuracy. A laser can be misaligned, a blade can obscure the line from one side, and dust can cover markings. Beginners should learn where the blade actually tracks relative to the shoe and confirm that relationship with a safe test cut in scrap. Consider which side of the saw offers the clearest view for your dominant hand and typical cut direction. Check that the saw can be held with both hands while maintaining that view.
For long or repeated straight cuts, a clamped straightedge or compatible guide can improve consistency. Confirm that the guide is secure and that the shoe will not run off it. Do not put a hand near the blade to hold a guide or workpiece. A laser does not replace a fence or guide, and a fence does not eliminate the need to support the material correctly.
Weight and grip
Weight matters because the saw is carried, positioned, and pushed while the shoe remains flat. A few pounds can feel significant when reaching across a panel or making repeated cuts. If you can test a saw in a store, hold it with both hands and imagine placing the shoe on a board. Check whether the handles allow relaxed wrist alignment and whether you can see the blade path. If you cannot handle the saw before buying, compare listed tool weight consistently: bare-tool weight and weight with battery are different measurements. Read the product details carefully.
Choosing the right blade
The included blade may be a general-purpose or framing blade, but the right blade depends on the material and finish expected. Tooth count is one factor, not a complete quality rating. Lower-tooth-count blades are commonly used for faster cuts in framing stock; higher-tooth-count blades can produce a cleaner edge in many sheet or finish materials when correctly matched. Tooth geometry, carbide quality, kerf, blade thickness, and material also matter. Consult blade makers’ compatibility charts and the saw manual.
Use a blade labeled for the material: wood, plywood, laminate, nonferrous metal, plastic, fiber cement, or another material as applicable. Do not use a wood blade on metal or masonry. Some materials need a specific blade and additional dust controls. Ensure the blade diameter, arbor, rotation direction, and maximum RPM meet the saw’s requirements. A sharp, clean blade cuts more predictably than one clogged with resin or damaged teeth. If a blade binds, wanders, burns material, or requires unusual force, stop and inspect the setup rather than pushing harder.
Finish quality and tear-out
Clean cuts depend on the blade, the direction of the teeth, the face of the material, the backing and support, and the feed. Plywood and veneered panels can splinter, especially on the exit side. The manual and blade maker may describe which face should be up for a particular saw design. A sacrificial backing, suitable fine-tooth blade, masking tape, or scoring strategy can sometimes reduce tear-out, but use only methods consistent with the material and tool instructions. First practice on scrap. Never hold thin offcuts near the blade to prevent splintering.
A simple decision framework for first-time buyers
- List your materials. Note whether you will cut sheet goods, framing lumber, boards, or specialty materials. Do not assume a standard wood blade covers every material.
- Measure the thickest planned cut. Compare it with the saw’s published capacity at the angle you will use, not just the blade diameter.
- Choose power around the location. Select corded for work near an outlet and cordless for mobility, accounting for battery and charger cost.
- Check handling. Favor a saw that lets you maintain a two-handed grip, keep the shoe flat, reach the controls, and see the cut line.
- Inspect adjustments. Look for clear depth and bevel markings and locking mechanisms that feel secure and are easy to use.
- Read the exact manual. Confirm blade requirements, intended materials, adjustment procedure, guard behavior, electrical or battery instructions, and maintenance.
- Budget for the system. Include a compatible blade, batteries if needed, eye and hearing protection, clamps, a stable support setup, and dust management.
- Practice on scrap. Learn how your saw tracks, how the guard behaves, and how your guide and work support perform before cutting project material.
This process is more useful than ranking saws by a single specification. A buyer who cuts occasional plywood in a garage may value a clear sightline and low setup friction. Someone framing outside may value portability and battery compatibility. A hobbyist making furniture may prioritize a fine blade and guide system. There is no single “best” beginner saw independent of the person, material, and job.
Beginner setup for straighter cuts
Plan the cut and the offcut
Mark the cut clearly and decide which side of the line is waste. Account for the blade’s kerf—the material removed by the blade—so the finished part remains the intended size. Identify where the offcut will fall and ensure it cannot pinch the blade or drop unexpectedly. Support the work so both sides remain stable through the cut, while keeping the blade path clear of sawhorses, benches, clamps, wiring, and the floor. A large panel can sag or shift if supported at the wrong points. Use the manufacturer’s guidance and a purpose-built panel support when needed.
Clamp and guide the material
Secure the workpiece with clamps or a suitable support system. The material must not move as the saw advances. Keep clamps clear of the saw’s path and do not clamp in a way that traps the offcut against the blade. For a long straight cut, clamp a guide at a measured distance from the blade edge or shoe, following the tool’s guide instructions. Measure that offset on scrap rather than assuming the shoe edge and blade line coincide. The saw should be able to travel the full length without hitting a clamp or losing support.
Make a test cut and check the result
With the saw disconnected from power, set depth and bevel, check blade installation and guard movement, then clear the area. For a new saw or guide setup, make a test cut in scrap of similar material. Keep the saw’s shoe flat, use both hands as the manual directs, and allow the motor to reach operating speed before engaging the material if the manual instructs. Move steadily without twisting the tool or forcing it. When the cut is complete, release the trigger and wait until the blade has stopped before setting the saw down. Check the cut with a square or tape measure before repeating the setup.
Safety essentials for new circular saw users
A circular saw can cause severe injury. This buying guide cannot replace hands-on instruction, the exact tool manual, or applicable workplace rules. Read and understand the manual before use; if any instruction is unclear, seek competent guidance. OSHA explains that handheld circular saws require upper and retractable lower guards, and recommends the proper blade, maintained sharpness, and eye and face protection. The OSHA handheld saw safety guidance is a useful overview, while the OSHA portable-tool guarding standard describes guard requirements in covered workplaces.
- Keep guards working. Do not wedge, tie back, remove, or defeat the lower guard. Before each use, check that it moves freely and returns as intended. If it sticks or is damaged, stop and get service.
- Disconnect before adjustments. Unplug a corded saw or remove the battery before changing the blade, adjusting the tool, clearing a jam, or inspecting it, as its manual specifies.
- Wear appropriate protection. Use safety glasses or a face shield as appropriate, hearing protection, and suitable footwear. Manage dust according to the material and tool guidance. Avoid loose clothing, dangling jewelry, and unsecured long hair.
- Keep hands out of the cut path. Use the handles and keep both hands positioned as the manual directs. Never reach under the work or place a hand near the blade to support the stock.
- Support the stock safely. An unsupported or pinched board can bind and cause kickback. Plan supports so the kerf stays open and the offcut does not trap the blade.
- Stand in a stable position. Keep balanced and out of the likely kickback path. Do not overreach or cut stock held in your lap or by another person.
- Wait for the blade to stop. Keep the saw in control after releasing the trigger and do not set it down while the blade is moving.
- Keep people clear. Point the blade away from nearby people and maintain a clean, well-lit work area.
Kickback can occur when the blade is pinched, binds, or is misused. If a saw stalls or reacts unexpectedly, release the trigger, maintain control, and follow the manual’s instructions; do not pull the saw backward through a moving blade. OSHA’s woodworking guidance discusses kickback hazards and keeping hands away from the cut line. The DEWALT DWE575 instruction manual and Makita 5007F manual show examples of model-specific controls, but use the manual supplied for your own saw rather than assuming procedures are interchangeable.
Common beginner use cases—and limits
Cutting plywood and other sheet goods
A circular saw is useful for breaking large panels down into manageable parts. The challenge is supporting the panel over a broad area and keeping a long cut straight. Use a stable panel support, a clamped guide, and a blade suited to the panel. Make sure the sheet cannot sag and pinch the blade. For many cuts in a small space, a track saw or a shop-based panel-cutting service may be easier. Accuracy depends on setup as much as on the saw.
Crosscutting boards
For occasional board crosscuts, a circular saw can work when the board is clamped and supported, and a square or guide helps keep the cut perpendicular. A miter saw can be more convenient for repeated crosscuts and angled trim, while a handsaw may be better for one quiet, small cut. Match the tool to the frequency, length, and accuracy needed.
Ripping lumber
Ripping means cutting along the grain. It requires steady guidance and support over the length of the cut. Use an appropriate blade and a compatible rip guide or securely clamped straightedge when suitable. Keep the material supported and prevent the kerf from closing on the blade. If the cut is long, repeated, or must be consistently dimensioned, a properly guarded table saw and fence may be more appropriate. See our table saw guide for that category.
Bevel cuts
A bevel cut tilts the blade relative to the work surface. It reduces cutting depth and can change how the shoe sits on the material. Set the angle with the saw disconnected, lock the adjustment, support the stock securely, and make a scrap test cut. Do not try to twist the saw mid-cut to create an angle. For recurring compound trim cuts, a miter saw may be easier to set and repeat.
Materials outside ordinary wood
Metal, masonry, plastic, cement board, and composite products can create different hazards, dust, heat, or chip patterns and require specific blades and controls. Do not use a standard wood blade simply because it fits. Check both tool and blade instructions; some applications require dust extraction or additional protective equipment. Beginners should avoid unfamiliar materials until they understand the hazards and have the specified equipment.
Maintenance and storage
Good maintenance makes a saw easier to inspect and operate. Disconnect it from power before cleaning or servicing. Remove sawdust from the shoe, vents, and accessible areas using a method permitted by the manufacturer. Do not direct compressed air into a tool unless the manual allows it and you can control the dust safely. Inspect the cord, plug, battery, shoe, handles, fasteners, and guard for damage. Keep the lower guard clean enough to move freely; never lubricate it unless the manual directs you to do so.
Check blades for missing teeth, cracks, warping, resin buildup, or other damage. Replace a damaged blade and clean or sharpen reusable blades only as instructed by the manufacturer. Use the correct wrench and tightening procedure. Store blades in a protective case and keep them dry. Store the saw so the blade is guarded, the cord is not sharply bent, and the tool cannot fall. Keep the manual and model information accessible; this helps you find accurate replacement blades and service parts.
When the saw behaves differently—unusual vibration, burning smell, sparking beyond what the manual describes, a guard that sticks, or a switch that does not function properly—stop using it and consult an authorized service provider. Do not attempt an improvised repair to a safety mechanism. Check the manufacturer’s service and warranty information for the exact model and region.
How this guide was prepared
This is a research-based buying guide, not a hands-on product test or a ranking of specific saw models. The criteria are drawn from OSHA handheld-saw safety information, OSHA’s portable-tool guarding standard, and manufacturer product documentation and instruction manuals. Those sources establish the importance of compatible blades, functional guards, correct adjustments, and model-specific procedures. They do not prove that one model is best for every beginner.
For current product comparisons, verify each model’s latest manual and specification sheet, included battery and charger, weight measurement method, blade compatibility, cutting capacities, warranty, and service availability. Product pages can change, and specifications may differ by region. A responsible shortlist should compare only models that meet the buyer’s material and cut-depth needs, then assess handling, adjustment clarity, guard performance, support options, and total system cost. No unverified ASINs, product images, live prices, or claims of personal testing are included here.
Frequently asked questions
What is the easiest circular saw for a beginner to use?
There is no one model that is easiest for everyone. Look for a saw that fits your hands, offers a secure two-handed grip, has readable depth and bevel controls, a stable shoe, a clear view of the blade path, and guards that move correctly. Match its weight and power source to where you work. If possible, handle the tool before buying and read its exact manual.
Should a beginner buy a corded or cordless circular saw?
Choose corded if you usually work near an outlet and want continuous operation without battery planning. Choose cordless if moving around or working far from outlets matters enough to justify batteries and charging. Include the cost of a battery and charger if the tool is sold bare. Safe cord routing matters with corded models; runtime and battery weight matter with cordless models.
Is a smaller circular saw safer for beginners?
Size alone does not determine safety. A smaller saw may feel lighter, but it may also have less cutting capacity or different handling characteristics. A full-size saw may suit thicker material but feel heavier. Select a model you can control, with intact guards and capacity for your planned cuts, and learn it using the manufacturer’s instructions and suitable supervision.
What blade should I use for plywood?
Use a blade the saw manufacturer permits and the blade maker identifies as suitable for plywood or the specific panel product. Tooth count and geometry influence finish, but support, feed, and cut direction matter too. Check the manual for blade diameter, arbor, rotation, and speed requirements. Make a test cut on scrap and use dust controls appropriate to the material.
How deep should the blade extend below the material?
Follow the depth-setting guidance in the manual for the exact saw and task. The ideal setting is not universal across tools and materials. Set depth with the tool disconnected from power, lock it securely, and confirm that the blade will not contact the work support or anything beneath it.
Can I make straight cuts without a track saw?
Yes. A stable, securely clamped straightedge or compatible guide can help a circular saw follow a long line. Measure the offset between the blade and shoe on scrap, keep the guide outside the saw’s path, and ensure the work remains supported for the full cut. Do not depend on a laser alone to guide the saw.
Can I cut a 2-by-4 with a circular saw?
Many saws are designed to cut common framing stock, but confirm the exact model’s capacity at 90 degrees and at any bevel angle you intend to use. Support and secure the board, use a compatible blade, and follow the manual. A board’s nominal label is not its exact measured thickness, so check the workpiece itself.
Why does a circular saw bind or kick back?
Binding can happen when material shifts, the kerf closes, the blade is dull or unsuitable, or the saw is twisted or forced. Support the stock so it does not pinch the blade, keep the shoe flat, and use a sharp compatible blade. If the tool reacts unexpectedly, release the trigger, keep control, and follow the manual. Do not restart with the blade trapped in the kerf.
Is a circular saw better than a table saw for a beginner?
They serve different roles. A circular saw is portable and useful for large panels or cuts at different locations. A table saw supports the tool on a stationary surface and uses a fence for certain repeatable cuts, but it needs space and proper guarding. Choose based on your tasks, workspace, and ability to set up and use the equipment safely; neither is automatically best for every novice.
What should I inspect before each use?
Follow the manual’s inspection checklist. At minimum, do not use a saw with a damaged cord or battery, a loose or damaged blade, an unstable shoe, a defective switch, or a lower guard that does not move and return as intended. Check the workpiece, support, clamps, and cutting path, and make sure the blade is suitable for the material.
Final buying reminder: choose for your projects, work location, and ability to control the saw. Confirm capacity and blade compatibility from the exact model’s manual, use stable support and a guide when needed, and treat every cut as a planned operation. A good beginner setup is one you understand, can inspect, and can use according to its instructions.