Best Miter Saws for Crown Molding: How to Choose and Set Up the Right Saw
The best miter saws for crown molding are the saws that can hold your molding securely, make the required combination of miter and bevel cuts, and support the molding’s full length without interfering with the saw head or fence. Crown trim is different from ordinary baseboard because it sits at an angle between wall and ceiling. That spring angle affects both the saw setup and the usable capacity. A saw that handles a wide crosscut may still be unable to cut a tall crown profile nested against its fence.
For crown work, compare two common cutting methods: nested cuts, where the molding is held against the fence at its installed spring angle, and flat cuts, where the molding lies flat on the table and the saw uses both miter and bevel settings. Each method has different capacity, setup, and repeatability tradeoffs. You also need to account for actual corner angles, molding profile, measurement direction, and whether inside corners will be coped or mitered. This guide focuses on those practical details rather than repeating a general miter-saw ranking. It does not report hands-on tests or claim that one saw fits every profile.
Affiliate disclosure: DailyHomeDecorating.com may earn a commission from qualifying purchases through links in this article. This does not change the price you pay.
Amazon product examples to compare

ASIN: B00540JS7C

ASIN: B073K99HWJ
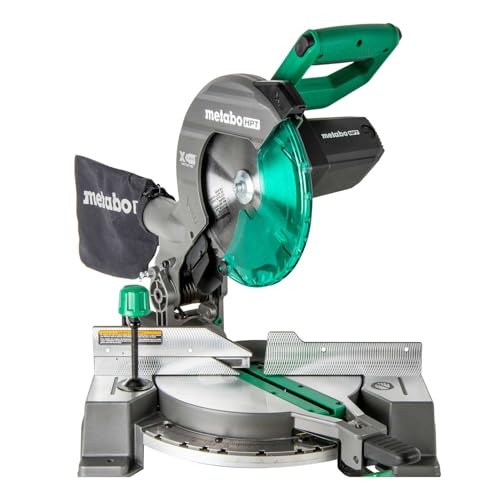
ASIN: B0FBPB1MJ8

ASIN: B07P8QTFRC
Certain content that appears on this site comes from Amazon. This content is provided “as is” and is subject to change or removal at any time. Product examples and images are supplied through Amazon Creators API; confirm specifications and availability on the current listing.
Table of contents
- Quick guide: what matters for crown molding
- Why crown molding changes saw selection
- Nested cuts: molding held against the fence
- Flat cuts: compound miter and bevel settings
- How to compare crown capacity
- Features that help with crown work
- Safe setup and test cuts
- Buying process and workflow
- Frequently asked questions
Quick guide: what matters for crown molding
| Decision | Why it matters | What to check |
|---|---|---|
| Nested or flat method | Changes how the molding sits and which saw settings are used | Manual instructions, spring angle, molding width, repeatability |
| Maximum crown capacity | Capacity can differ by spring angle and method | Exact size limits in the model manual, not only crosscut capacity |
| Bevel range | Flat cutting needs both bevel and miter adjustments | Required left/right bevel angles and detents for your profile |
| Fence and clamp clearance | Tall or nested molding must stay supported and stable | Fence height, sliding-fence positions, clamp location, head travel |
| Corner and profile accuracy | Real rooms and molding may differ from standard assumptions | Spring angle, corner angle, wall variation, scrap test cuts |
| Long stock handling | Crown pieces can be awkward and easy to tip | Matching-height supports, stable stand, clear infeed/outfeed path |
A compound miter saw is generally useful for crown molding because it can set both miter and bevel angles. A sliding compound saw can add crosscut capacity, but its rails and rear clearance may affect how close it can sit to a wall or shelf. A non-sliding compound saw may be adequate for shorter or narrower molding if its manual lists enough capacity. The model’s crown capacity—not the blade diameter alone—should decide whether your trim fits.
Why crown molding changes saw selection
Spring angle is part of the workpiece geometry
Crown molding is installed at an angle, with one edge against the wall and another against the ceiling. The angle between the back of the molding and the wall is often called the spring angle. Common profiles may be sold with different spring angles, but dimensions and names vary by manufacturer. Measure or verify the profile from its documentation rather than assuming it matches a standard chart. The installed position determines how the trim must sit against the fence or on the table during a cut.
When crown is held in the saw as installed—one edge against the fence and one against the table—it is called nested cutting. When the molding lies flat on the saw table, the saw head and table are angled to create the compound cut. Flat cutting depends on the spring angle and the corner angle. An incorrect spring-angle assumption can make even carefully copied scale settings wrong.
Inside and outside corners are not interchangeable
An inside corner turns into a room; an outside corner projects outward. The left and right pieces require mirrored cuts, and the direction of the miter and bevel depends on which end is saved. Before cutting, label the room side, top edge, wall edge, and waste end on a scrap sample. Make a paper diagram or mark the pieces directly. A pile of unmarked short offcuts is a common source of confusion.
Do not assume every room corner is exactly 90 degrees. A digital angle finder, bevel gauge, or a physical template can help determine the actual corner angle. The method should suit the measuring surfaces and tool. Small angle deviations can create visible gaps along long crown joints. Use the angle you measured and test it on scrap; if the corner is irregular, adjust the cut or use coping where appropriate.
Crown height and saw capacity are different numbers
Crosscut capacity describes a board lying flat or upright in a specified orientation, often at a stated miter and bevel. Crown capacity may describe molding held nested at a spring angle or flat on the table with a compound setting. Those conditions are not equivalent. Manufacturers may publish separate values for nested crown, baseboard, vertical cutting, and horizontal crosscuts. A saw’s maximum crosscut width does not prove that it can handle a tall profile against the fence.
Measure the crown’s projection and height as installed, and compare those dimensions with the manual’s exact crown-molding limit. Check whether the listed capacity assumes a particular spring angle or accessory. If the profile exceeds the stated limit, do not remove the guard, defeat a fence, or improvise a clamp setup to force it through. Use a different saw, a suitable jig or stop approved by the manufacturer, or a professional shop.
Cut accuracy includes the molding, not just the saw scale
Scale markings are references. Accuracy also depends on fence alignment, table flatness, blade condition, molding consistency, support, and how the work is clamped. Crown can flex or rock if it is not seated against both the table and fence. A slightly bowed piece may not match the test cut made from a straight scrap. Inspect the lengths you will install and choose the reference edge that provides the most consistent fit.
Dry fit joints before applying adhesive or fasteners. Label each end and each room location. For long runs, keep the same molding orientation and reference edges during measuring and cutting. A careful measurement process reduces errors more effectively than repeatedly adjusting the saw without knowing which variable changed.
Nested cuts: molding held against the fence
How nested cutting works
In a nested cut, the molding is held against the miter-saw fence as it would sit against the room wall, with its top edge and bottom edge touching consistent reference surfaces. The crown rests at its spring angle, and the saw makes a miter cut without tilting the blade for a standard corner. This method can be straightforward because the bevel stays at zero for many common setups, but the saw and fence must accommodate the profile securely.
Set a sample against the fence and table and confirm that it sits exactly as it will in use. Some saws or crown stops have angled supports that help hold a known spring angle. A stop can improve repeatability only when it fits the exact molding and saw. Do not assume a generic jig sets the correct angle for a profile with a different spring angle. Kreg’s official crown-molding jig information, for example, explains using an angle finder to check spring angle and holding trim at an intended angle; refer to the accessory’s instructions and compatibility notes.
Capacity and support for nested crown
Nested molding stands taller than a flat board and can contact the saw head, guard, or sliding fence. Check the manual’s maximum nested crown size at your profile’s spring angle. Confirm the fence can be positioned and locked without interfering with the blade path. Verify that the clamp can secure the molding without forcing it away from the table or fence. A tall crown profile needs consistent support along its length; a narrow contact patch can let it rock.
Support longer pieces at the same height as the saw table. Keep the support stable and close enough to prevent sagging, but position it so it does not interfere with the saw’s movement or offcut. The operator should be able to hold the molding firmly against both reference surfaces while keeping hands out of the blade path. If the molding cannot be clamped without conflict, choose another method or saw configuration.
Making repeatable nested cuts
Once the molding is seated correctly, mark the desired length and identify the piece to keep. Set the miter direction for the corner and side, then make a dry run with the saw unplugged or battery removed. Lower the saw head carefully and confirm the blade clears the molding, clamp, fence, and supports. Use a scrap piece of the same profile to make a test cut. Check the joint in a corner sample or with a reliable angle fixture before cutting production pieces.
Nested cuts can be a good option when the molding fits the saw’s listed capacity and remains stable. They may be awkward for very tall profiles or for saws with low fences. If your saw has a crown stop, verify the stop does not obstruct the guard or blade. Keep the molding orientation consistent; flipping it during a sequence changes which edge references the fence and can reverse the cut logic.
Flat cuts: compound miter and bevel settings
How flat cutting differs
In a flat cut, the back of the molding rests flat on the saw table. The saw uses both miter and bevel settings to reproduce the installed spring angle and corner angle. This can accommodate profiles that are too tall to fit nested, and it can be efficient when the saw has suitable angle scales and repeatable stops. The tradeoff is that setup requires the correct pair of settings and careful placement of the molding on the table.
Manufacturer charts commonly assume a specific spring angle and a square corner. Bosch manuals, for example, publish tables for standard crown cuts laid flat, with different settings for different spring angles and directions. They also instruct users to clamp the workpiece clear of the head and guard and to make test cuts on scrap. These are model-specific instructions. Do not copy a chart from a different saw or assume that a standard angle applies to your profile or corner.
Use the chart only after verifying its assumptions
Before using any miter/bevel chart, check the assumed spring angle, corner angle, molding orientation, top or bottom edge against the fence, and whether the chart shows the left or right end of an inside or outside corner. Confirm whether angles are labeled from zero or from another reference. Saw scales may have left and right signs that are easy to misread. Write down a simple cut list with the saw settings and saved ends before starting.
If the corner is not square, standard 90-degree settings may leave a gap. Measure the wall angle and use the saw manufacturer’s calculation method or a trusted angle-calculation process based on the actual spring angle. Make a test joint with scrap. Small adjustments should be deliberate and recorded; changing both miter and bevel without a clear reason can make the error worse.
Support and clamp flat crown safely
Flat crown may be wider than the saw table. Use the manufacturer-approved support or extension if needed, and clamp the workpiece so it cannot shift. Check that the clamp clears the guard and saw head throughout the complete cutting cycle. A sliding saw may need a different head movement than a chop-only saw. Simulate the cut with the saw switched off and power isolated before making a live cut, as the manual directs.
Make sure the workpiece lies flat without rocking and that the waste end will not pinch or fall. Keep hands away from the projected blade path. If the molding’s profile prevents stable clamping, do not proceed with a freehand cut. Use an appropriate jig or nested method if it is approved and safe, or take the work to a professional shop.
How to compare crown capacity
Look for the exact crown measurement and orientation
Product pages may list a maximum crown size, but that number is meaningful only with its setup. Check whether the capacity is measured nested vertically, flat on the table, or at a specific spring angle. Verify whether the number depends on a sliding-fence position or an accessory. Then compare it with the actual molding profile—not only its catalog width. The crown’s installed projection, height, and spring angle determine how it occupies the saw envelope.
Confirm the limit in the manufacturer’s manual rather than relying only on a retailer bullet point. The manual may include a diagram showing orientation and clearance. If it lists different maximums for left and right bevels or for nested and flat positions, use the value that matches your intended method. Do not assume that a larger blade diameter automatically creates more nested crown capacity; guard, fence, motor housing, and head design all matter.
Decide whether sliding capacity is useful
A sliding compound miter saw can increase crosscut capacity for wide trim, but the rails need room behind the saw on many designs. Some models use forward rails or a compact mechanism that changes rear clearance; verify the exact setup dimensions. A slide can be useful for broader flat molding and other shop tasks, but it adds weight, moving parts, and a potentially larger footprint. If you cut mostly crown pieces within a non-sliding saw’s capacity, a slide may add little value.
For a small workshop, look at the saw’s operating depth with the head moved through its full travel. A machine that fits on a bench when parked may need to sit farther from the wall during a slide cut. Include the stand, fence extensions, crown stops, clamp, dust hose, and work supports in your layout. Our compound miter saw guide compares the broader category; this guide narrows selection to crown profile fit and handling.
Blade size is only one part of capacity
A larger blade may provide greater vertical or horizontal cut capacity on some saws, but it does not guarantee that the molding can be positioned correctly. The fence, throat opening, blade guard, bevel range, and miter range all affect access. A smaller saw with a well-designed crown setup may handle a profile that a larger saw cannot, while another larger model may have its own limits. Compare model-specific diagrams and charts.
Also consider blade selection. A fine-tooth trim blade may leave a cleaner edge on some materials, but tooth count alone does not define performance. Match the blade diameter, arbor, maximum RPM, and intended material to the saw. Composite or MDF crown may behave differently from solid wood or polymer trim. Inspect the blade for damage and replace it when needed. Follow both the blade and saw manuals.
Features that help with crown work
Dual bevel and useful detents
A dual-bevel saw tilts in both directions, which can reduce the need to flip molding for mirrored cuts. That may simplify repeated crown work, especially when using flat cuts. It does not guarantee faster or more accurate cuts; setup and orientation still matter. Check that the bevel range covers the settings required by the crown profile and whether common angles have positive stops. Detents should be repeatable, but verify them with a test cut and calibration procedure.
Bevel override or detent release controls can allow small adjustments away from preset stops. These controls are useful for nonstandard corners, but they should lock securely. Inspect the scale readability and whether the bevel can be adjusted without moving the saw on its stand. If you expect irregular walls, angle adjustment range and accuracy can matter more than a long list of preset stops.
Fence height, sliding fences, and crown stops
A tall fence can support molding in a nested position, while sliding fences may move out of the blade’s path for bevel cuts. Check the fence height and manual-listed crown capacity together. A fence that looks tall may still be interrupted where the head or blade needs clearance. Confirm the fence locks rigidly and returns to a consistent position after adjustment.
A crown stop or crown-molding jig can hold the trim at a fixed spring angle. Such accessories can make repeat cuts easier and may allow ordinary miter settings without compound bevel calculations. They are not universal. Verify compatibility, capacity, supported spring angle, clamping instructions, and guard clearance. Kreg’s official crown-molding jig page describes its specific jig and angle-finding approach; it should not be treated as a substitute for the saw manual or trim profile instructions.
Accurate scales, fences, and clamping
Clear miter and bevel scales reduce setup mistakes, but make test cuts. Check that locks hold settings without shifting and that the fence faces are aligned. If the saw includes a laser or shadow line, treat it as a visual aid and confirm its alignment against the blade and kerf. A light can improve visibility but cannot correct a wrong setting or measurement.
Clamps should hold the molding without crushing a soft profile or interfering with the saw head. If you often work with long crown, integrated extensions or a compatible stand may help. Verify how those supports attach and whether their height matches the saw table. A support that is too high or low can twist the molding and change the cut.
Dust collection, portability, and shop setup
Miter saws generate chips and dust, particularly when cutting MDF or composite trim. Consider the dust port, bag, extractor compatibility, and how a hose affects head movement. A dust bag may catch larger chips but may not control fine dust adequately. Use a suitable extraction setup and follow the material maker’s information. OSHA’s woodworking guidance discusses local exhaust and dust control for professional settings; home-shop users should still plan for cleanup and ventilation.
If you work at multiple locations, portability and stand setup may matter. A crown-molding saw can be heavy, especially with a sliding mechanism. Check lifting points, transport locks, stand stability, and whether one person can move it safely. In a fixed shop, weigh portability against the benefit of a heavier stationary base and dedicated supports. See our general miter saw guide for broader selection criteria and our beginner miter saw guide for setup fundamentals.
Safe setup and accurate crown cuts
Measure the trim and the room before selecting settings
Identify the molding manufacturer, profile, spring angle, and orientation. Measure the room’s corners at the molding height, not just at the floor, because walls can lean or vary. Decide whether each inside corner will be mitered or coped. Coping can accommodate some irregularities and is made with a coping saw after a preliminary miter; it is a different workflow from cutting both mating pieces at a compound angle. Our coping saw guide covers that hand-tool category.
Make a room sketch and label each wall, corner, and piece. Mark the top and bottom edges and the finished end on each length. Add waste allowance for test pieces and errors. Keep the cut list clear about which side of the line is retained and whether the cut is an inside or outside corner. When measurements are transferred, maintain a consistent convention—inside measurement, long point, or short point—and write it down.
Set up the saw and supports
Place the saw on a stable, level stand or bench. Secure it as the manufacturer directs. Set the fence, crown stop, or support jig for the selected method. Support both ends of long molding at the same height as the saw table. Ensure the support does not prevent the molding from lying against the fence or moving through the cut. Keep the operator’s stance clear of the blade path and offcut.
Before any live cut, isolate power and move the saw head through the full path to check that the blade, guard, clamp, fence, and supports clear one another. Bosch’s manual instructions for flat crown cuts specifically emphasize clamp clearance and test cuts; the exact procedures differ by model. Reconnect power only after the setup is secure. Wear eye and hearing protection and any task-appropriate equipment required by the saw manual.
Make a test cut from scrap
Use scrap molding of the same profile and, ideally, the same stock to verify the settings. Two short pieces can be joined at a sample corner to check the fit. Confirm spring angle, edge orientation, left/right settings, and which end is saved. If the joint is open, identify whether the error comes from corner angle, spring angle, fence position, molding bow, cut direction, or a measurement mistake. Change one variable at a time and record it.
Do not use a test piece that has a different profile or spring angle and assume the result transfers. Crown thickness and back geometry affect how it sits against the fence. If the trim changes lot or profile, recheck setup. A sample joint is faster to correct than a long installed run.
Operate the saw and handle cutoffs carefully
Clamp the work when the manual calls for it, but place the clamp so it cannot contact the blade, guard, or moving head. Keep the molding fully supported and hands outside the projected blade path. Start the saw using the specified procedure, lower the head under control, and let the blade reach a complete stop before raising or removing the workpiece. Keep your body out of the likely kickback path and do not reach behind the blade to catch an offcut.
Do not cut short pieces unless the saw manual and an appropriate holding method permit it. Small pieces can be pulled or thrown by the blade. Use a stop block that does not trap the offcut against the blade. Never freehand a short crown cutoff against the fence. If a workpiece moves, binds, or pinches, stop the saw and wait for the blade to stop before resolving the issue.
Buying process: match the saw to the molding and method
Step 1: Measure the largest profile
Find the tallest and widest crown profile you plan to install. Confirm its spring angle and material. Compare it to the saw’s nested and flat crown capacity in the manual. Do not use ordinary crosscut capacity as a substitute. If you have different profiles in the same project, use the largest one when evaluating fit.
Step 2: Decide nested, flat, or coping workflow
Nested cutting can simplify settings when the profile fits and is stable against the fence. Flat cutting can handle profiles that are too tall to nest but demands accurate miter and bevel settings. Coping can be useful for inside corners and may be more forgiving where walls vary, but it takes a different skill and hand-tool process. Many installers use more than one method. Choose the saw based on the cuts you expect to make regularly.
Step 3: Confirm bevel, fence, and clamp compatibility
Check the bevel range, sliding-fence positions, crown stop compatibility, clamp position, and head clearance. Review diagrams in the manual and make sure the settings are attainable without removing safety components. If the molding’s back profile cannot be held securely, the saw is not a safe match for that nested setup.
Step 4: Plan stock support and transport
Long lengths need stable supports and may require a stand. Check the saw’s weight, lifting instructions, transport lock, and stand capacity. For a home shop, measure storage and doorways. For installation work, plan how the saw and molding will be carried, staged, and protected. Consider dust collection and the space needed for the saw to slide or bevel.
Step 5: Compare the whole setup cost
Include the saw, stand, crown stop or jig, clamps, compatible blade, support extensions, dust collection, and service. Verify current replacement parts and warranty support. Avoid choosing solely by a maximum crown size claim or blade diameter. The best value is the setup that cuts your actual profile safely and repeatably.
How this crown-molding guide differs from general miter-saw guides
The site’s general miter-saw guide covers broad use and category choice. Its compound-saw guide explains bevel and capacity features, and the beginner guide covers basic operation. This article narrows the decision to crown-molding geometry and work practice: nested versus flat cutting, spring angle, actual corner angle, crown-specific capacity, orientation, clamping, and test-fit joints. It does not duplicate a universal model ranking or make unsupported product performance claims.
Primary references include DEWALT’s official miter-saw how-to resources, which include separate crown-molding instructions for nested and flat methods; Bosch’s official miter-saw manual and crown angle chart; Bosch’s crown stop accessory information; and Kreg’s crown-molding jig documentation. These sources describe specific products and methods. Always use the current manual for your saw, accessory, and molding.
This article is based on manufacturer instructions and general buying criteria. It does not claim hands-on tests, measured accuracy comparisons, or current prices. Saw capacities and accessories change by model and region. Verify the manual and product page for the exact saw before purchase, and consult a qualified installer if the trim profile or corner geometry is outside your experience.
Frequently asked questions
What kind of miter saw is best for crown molding?
A compound miter saw that can make the required miter and bevel angles and safely support your crown profile is a practical starting point. A dual-bevel or sliding design may help with workflow or capacity, but the exact model’s crown-molding chart and manual determine suitability.
Can a regular miter saw cut crown molding?
Some non-sliding compound saws can cut crown if the profile fits the listed nested or flat capacity and the setup is stable. A basic miter-only saw may not make the compound settings required for flat crown cuts. Check the exact manual and use a test piece.
Is it better to cut crown molding nested or flat?
Neither method is universally better. Nested cuts can keep the saw at a simple miter setting when the molding fits and can be held at its spring angle. Flat cuts can increase capacity but require accurate miter and bevel settings. Choose based on the saw manual, profile, corner, and work volume.
What is a crown molding spring angle?
It is the angle at which the molding sits between wall and ceiling. It affects how the molding rests against a saw fence when nested and the compound settings used when cutting flat. Verify the profile’s spring angle from its maker or measure it with a suitable gauge.
Can I use the standard 31.6-degree and 33.9-degree settings?
Those settings appear in some manufacturer charts for particular standard spring angles and 90-degree corners. They are not universal. Check your saw’s chart, molding spring angle, room corner, orientation, and which end of the cut you need, then confirm with a scrap test.
Does a larger blade cut taller crown molding?
Not necessarily. Crown capacity depends on saw-head and fence geometry, guard clearance, bevel range, and the molding’s orientation. Compare the exact nested and flat crown capacities in the model manual rather than inferring them from blade diameter.
Do I need a sliding miter saw for crown?
Not always. Sliding action can add crosscut width for flat molding or other projects, but a non-sliding saw may handle your crown profile if its listed capacity is sufficient. Slides also affect footprint and rear clearance. Decide from your profile and room layout.
Should inside corners be coped or mitered?
Both methods are used. A coped joint cuts the profile of one piece to fit over the face of the adjoining piece and can accommodate some corner variation. A mitered joint cuts both pieces at matching angles. Choose based on the trim, room, finish, and installer skill; use a coping saw for the coping process.
How can I avoid gaps in crown molding joints?
Verify the spring angle and actual corner angle, support the molding consistently, keep the saw aligned, and make a test joint with scrap. Check that the trim is not bowed and that the saved ends are correct. Change one setup variable at a time when tuning a fit.
Can I cut crown molding without a crown stop?
Yes, if the molding can be held securely in an approved position and the saw manual permits the setup. A crown stop can improve repeatability but must be compatible and clear of the blade guard. Do not improvise a support that destabilizes the workpiece or interferes with the saw.
Conclusion
The best miter saw for crown molding is not defined by blade size alone. It must fit the trim profile in the chosen nested or flat orientation, provide the required miter and bevel range, support long pieces, and allow safe clamping and blade travel. Measure the spring angle and real corners, consult the exact manual, and test the settings on scrap before cutting finished lengths.
When the profile exceeds the saw’s stated capacity or cannot be held securely, choose a different method or get professional help. A stable setup and accurate test joint are more valuable than forcing an oversized molding onto an unsuitable saw.
This guide is general buying information. Follow the saw and accessory manuals, use appropriate protective equipment, and obtain training for unfamiliar operations.