Affiliate disclosure: As an Amazon Associate, Daily Home Decorating may earn from qualifying purchases. Product links may earn a commission at no extra cost to you.
intro
The best computer case for a 240 water cooler is the one that supports your exact radiator at the mounting position you plan to use, with enough room for the radiator and its fans together. A spec sheet that says “240 mm radiator support” is only the start: the radiator can be longer than 240 mm, a top mount can collide with tall memory or motherboard heatsinks, and a front mount can reduce graphics-card clearance. This guide focuses on choosing and checking a PC case for a 240 mm all-in-one (AIO) CPU cooler. It compares compact and mainstream case examples, explains top versus front mounting, and gives a practical measurement checklist. We have not tested these cases side by side; fit details below are based on manufacturer documentation and catalog data, so check the exact revision and cooler dimensions before ordering.
In this guide
What “240 mm” means
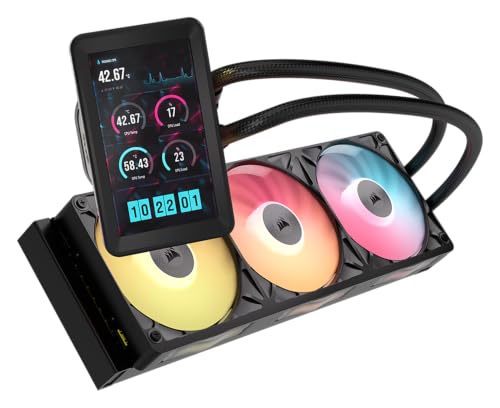
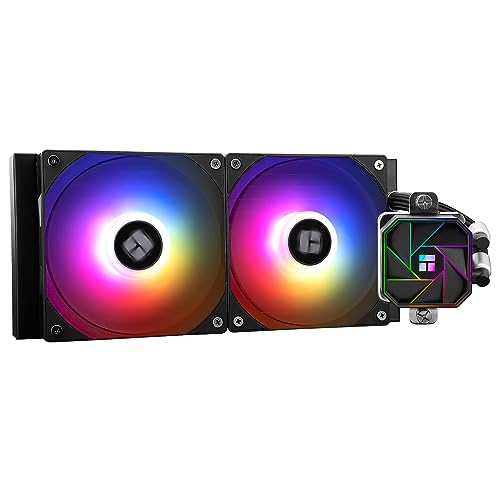
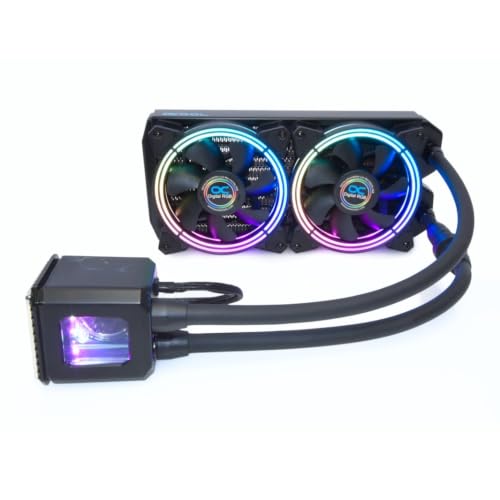
A 240-class AIO normally uses two 120 mm fans on a radiator. The nominal class describes the fan arrangement, not an exact radiator length of 240 mm. For example, Cooler Master lists a 240 mm radiator at 277 × 119.6 × 27.2 mm before fans. Add the fans, usually around 25 mm thick each, and the assembly can approach 52 mm in thickness. Other models have different radiator lengths, widths, end tanks, hose fittings, and fan thicknesses. A case must have mounting holes and usable space for the specific assembly, not simply a 240 label in an online listing.
The fastest compatibility rule
Treat the case, radiator, fans, motherboard, memory, graphics card, and cables as one geometry problem. First confirm the intended position is explicitly rated for 240 mm radiators. Next compare the cooler’s full radiator dimensions and total radiator-plus-fan thickness against the case’s stated clearance. Then check the nearby components: RAM and VRM heatsinks for top mounts; GPU length and front-panel wiring for front mounts. Manufacturer tables often summarize only the first part of this check. If they do not state a clearance dimension, look for the case manual, support page, or a direct confirmation for your exact radiator and motherboard combination.
Why choose a 240 AIO case
A 240 AIO uses a familiar two-fan footprint and can suit a compact build that needs liquid cooling without a three-fan radiator. Its appeal may be clean styling, freeing space around the CPU socket, or keeping a high performance processor within a cooler format that fits the chassis. The case should make installation straightforward and retain useful airflow for the graphics card and motherboard. A chassis with a 240 mount in both the roof and front gives more options, but flexibility matters only if the cooler dimensions and nearby components clear each location. A single well-designed 240 position can be enough when it matches your planned orientation and component list.
Case picks at a glance
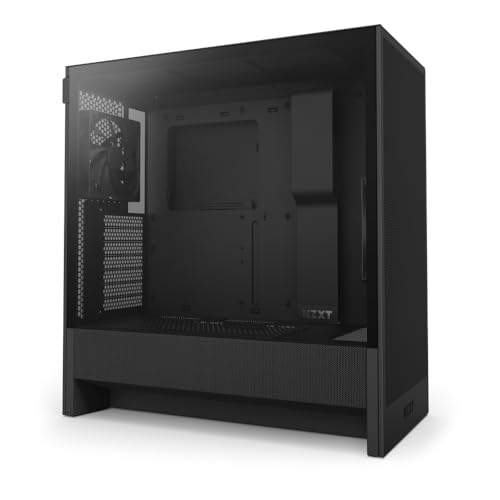
NZXT H5 Flow (2024) is a compact ATX option with a top 240 mm radiator position and a stated top radiator-plus-fan thickness limit of 55 mm. The front supports larger radiators, which gives flexibility, but this guide evaluates its 240 fit at the top. Cooler Master Q300L V3 is a smaller Micro-ATX candidate with manufacturer-listed 240 mm radiator support at both top and front. Fractal Design Pop Air is a conventional airflow-focused ATX case whose top supports 240 mm; Fractal specifies a memory-height limit for this location. None is a universal winner: motherboard layout, RAM height, radiator thickness, GPU dimensions, and assembly preference determine the best match.
NZXT H5 Flow: compact ATX with top clearance data
NZXT lists the H5 Flow (2024) as supporting a top radiator up to 240 mm on a 120 mm base. Its published top radiator-plus-fan thickness allowance is up to 55 mm. That dimension is useful because it addresses the assembled stack rather than the radiator alone. A conventional 27–30 mm radiator with a standard 25 mm fan often sits around the limit, but check the exact product’s thickness and screw/fan arrangement instead of relying on a typical value. The H5 Flow also supports a front 360 mm radiator, but a larger radiator is outside this article’s focus. Review the current case revision because model names and specifications can change.
NZXT H5 Flow: what still needs checking
A top-mounted 240 AIO shares space with memory modules, motherboard power delivery heatsinks, and the CPU power lead. NZXT’s maximum 55 mm stack clearance does not mean every board-and-memory combination has 55 mm of free space in the same place; it is the case’s stated top radiator/fan allowance. Inspect the board’s top edge and RAM height, then compare the cooler’s footprint and tube exits. A thick radiator, unusually tall fan frame, or offset fitting can create a local collision even when the nominal thickness fits. If your RAM is tall or the board has oversized VRM covers, ask the case or cooler maker about the exact pairing before buying.
Cooler Master Q300L V3: smaller Micro-ATX builds
Cooler Master’s Q300L V3 product specifications list 240 mm radiator support at both the top and front. This can make it a flexible choice for a Micro-ATX system where the builder wants a smaller chassis but still wants to choose between roof exhaust and front intake. The manufacturer’s published overall dimensions are about 386 × 230 × 389 mm including protrusions. The case page and revision-specific manual should be used for additional clearances; do not infer GPU or radiator fit from the outer dimensions. The Q300L V3 is especially relevant when board size is Micro-ATX and desk footprint matters, but the remaining internal space must still be planned around the graphics card, power supply, cables, and storage.
Q300L V3: front versus top in a compact enclosure
In a compact case, two positions listed as supporting the same 240 radiator do not necessarily have the same installation difficulty. A front mount consumes some depth that might otherwise belong to the GPU, drive cage, or cable routing. A top mount competes with the motherboard’s memory and heatsinks. With a Micro-ATX board, there can be less space between the top edge of the board and the roof than in a taller tower, so check the manual diagrams and actual stack dimensions. Confirm whether the included front fans must be relocated, whether the radiator ports can route without sharp bends, and whether the power cable can still be installed after mounting.
Fractal Design Pop Air: top fit with a memory limit
Fractal lists top radiator compatibility up to 240 mm for the Pop Air and its product sheet gives a maximum 46 mm RAM height for the top radiator configuration. That warning is valuable: a 240 mount is supported, but tall memory can be the deciding constraint. If a top AIO is your plan, compare the published RAM-height measurement for the exact memory kit with the case’s limit. Also check the radiator thickness, fan thickness, and the board’s VRM heatsink height. Pop Air versions can vary in front-panel details and included fans, so confirm the exact SKU rather than assuming one specification applies to every Pop-family case.
Pop Air: front radiator and graphics-card length
A front radiator moves the fit question from the motherboard roof to the graphics-card area. Fractal’s product sheet states a maximum GPU length of 405 mm with the front fan mounted for the listed Pop Air configuration, but adding a radiator and fans changes the available depth. Do not treat that fan-only GPU number as the clearance for a front AIO. Find the exact case revision’s GPU limit with a front radiator installed or measure from the radiator/fan stack to the expansion slots. The result also depends on the radiator’s tank length and where its tubes exit. When the documentation does not publish a specific front-AIO GPU limit, use a conservative fit check or contact Fractal support.
How to choose the mounting position
Top mounting usually makes the radiator an exhaust: warm case air passes through the radiator and exits upward. It keeps the front intake path open for the graphics card and can preserve more GPU length. It is often the simplest choice when the case has sufficient motherboard clearance and the cooler’s tube route reaches naturally. Front mounting typically uses cooler outside air, but the radiator warms the air entering the case and occupies space ahead of the GPU. That can be acceptable when the card is short or the case has generous depth, and it can be the only practical location when memory or motherboard heatsinks obstruct the roof. Neither position is automatically best for every build.
Top mount: RAM and VRM clearance
The roof rail sits close to the motherboard’s top edge. A radiator and fans can overlap the area above the DIMM slots or the VRM heatsink. Even if the radiator technically mounts, a fan frame may cover the clips used to release memory, or a tube fitting may press against a heatsink. Measure vertically from the motherboard mounting plane to the underside of the case roof, accounting for any offset rail. Then measure the full radiator-plus-fan stack and note whether the case’s dimension includes the installed motherboard. A RAM-height limit is not a universal clearance measurement for every point on the board; it is a model-specific indication. If clearance is marginal, test-fit the radiator before routing cables permanently.
Top mount: motherboard power connectors and tools
A top radiator can make the EPS/CPU power connectors hard to reach. Many builders find it easier to plug the CPU power cable in before placing the radiator, particularly if the connector is near a roof rail. Check that the cable can bend without being pinched between the radiator and chassis. Also consider access to fan screws and the ability to remove the filter. A removable radiator bracket helps, but it does not replace a clearance check. If the case has an offset top bracket, review which side of the rail it moves toward; a few millimeters of offset can decide whether the fans clear memory or overlap the board’s heatsink.
Front mount: GPU length and tubes
A front-mounted radiator plus fans consumes chassis depth, often more than a single row of case fans. Compare the GPU’s length to the manufacturer’s maximum GPU length when a radiator is installed, if that number is available. Do not subtract radiator thickness from a fan-only limit without verifying where the case measures from; front brackets, cable grommets, and angled GPU power connectors complicate the calculation. Check the tube direction too. A tube that presses against the GPU, blocks a slot, or kinks at the radiator end can turn a nominally compatible pairing into a poor build. Leave a little margin rather than targeting the exact listed maximum.
Front mount: airflow tradeoffs
A front radiator can draw cool outside air through the radiator and into the case, which gives the AIO access to fresh air. The air then enters the main chamber warmer than ambient and may affect GPU or motherboard temperatures under simultaneous load. A top exhaust radiator uses warmer internal air, while front intake fans can deliver unheated outside air directly to the GPU. Real results depend on fan curves, GPU power, case mesh, room temperature, and the rest of the airflow layout. Select a position based on the full system: CPU-only workloads, gaming with a powerful GPU, noise goals, dust filtering, and available fan mounts all matter. Avoid promising a fixed temperature outcome from the mounting location alone.
Airflow setup around a 240 AIO
A radiator is an airflow restriction compared with an open fan mount. The case needs a path for air to enter and leave, not simply a radiator attached to two fans. With a front intake radiator, retain at least a practical exhaust path at the roof or rear. With a top exhaust radiator, keep unobstructed front or bottom intakes for the GPU and other components. Mesh panels and clean filters help, but fan direction and curves matter too. A balanced setup can reduce recirculation and dust accumulation. Start with moderate fan speeds, monitor CPU and GPU temperatures during the workloads you use, then adjust acoustics and airflow together rather than running every fan at maximum speed.
Motherboard size and layout
ATX, Micro-ATX, and Mini-ITX boards place components differently, so a case’s radiator support does not translate into an identical fit on every board. A tall VRM heatsink, a high memory slot, a rear I/O cover, or an angled CPU power connector may occupy the radiator’s path. The board’s socket location also affects how far the pump tubes must reach. Before selecting a case, identify your exact motherboard model and review its top-edge layout. Product photos can reveal the general arrangement but are not precision drawings. The case maker’s clearance figures and installation diagrams take priority; if a board is unusually tall or thick around the VRM, verify it directly.
RAM and the temptation to force a fit
A memory module that physically touches a fan is not a compatible fit. Contact can transmit vibration, block a fan frame, make memory removal difficult, or place pressure on the radiator assembly. Avoid bending a fan bracket or forcing the radiator against a heatsink. Check the memory kit’s actual height including RGB diffusers, not just the bare PCB. If a top mount is too tight, consider a front mount, lower-profile memory, a thinner radiator/fan combination approved by the cooler manufacturer, or a case with more top clearance. A slim fan may change cooling and noise behavior, so evaluate it as a whole cooler configuration rather than assuming it is an equivalent swap.
Radiator length, width, and tank shape
The nominal “240” name describes two 120 mm fans, but radiator end tanks can extend beyond their fan frames. The radiator may also be wider than the fans, and fittings can protrude at one end. A case can have the right slot pattern but still lack room for the tank or hose connector. Look up the AIO manufacturer’s mechanical drawing and record length, width, thickness, and tube-exit location. Then check the case’s usable mounting area and clearance around the panel, roof, motherboard, or GPU. When comparing models, do not assume two 240 mm AIOs have the same outer shape. This is especially important in small Micro-ATX and Mini-ITX cases.
Radiator plus fan thickness
A common mistake is comparing the radiator thickness alone with a case’s clearance limit. If the radiator is 27 mm thick and the fan is 25 mm, the stack is about 52 mm before allowing for screws, grommets, or any special offset. Some models use thicker fans or radiators, and push-pull configurations add a second set of fans. A manufacturer limit of 55 mm leaves little margin for a thicker assembly or nearby component protrusions. Confirm whether the case clearance refers to the radiator and fan together, and whether it applies to a particular mounting position. If the documentation is silent, request a measurement instead of assuming a case marked “240” accepts every stack.
Graphics-card power cables and side panels
GPU fit is not only card length. Some modern power connectors need a safe bend radius and space between the card and the side panel. A front AIO can move the GPU rearward or reduce the available front-to-back depth, depending on the chassis. A top radiator may leave GPU length unchanged but does not solve side-panel clearance. Check the card maker’s connector guidance and the case’s width, cable channel, and side-panel distance. Avoid pressing a power cable hard against glass or sharply folding it at the plug. For a large graphics card, include the connector and cable in the fit plan, not just the GPU board dimensions.
What to look for in a case specification
A useful case specification names the radiator size and location separately, then publishes a relevant clearance limit. The best documentation distinguishes radiator support from fan support, gives radiator-plus-fan thickness, identifies RAM or motherboard limits for the top, and states GPU clearance with a front radiator installed. A product page that simply lists “240 mm” is less informative. Check official support pages and downloadable manuals because a store listing may collapse variants into one generic description. Record the exact model and revision. Case families can have airflow, RGB, compact, and refreshed versions with different internal brackets even when the names look similar.
How to read a compatibility table
A table that lists “top: 240 mm” confirms intended mounting pattern, not universal component clearance. Find footnotes, diagrams, maximum stack thickness, or restrictions such as “low-profile memory only.” Check if the limit applies to a 120 mm radiator base or 140 mm base; a top rail with 120 mm spacing can sit in a different position from a 140 mm rail. Verify whether the support applies to the case without a drive cage or with a specific front fan arrangement. If a table conflicts with the manual, contact manufacturer support with the exact cooler, motherboard, RAM, and graphics card model. Save the answer or the relevant page before purchasing.
Step-by-step fit check before purchase
1) Write down the exact case model and revision. 2) Download its manual and note top and front radiator support separately. 3) Find your AIO’s real radiator length, width, thickness, fan thickness, and tube exit. 4) Add radiator and fan thickness for the assembled stack. 5) For a top mount, compare RAM height, VRM covers, board connectors, and roof clearance. 6) For a front mount, check GPU clearance with a radiator and fan, not just an empty front. 7) Include cables, filters, and room to tighten screws. 8) If one dimension is missing or the fit is within a few millimeters, ask the manufacturer or choose a roomier case.
Installation order for a top radiator
Dry-fit the motherboard and memory first. Connect the CPU power cable while the roof area is accessible. Decide whether tubes should exit toward the front or rear based on the cooler’s reach and the case layout; avoid sharp bends or tension. If a removable top bracket exists, take it out, mount the radiator and fans on the bench, and reinstall the assembly carefully. Keep screws at the correct length so they do not pierce or damage the radiator channels. Connect pump and fan cables before the graphics card blocks access. Finally, check that the top filter and panel reinstall without pressing on the fans. Follow the AIO maker’s sequence and torque guidance.
Installation order for a front radiator
Confirm the case’s front bracket can be removed and whether the front fans are attached to it. Measure GPU length with the planned radiator/fan stack before assembling the loop. Mount the radiator so the tubes can reach the CPU block naturally and do not interfere with the graphics card. If your case and hose length permit, radiator tubes exiting from the bottom can help keep the pump from being the highest point in some layouts; the exact advice depends on the cooler design and mounting. Do not kink tubes to force that orientation. Route front-panel cables before reinstalling the bracket, then confirm the GPU and its power cable have clearance.
Noise and vibration considerations
Case choice affects sound as well as fit. A radiator mounted against a thin panel can transmit fan or pump vibration, while restrictive filters may encourage higher fan speeds. Use the supplied rubber washers or isolation parts if the manufacturer includes them. Make sure the radiator is secure and cables do not touch fan blades. A top exhaust can send CPU heat directly out but may require fans to ramp during sustained workloads. A front intake can move cooler air through the radiator but may increase GPU heat. Tune a gradual fan curve rather than tying every fan to short temperature spikes. Sound quality depends on pump whine, fan tone, resonance, and airflow, not just a single dBA number.
Dust and cleaning access
A 240 radiator needs occasional dust removal, particularly when mounted behind a front or roof filter. Look for a filter that can be removed without disassembling the system, and check that the front panel comes off easily. Dust buildup can reduce airflow and make fans louder. Use a soft brush or compressed air according to the cooler and case instructions, and hold fan blades still when cleaning so they do not spin freely. A convenient filter is a practical feature for a daily-use PC. If the case is placed on carpet or near a dusty floor, a raised intake or accessible bottom filter may matter more than a decorative panel.
When a smaller case is the right pick
Choose a compact Micro-ATX case when motherboard size and desk footprint are real constraints, not just because its product page says “240 mm.” The Q300L V3’s listed top and front support gives placement choices, but you still need the manual’s component clearances and a specific GPU length check. A compact case rewards planning: modular cables, a shorter GPU, and an AIO with manageable tube routing can simplify assembly. If you have tall RGB memory, an oversized GPU, or multiple storage devices, a larger mid-tower may save time and reduce compromise. The smallest case that technically fits is not always the most useful case to build in.
When a mainstream ATX case is the better pick
A mid-tower can provide more room to work, more fan positions, and a clearer route for tubing and GPU power cables. The H5 Flow and Pop Air offer 240 mm top support, but each has its own memory or stack restrictions. Extra volume is not a substitute for reading those limits, yet it can make cable management and maintenance easier. Consider the motherboard form factor you already own, future GPU length, storage needs, front I/O, removable brackets, and dust filters. If the price difference is reasonable, a chassis with more than one viable 240 mounting position offers a useful fallback if a top mount conflicts with a board component.
A note on “best” and product rankings
There is no single best case for every 240 mm cooler. We do not claim to have installed and measured every cooler in every case listed here. The examples are chosen because manufacturer documentation describes 240 mm radiator support and highlights relevant fit conditions. Before buying, verify the exact case SKU and cooler revision. Product availability, included fans, color, and bundle contents can vary by listing. Use this page as a compatibility framework, then treat the maker’s current drawing and support response as authoritative for a close fit. If you already own the case, measure it and compare your exact parts instead of buying a new chassis based only on a broad recommendation.
Common mistakes to avoid
Do not equate two 120 mm fan mounts with a guaranteed AIO fit. Do not read “240 mm compatible” as proof that the top clears tall memory. Do not use the case’s fan-only GPU length as its GPU clearance with a front radiator. Do not add fans to a radiator without rechecking total stack thickness. Do not choose a case based solely on an Amazon listing title when the manufacturer’s manual has a more precise restriction. Do not force a tube around a sharp edge or place a connector under pressure. Finally, do not assume all revisions within a case family share identical radiator brackets; confirm the model number printed on the product page or chassis.
A practical final decision
For the simplest top-mounted 240 AIO in a compact ATX layout, begin by checking the NZXT H5 Flow (2024) and its 55 mm top radiator-plus-fan limit. For a Micro-ATX build that values both top and front placement options, consider the Q300L V3, then verify GPU, RAM, and cable clearances in the official documentation. For an ATX airflow case with a top 240 mount, the Fractal Pop Air is a candidate when RAM height is within the stated limit and the selected version matches your plan. These are starting points, not guarantees. The best choice is the case whose official dimensions match your exact cooler and other components with room to install, maintain, and route cables safely.
The three example cases, compared as a decision
The three cases in this guide’s examples answer the same question — where does a 240 radiator live, and what does it cost the rest of the build — with three different priorities. The NZXT H5 Flow is the mainstream answer: a compact ATX tower whose top mount is the natural home for the radiator, with the memory and motherboard clearance checks this guide details, and airflow provision that suits a gaming build’s combined loads. It is the case to choose when the build is a conventional ATX system and the 240 AIO is the main cooling for a hot processor.
The Cooler Master Q300L V3 compresses the question into a Micro-ATX footprint. Its lesson, covered in its own sections above, is that small cases do not forbid 240 cooling — they discipline it: the front-versus-top decision interacts with graphics-card length and tube routing more tightly, and every clearance in this guide must be checked rather than assumed. Choose it when the smaller desk footprint is a genuine requirement and the component list is chosen to fit the case, not the other way round. The Fractal Design Pop Air is the value-and-airflow answer in a full ATX layout, with the documented top-mount memory constraint that this guide flags: it rewards builders who check RAM height before ordering and punishes, mildly and avoidably, those who do not.
Across all three, the verification order is the one this guide teaches: radiator dimensions including tanks, radiator-plus-fan thickness, the mount position’s effect on RAM, EPS cables, and GPU length, and only then aesthetics and price. A case that passes those checks in your component list is a good case; a case that fails one is a return, however strong its reviews.
Building in the case: cable and tube discipline
A 240 installation succeeds or fails on routing. Plan the radiator fans’ cables before the radiator goes in, because the top mount buries the fan headers’ neighbourhood under the radiator once fitted. Route the pump’s power and tachometer leads so they cannot drift into a fan, and give the tubes a gentle curve with no contact against fan blades or sharp panel edges. Where the case offers grommeted routing holes, use them for the EPS cable before the radiator occupies the top, following the installation-order guidance earlier in this guide; the single most common build-day frustration in a top-mount case is discovering the EPS connector can no longer be reached.
After the first boot, the work is not finished. Run a sustained load and listen: a gurgling pump suggests air trapped at the pump rather than the radiator, which the mounting guidance in this guide is designed to prevent, and a fan rattle at certain speeds usually traces to a cable resting against a frame. Check coolant-side temperatures against the processor’s behaviour under the same load you tested before the build, if it is an upgrade, so you have a baseline. Record fan curves once the system is quiet and cool; that record is the reference when a future upgrade changes the noise picture and you need to know what moved.
Planning the next upgrade while you choose the case
A case outlives several component generations, so judge the three examples partly on what they let you do next. A longer future graphics card argues for the front-radiator clearance figures to be checked with headroom, not at the limit. A future move to a larger radiator argues for choosing the case whose top mount has space beyond today’s 240. Builders who expect to stay with 240-class cooling and mid-size cards can safely prioritise today’s fit and acoustics; builders who upgrade yearly should buy the clearance they will need, because the case is the one component whose limitations cannot be worked around with settings.
Worked examples: three builds and their mount decisions
The compact gaming build
A Micro-ATX board, a mid-length graphics card, and a 240 AIO in the Q300L V3 pattern: the front mount preserves the top as exhaust and keeps RAM entirely out of the argument, provided the card length plus radiator thickness clears — the exact calculation this guide’s front-mount section sets out. If the chosen card is long, the same build in the H5 Flow’s ATX footprint removes the squeeze at the cost of desk space. Neither answer is wrong; the measurements decide.
The quiet workstation
A processor under sustained rendering loads, in the Pop Air pattern with a top-mounted radiator: the memory-height check decides the RAM kit before purchase, fans run a flat, quiet curve through working temperatures, and the radiator exhausts the processor’s heat directly out of the case so the graphics card’s cooling is not asked to swallow it. This is the build where the noise section’s advice pays for itself daily.
The first-time builder
Forgiveness is the criterion: the case with the most published clearance data, the most standard layout, and the mount that requires the least disassembly to adjust. In this guide’s examples that points to the mainstream ATX pattern, a top mount, standard-height memory, and a build order written down before the first screw — the step-by-step fit check in this guide, used as a checklist rather than read as an essay.
Acoustics in the finished build: measuring what you hear
Judge the finished system by measurement rather than mood. A phone sound-meter application, used consistently at your seated position, gives numbers you can compare across fan-curve changes, and a simple log — load, temperatures, fan speeds, measured noise — turns the subjective art of a quiet build into an adjustable system. Change one variable at a time: a fan curve flattened through the working range, a radiator fan pair swapped from case control to a steadier profile, a pump speed fixed at the point where its note disappears under the fans. Builds become quiet by iteration, and iteration needs records.
Remember also that the case sits in a room. A desk surface that resonates, a case placed in a corner that reinforces low frequencies, and hard floors all amplify what the build produces; feet, placement, and a desk mat are acoustic components too. The three example cases differ here in panel construction and venting, but room placement routinely outweighs those differences, which is why this guide’s last advice is unglamorous: build it, measure it, move it a foot, and measure again before spending anything on quieter parts.
Longevity: the AIO and the case over five years
An AIO’s service life is finite — permeation slowly reduces coolant volume over years — while a case can serve indefinitely. Choose the case without assuming today’s cooler is permanent: the clearance that fits a 240 today should ideally accept its replacement, and the mount that works for this radiator should not depend on one model’s unusual tank shape. Keep the case’s spare screws, brackets, and blanking plates in one labelled bag; the builder who does this is the builder whose five-year upgrade takes an afternoon instead of a week of improvisation.
The decision, closed
End where the guide began, with the measurements in hand. Your radiator’s true dimensions, its thickness with your fans, your memory height, your graphics card’s length, and your motherboard’s connector layout are five numbers that decide this purchase completely. Run them against the three example cases in the order this guide teaches — mount position first, then the clearances that mount imposes, then airflow, noise, and looks — and the right case selects itself with an almost disappointing lack of drama. Build in the order that keeps the EPS cable reachable, route the tubes and fan leads before they are buried, set your fan curves from a measured baseline, and keep the spares bag. What remains is a system that cools quietly and upgrades gracefully, which is all a case for a 240 water cooler was ever supposed to provide.
A last word on cool and quiet
A 240 build done well has a particular character: nothing about it draws attention. Temperatures sit where they should, the fans turn without announcing themselves, and the case disappears into the desk’s landscape while the machine inside does its work for years. That invisibility is engineered, not accidental — it is the sum of the measurements, the mount decision, and the routing discipline this guide lays out. Do those things and the case you chose, whichever of the examples it was, becomes the least interesting part of your computer. That is the highest compliment a case can earn.
FAQ: Does every case with two 120 mm fan mounts support a 240 AIO?
No. Fan mounting holes do not guarantee radiator clearance. A radiator can be longer or wider than the fan pair, and the assembled radiator-plus-fan stack needs room around the motherboard, memory, GPU, and chassis rails. Look for explicit 240 mm radiator support at the location you intend to use.
FAQ: Is top or front mounting better for a 240 AIO?
Neither is universally better. A top exhaust keeps front intake air available for the graphics card but may conflict with RAM or VRM heatsinks. A front intake gives the radiator outside air but can warm case air and reduce GPU clearance. Choose the location that clears your parts and suits your airflow goals.
FAQ: How thick is a 240 mm radiator with fans?
It varies by model. Add the radiator thickness to the fan thickness and include any gasket or bracket offset. A 27 mm radiator and 25 mm fan make roughly a 52 mm stack, but use the dimensions of your exact cooler.
FAQ: Will a top 240 AIO fit with tall RAM?
Possibly, but do not assume so. Check the case maker’s RAM-height limit or top radiator clearance, then compare it with the full height of your installed memory. Also account for motherboard heatsinks and the cooler’s fan frame.
FAQ: Does a front 240 AIO reduce GPU length?
It can. The radiator and fans occupy space in front of the graphics card. Use a case specification that states GPU clearance with a front radiator installed, or confirm the dimension with the case maker. A fan-only GPU limit may not apply.
FAQ: Is the Q300L V3 a good case for a 240 AIO?
Cooler Master lists 240 mm radiator support at the top and front on the Q300L V3. It is worth considering for Micro-ATX builds, but verify exact GPU, memory, power-supply, and cable clearances in the manufacturer’s current documentation.
Does a 240 AIO need both fans, or can I run one for a quieter build?
Run both. The radiator’s fin area is designed around airflow across its full length, and removing a fan leaves half the radiator largely passive while the pump still moves the same heat into the loop. Quieter operation comes from fan curves, larger and slower fan behaviour, and mount position — the levers this guide’s noise section covers — not from disabling half the radiator’s airflow. If noise is the priority, choose the case and mount that let both fans run slowly, which will outperform a single fan running fast on every measure.
How do I know if my specific AIO model will fit, beyond the case’s headline claim?
Compare the AIO manufacturer’s full dimensional drawing — radiator length including end tanks, width, and thickness — against the case manufacturer’s clearance figures for the mount you intend, then add your fan thickness if it differs from standard. Headline claims assume a typical radiator; unusually long tanks, thick radiators, and non-standard fan frames are where builds fail. If either manufacturer does not publish the figure you need, that absence is itself a reason to choose a better-documented pairing from the examples in this guide.
Should I replace the case fans that come with the case?
Not before testing the build as supplied. Many cases ship with fans adequate for a 240 AIO build, and the radiator’s own fans do the heaviest work. Replace case fans when a measured problem exists — noise at the speeds your temperatures require, or an intake path that starves the graphics card — and change one variable at a time so the improvement, or its absence, is attributable. Money spent on fans before the baseline is known is usually money spent twice.
Sources and further reading
Specifications change by case revision and cooler model. Check the current product pages and manuals: NZXT H5 Flow (2024) specifications at https://support.nzxt.com/hc/en-us/articles/40225168535451-H5-Flow-2024-Specs ; NZXT H5 Flow product overview at https://nzxt.com/products/h5-flow ; Cooler Master QUBE 340 / Q300L V3 at https://www.coolermaster.com/en-global/products/qube-340-q300l-v3.html ; Fractal Design Pop radiator support at https://support.fractal-design.com/support/solutions/articles/4000184344-pop-radiator-support ; Fractal Pop Air product sheet at https://assets.fractal-design.com/files/uxzbxy2o/production/aee3c31f032ec28432cd15cf6396576b01b43ec4.pdf ; Corsair 4000D / 4000D Airflow Quick Start Guide at https://assets.corsair.com/image/upload/v1684779868/corsairmedia/sys_master/productcontent/WW_4000D_4000D_Airflow_QSG_AB.pdf ; Cooler Master 240 mm radiator dimensions at https://sfcc.coolermaster.com/en-global/products/masterliquid-core-nex-series.html . Product examples and primary images were retrieved from Amazon Creators API; confirm current listing details before purchase.
240 mm compatible PC case examples

ASIN: B0D2MK6NML

ASIN: B0GWK8BPG3

ASIN: B08SRBTYGK
Certain content that appears on this site comes from Amazon. This content is provided “as is” and is subject to change or removal at any time. Product examples and images are supplied through Amazon Creators API; confirm specifications and availability on the current listing.