Affiliate disclosure: As an Amazon Associate, Daily Home Decorating may earn from qualifying purchases. Product links may earn a commission at no extra cost to you.
intro
The best Corsair water cooler depends on your case, processor, and how much you want the cooler to connect to Corsair’s iCUE software. Corsair’s current AIO range centers on two different approaches: NAUTILUS models use standard motherboard PWM and, on ARGB versions, 5V lighting headers; iCUE LINK TITAN models connect through the LINK system hub and iCUE. The two families serve different build priorities, so the feature-rich option is not automatically the right buy for every PC. This guide explains the current families, radiator sizes, socket support, software and cabling, case fit, warranty questions, and what to verify when comparing older H-series listings. We have not tested these coolers side by side; technical comparisons below follow Corsair specifications and official support documentation.
In this guide
Quick recommendations by buyer
Choose a NAUTILUS II RS when you want a basic cooler controlled from motherboard PWM and do not need lighting. Choose NAUTILUS II RS ARGB when you want motherboard-controlled 5V ARGB lighting without building around iCUE LINK. Consider iCUE LINK TITAN II when unified Corsair control, LINK cable management, customizable lighting, and premium features matter to your setup. An older TITAN RX or H-series unit can still be appropriate when its exact listing, socket hardware, warranty, and replacement accessories are clear. The practical recommendation is to select the connection system first, radiator size second, then confirm the precise CPU socket and chassis position. Product generations and seller listings change, so verify the exact product code before ordering.
Current Corsair AIO families at a glance
NAUTILUS II is Corsair’s direct-to-motherboard line: the pump and fans use standard PWM control, and the ARGB models use standard 5V motherboard lighting. The advertised models include 240 mm and 360 mm variants in the current RS and RS ARGB family. TITAN II uses iCUE LINK components and a System Hub for coordinated control through iCUE; 2026 models include RGB and LCD configurations, with sizes and options depending on SKU. Earlier TITAN RX models remain listed by Corsair and retailers, while H100i, H150i, and H170i names cover multiple generations and feature sets. These labels are not interchangeable: use the model number and current manufacturer page, not only the family name.
The 2026 generation update
Corsair’s 2026 AIO range includes second-generation TITAN II and NAUTILUS II families. The product generation matters because model names may share a similar size and appearance while using different pump platforms, fans, cables, display options, warranties, or socket matrices. Corsair describes NAUTILUS II as using a FlowDrive 2S pump and motherboard connections, and TITAN II as using a FlowDrive 2 pump and the iCUE LINK ecosystem. Individual product pages and quick-start guides carry the definitive specifications for each SKU. When shopping a marketplace, be wary of listings that abbreviate the name to “Corsair 360 AIO” or blend second-generation images with older stock descriptions.
NAUTILUS II: simpler motherboard control
NAUTILUS II is designed for a builder who prefers standard connections. Corsair’s current NAUTILUS II pages describe 4-pin PWM fan and pump connections; ARGB models also use standard 5V motherboard lighting. That means fan curves can be configured in BIOS or motherboard software, and lighting can use the board’s ARGB tool. No iCUE LINK System Hub is required for ordinary pump and fan operation. Corsair says the series includes pre-applied thermal paste and mounting brackets for current Intel and AMD sockets, but you should still check the exact part number. A simpler control path can be attractive for a mixed-brand system or for someone who wants to minimize software and hub dependencies.
NAUTILUS II RS versus RS ARGB
The plain RS model is the understated option: no illuminated fans, and the cooler uses motherboard PWM connections. RS ARGB adds customizable lighting using a standard 5V ARGB motherboard header, and its pump/fan lighting is controlled through the motherboard ecosystem. The two options share the broad idea of a direct-control AIO, but connector availability becomes important. Confirm that the motherboard has a 5V three-pin ARGB header before choosing the ARGB version; a 12V four-pin RGB header is electrically different and must not be substituted. If your board lacks the appropriate header, lighting may require a separate compatible controller. The non-RGB model avoids that decision altogether.
iCUE LINK TITAN II: integrated control
TITAN II uses Corsair’s iCUE LINK System Hub to connect the cooler and compatible LINK components. The hub lets supported devices communicate over LINK connectors and exposes their performance and lighting controls in iCUE. Corsair’s 2026 comparison says the TITAN II family uses the FlowDrive 2 pump and RX II unified frame fans, with RGB features and an included hub on specified packages. The approach can simplify cable routing because the fan wiring is integrated into the frame and cooler devices join a common LINK network. It also adds a controller and software ecosystem to the build. Check the box contents for your exact kit; do not assume every retail bundle includes the same LCD module or additional LINK cables.
What iCUE LINK changes in a build
LINK changes the wiring and control approach, not the physical fit rules. The radiator still needs a compatible case position, fans still need clearance, and the pump still needs the right mounting hardware. The hub also needs a suitable place in the chassis and its required power/data connections. Before choosing a LINK cooler, check the System Hub installation guide, internal cable reach, available mounting space, and the motherboard connections required by that hub. Think about whether you plan to add other LINK fans or devices; the hub’s value increases when it manages several compatible parts. If the AIO will be the only Corsair device and your motherboard already controls PWM and ARGB, a standard-connected NAUTILUS may be the more straightforward fit.
LCD and pump-cap options
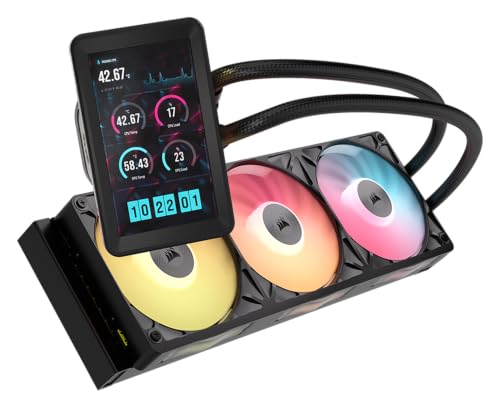
LCD-equipped AIOs add a screen for system information or custom visuals and can make the pump area a focal point. They also introduce display-specific cables, software setup, and another feature to configure. In current Corsair pages, some TITAN II LCD models include a 5-inch display; exact model details and size should be verified on the SKU page. Earlier TITAN RX LCD models use a smaller display platform, while H-series LCD XT models have their own generation-specific options. Corsair’s CapSwap modules are another modular feature: the company says CapSwap is compatible with iCUE LINK AIOs, not the non-LINK NAUTILUS line. Do not buy an accessory based only on the word “Corsair AIO”; match its compatibility list to the cooler family.
Radiator size: 240, 280, 360, and 420
Corsair’s current NAUTILUS II range offers 240 mm and 360 mm radiator formats, while TITAN model sizes depend on generation and SKU. Earlier TITAN RX RGB options include 240, 280, and 360 mm; 420 mm also appears in some TITAN products. A larger radiator class generally offers more heat-exchange area, but it only helps if the case supports the exact size and the cooler can be mounted without blocking memory, motherboard heatsinks, GPU space, or cables. A 240 uses two 120 mm fans, a 280 uses two 140 mm fans, and a 360 uses three 120 mm fans. The model name is a size class; the radiator itself has different real dimensions.
Choosing the radiator to fit your case
Start from the case manual. Find the radiator support for the top, front, and any side bracket separately. Then compare the AIO’s published radiator length, width, thickness, and fan stack. A case that accepts a 360 radiator in front may not accept the same unit at the top, and a nominal 240 top mount may still conflict with tall RAM. Check whether the case manual limits total radiator-plus-fan thickness or identifies a memory-height cap. Also inspect GPU length with a front radiator installed; fan-only GPU clearance can be misleading. Corsair’s product specifications give the cooler dimensions, while the case maker determines chassis clearance. If either dimension is missing, verify before purchasing.
240 mm for compact cases
A 240 mm Corsair AIO is often the practical choice when the case cannot fit a 360 or 280 radiator, or when the builder wants a two-fan installation. NAUTILUS II 240 is the direct-control option in the current line; a TITAN II model of the appropriate size may suit a builder who wants the LINK ecosystem, if available for the intended generation and market. Before purchase, confirm the radiator length and thickness plus fans. A nominal 240 is not a guarantee of fit in every case with two 120 mm fan mounts. For a clear case-fit explanation, see our <a href="https://dailyhomedecorating.com/best-computer-case-for-a-240-water-cooler/">240 AIO case compatibility guide</a>.
280 mm for two larger fans
A 280 mm radiator uses two 140 mm fans and can be a compelling middle size for a case that offers a 140 mm-based radiator mount. It is not simply a wider 240. The case needs 280-specific rails and enough room for the radiator end tanks and fans. Corsair’s original TITAN RX range includes a 280 mm option, whereas current family offerings can differ by generation. Check whether the listing is an original TITAN RX, TITAN II, or another model, and confirm its exact product page. Our [280 mm AIO guide for AM4](https://dailyhomedecorating.com/best-280mm-water-coolers-for-am4/) explains radiator fit and socket checks in more detail.
360 mm for compatible mid-towers
A 360 mm radiator typically mounts three 120 mm fans and needs a longer chassis opening. It can be appropriate for higher heat loads or a build where the case has a well-planned 360 position, but it is often overkill for a lower-power processor. A front 360 can reduce available graphics-card depth; a top 360 can compete with memory and motherboard heatsinks. Check the combined fan/radiator stack, not only the length. Corsair’s TITAN II and NAUTILUS II have current 360 offerings, but they differ in control ecosystem, fan type, warranty, and options. Our [480 mm cooler alternatives guide](https://dailyhomedecorating.com/best-480mm-water-coolers/) covers larger-format comparison context.
420 mm and specialist fit
A 420 mm format uses three 140 mm fans and is limited to cases with a matching long radiator bracket. It can work in selected full-tower or large mid-tower cases, but the case’s length is not enough to establish compatibility. Verify the exact 420 radiator dimensions and where its end tanks sit relative to drive cages, motherboard, and power supply. Check whether front mounting cuts into GPU room or top mounting clears the board. A larger case can still have a short radiator position due to its internal layout. Do not shop by the cooler size alone; match the actual model number to the case’s supported dimensions.
CPU socket compatibility: check the exact SKU
Many current Corsair AIOs support AMD AM4 and AM5 and Intel LGA1700 and LGA1851, but the official compatibility matrix shows that support varies across models and older revisions. A product name does not guarantee a socket bracket is in the box. Older models sometimes require retrofit kits for newer Intel sockets; legacy compatibility may also differ for AMD Threadripper. Corsair’s current compatibility table lists supported families and notes required retrofit hardware on specific legacy coolers. Use the current table and the model’s quick-start guide, then verify the retail package contents. The socket and the motherboard’s actual retention hardware both matter. If the cooler is used or refurbished, ask the seller whether every mounting plate, standoff, screw, and bracket is included.
AM4 to AM5 upgrade considerations
Corsair says AM5 uses the same cooler bracket size as AM4 for compatible existing Corsair AIOs, so some AM4-installed coolers can be moved to an AM5 board without buying a new bracket. That does not mean every old AIO is automatically compatible: the cooler must have the correct AMD mounting hardware, be in serviceable condition, and appear in Corsair’s compatibility guidance. Review the exact cooler model and installation instructions. When buying secondhand, inspect the bracket and hardware photos or request confirmation before paying. A shared bracket standard addresses the mounting pattern, not radiator fit, pump condition, tube reach, or the rest of the build.
Intel socket upgrades and retrofit kits
Intel LGA1700 and LGA1851 compatibility can differ for older Corsair coolers. Corsair’s compatibility matrix marks models that need an LGA1700 retrofit kit and notes that the kit also enables compatibility with Intel 1851 CPUs for those applicable products. Newer models may include current mounting kits in the box. Do not generalize a kit requirement from one generation to another; compare the exact model, production revision, and current Corsair table. If a cooler is old stock, refurbished, or used, confirm whether the correct bracket is present and whether the kit is still available. A retrofit kit cannot solve unrelated issues such as an incorrect pump mount or a case that lacks radiator clearance.
Radiator mounting and tube routing
Corsair’s AIO mounting guides cover orientation and installation for Intel and AMD systems. Before choosing a case, consider whether the tubes reach the planned mount without tension, whether the fittings face away from obstructions, and whether the radiator can be installed without forcing a bend. A top mount often serves as exhaust; a front mount usually draws outside air through the radiator. Both can be valid. The selected position should keep tubing clear of fans and graphics-card power cables. Read the cooler quick-start guide for the specific pump orientation and mounting order, and use the case’s manual for the radiator bracket. Avoid improvising a mount that puts pressure on the tubing or fittings.
Fan wiring: PWM, ARGB, and USB are different
Standard PWM uses a four-pin fan header to control speed. Standard 5V ARGB uses a three-pin lighting header, which is different from 12V four-pin RGB. USB may be required for some controller features or software integration. iCUE LINK uses its own connectors and a System Hub. These are distinct paths; a lighting cable does not replace fan control, and a PWM header does not power ARGB LEDs. Map each connection before installing the radiator, when header access is easier. Check the motherboard manual for header locations and electrical limits. If you use a hub, confirm its power source, internal USB connection, and cable lengths. This avoids discovering a missing header after the cooler is mounted.
iCUE versus BIOS and motherboard software
The NAUTILUS II family is designed for motherboard control. Configure pump or fan behavior through BIOS and use the motherboard’s software for ARGB when applicable. A TITAN or iCUE LINK model exposes device control in Corsair’s iCUE software through its hub. That can bring pump, fans, lighting, and other supported Corsair products together, but it also means the cooler depends on a software and firmware path for advanced customization. Decide whether you want one vendor’s management app or a simpler firmware-level fan curve. The cooler can still operate with basic connections if the software is not open, but exact fallback behavior is model-specific; read the manual and set a sensible hardware profile.
Control ecosystem and mixed-brand PCs
A system can mix Corsair parts with other brands, but each device may appear in a separate app. LINK is most useful when you already have or intend to add LINK fans and related devices; it provides centralized configuration within the supported ecosystem. NAUTILUS with standard PWM/ARGB can work with motherboard control, which may be preferable if the board’s utilities already manage the rest of the PC. Lighting control may not synchronize perfectly across ecosystems without additional software or hardware. Plan for the number of apps and controllers you are comfortable managing. Do not assume that all Corsair RGB hardware connects to one another just because it shares the same brand; the connector generation and controller support determine that.
Build complexity and cable management
A clean build depends on the entire case and component layout. LINK can reduce the number of separate fan cables along the radiator, while NAUTILUS keeps the control path simple and conventional. The unified frame on newer fans can also reduce fan-to-fan wiring and make screw installation easier. Still, both AIO types need pump power/control, radiator mounting screws, tubing clearance, and case airflow. A hub adds another component to mount and wire. Standard headers can be easier to troubleshoot, but crowded boards may run short of available headers. Estimate cable paths before final assembly, and leave enough slack for the pump block to be removed later without pulling on connectors.
What you receive in the box
Check product-page contents for the radiator, fans, pump, mounting hardware, cables, controller, and thermal paste. Some Corsair models include an iCUE LINK System Hub; other models connect directly to motherboard headers. Current NAUTILUS pages describe pre-applied thermal paste and Intel/AMD retention brackets. TITAN versions can include their hub and may bundle an LCD or particular fan configuration. Older H-series kits vary, especially for socket retrofit parts and lighting controllers. Retailer listings may use images from another color or variant. Compare the model number printed on the Corsair page to the marketplace title before purchasing, and inspect refurbished listings closely for missing accessories.
Warranty, support, and refurbished listings
Corsair’s current family specifications list different warranty durations: for example, current NAUTILUS II documentation advertises five years, while TITAN RGB documentation states six years for the original generation; newer TITAN II SKUs should be checked on their own current product pages. Warranty coverage and service terms depend on region, purchase date, seller, and product condition. A refurbished or marketplace-sold cooler may not receive the same coverage as a new authorized-retailer purchase. Keep your receipt and serial number. If a used AIO is missing the correct bracket or has signs of leakage, damaged tubing, corrosion, or abnormal pump noise, choose another unit. The lower price is not useful if installation parts or warranty support are unavailable.
Maintenance and lifespan
Corsair describes its AIOs as factory-sealed and prefilled; routine liquid replacement is not part of standard owner maintenance. Keep the radiator fins and fans free of dust and check that cables and screws remain secure. Dust filters may need cleaning more often in a pet home or a PC placed near the floor. If you hear new grinding, persistent gurgling, or a pump alarm, consult the cooler manual and Corsair support rather than opening the loop. AIOs have a finite service life, and the warranty is not a promise that every unit lasts indefinitely. Consider the cost and difficulty of replacement when deciding whether liquid cooling is right for your PC.
When Corsair is a good choice
Corsair AIOs make sense when the desired size and connection style match the system. A NAUTILUS model suits builders who want standard motherboard fan control and optional ARGB without a Corsair hub. A TITAN model suits builders who value the LINK ecosystem, unified Corsair controls, and family-specific features such as an LCD variant or CapSwap compatibility. The ability to manage several components together can be worthwhile when the rest of the system already uses compatible Corsair hardware. For a one-off CPU cooler in a budget build, compare the full cost including controller, software needs, and case fans. Brand familiarity should not replace a compatibility check.
When a different cooler may be better
A Corsair AIO may not be the best fit if the chassis cannot support the required radiator, the motherboard lacks the desired control headers, or you prefer a low-maintenance air cooler without a pump. A compact case may only fit a 120 or 240 radiator; a processor with a modest workload may not benefit from a large 360 or 420 unit. If you want to avoid RGB software, choose a non-RGB model or consider an air cooler. If a particular Corsair series is unavailable in your region, compare a reputable equivalent using radiator dimensions, socket kit, fan curve behavior, pump warranty, and noise data. Match the solution to the system instead of buying the largest listed AIO.
Common Corsair AIO buying mistakes
Do not confuse iCUE LINK with standard PWM/ARGB. Do not assume every Corsair AIO requires iCUE or that every one can join LINK. Do not treat H100i, H150i, and H170i as a single generation; the naming spans many models. Do not infer socket support from the cooler’s age or from a retailer’s generic compatibility text. Do not buy a radiator size before checking the case’s exact mount position and GPU/RAM clearance. Do not assume a refurbished cooler includes every bracket. Finally, do not rely on promotional thermal claims as a measured comparison across CPUs and cases. Use manufacturer data to shortlist, then consult independent tests for the exact model if comparative performance is central to your decision.
How to compare two specific models
Make a short table for each candidate: exact product SKU, generation, radiator size and dimensions, included fans, pump type, control connection, lighting connector, screen or accessory options, supported sockets, package hardware, warranty, and case position. Confirm each fact on Corsair’s current page or manual. Then map the case and motherboard constraints: radiator stack, RAM height, GPU length, fan headers, ARGB header, USB 2.0 headers, controller mount, and cable reach. A small scorecard for your actual needs is more useful than a global ranking. For example, a build with only a 240 mm top position and motherboard ARGB may favor NAUTILUS II 240 ARGB, while a LINK-heavy system may favor TITAN II if its size and price fit.
Product examples to compare
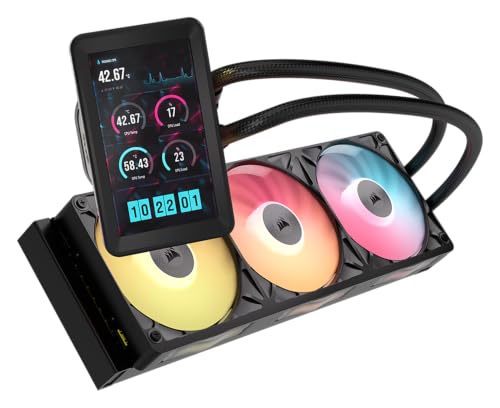
The products below illustrate distinct Corsair approaches rather than claiming a universal performance order. The NAUTILUS II 240 RS ARGB shows the newer motherboard-controlled 240 mm option. The TITAN II 360 RX LCD represents a feature-rich LINK model with a display and integrated hub. The original TITAN 360 RX RGB remains a separate generation and can be useful when comparing availability or pricing, but confirm its warranty and exact retailer condition. Listing details, prices, stock, and product generations change. Use each ASIN as a route to a specific listing, then re-check the exact SKU, included hardware, and seller before purchasing.
Final recommendation
For most builders, start with the current NAUTILUS II family if you want a straightforward, motherboard-controlled Corsair AIO. Choose 240 mm for a case that supports only two 120 mm fans, or 360 mm when the chassis has a documented 360 position and you have a reason to use it. Select TITAN II if the iCUE LINK ecosystem, unified control, premium features, or LCD display are priorities and you are comfortable adding the hub and iCUE software. Check CPU socket support in Corsair’s current matrix, confirm the specific SKU and bracket kit, then compare radiator and fan dimensions with the case manual. The right Corsair cooler is the one that fits and connects cleanly to your particular PC.
Coolant, pump noise, and acoustics: living with an AIO daily
An AIO’s specification sheet talks about cooling; your ears will judge it on acoustics. The pump is a constant source, running whenever the system does, and its character matters more than its volume: a steady low hum disappears, while a high-pitched whine or a gurgle from air in the loop draws attention forever. Mounting influences both. A radiator positioned so its top sits above the pump, with the pump not at the loop’s highest point, keeps air collecting in the radiator’s end tank rather than in the pump housing, which is the main defense against gurgle and the dry-running wear that shortens pump life. When you plan a build around the coolers in this guide, plan the radiator’s position as an acoustic decision as much as a thermal one.
Fan strategy completes the acoustic picture. Radiator fans do their best work at moderate speeds with static pressure to spare; run them at a curve that stays quiet through desktop work and browsing, rising only when sustained loads arrive. Most modern boards and control suites let you base that curve on coolant or package temperature with a smoothing delay, which prevents the surging that makes a PC sound anxious during ordinary use. A cooler that can hold your processor’s temperatures at fan speeds you cannot hear is, for most builders, the correct definition of high performance.
Pump speed control deserves a decision rather than a default. Some designs expect the pump at full speed constantly; others allow a quieter profile at idle. Follow the maker’s guidance for your family rather than forum habit, because pump curves are designed around their intended control. Whatever you choose, set it once, verify temperatures under a real sustained load, and then leave the loop alone; AIOs reward builders who configure them deliberately and then stop tinkering.
Tube routing, radiator orientation, and case fit in practice
Case compatibility lists give dimensions; builds fail on centimeters and common sense. Measure the radiator’s full length including its end tanks, not just its fan-size name, and measure the case’s clearance at the intended mount with the motherboard, memory, and graphics card in mind. Top mounts collide with tall memory and motherboard heatsinks; front mounts consume tube reach and can starve a long graphics card of space; side mounts in dual-chamber cases are often the elegant answer and the first to be forgotten when checking a case’s specifications. Dry-fit the radiator before any thermal paste is opened, and route the tubes in a gentle arc without kinks or pressure on the fittings.
Orientation rules are simple and frequently ignored. Avoid mounting the radiator below the pump, which invites air to the pump and noise to the build. If the front is the only option, tubes at the bottom of a front-mounted radiator keep air at the top, away from the tube ports. Keep the pump block’s fittings unstressed when the side panel closes; a tube pressed by a panel is a slow leak’s favorite beginning. These are five-minute decisions at build time that decide whether the cooler is silent and reliable for years or merely installed.
Cable routing is part of the same discipline, especially in the LINK ecosystem discussed earlier in this guide, where a single cable chain can tidy a build dramatically if it is planned, and tangle it if it is improvised after the fans are mounted. Decide the order of devices, the controller’s position, and the cable path before the first screw, and photograph the finished routing. The photograph is your map when you upgrade a fan or move the build to a new case in three years.
Thermal expectations by workload: gaming, creation, and sustained loads
Different loads ask different questions of a cooler. Gaming loads are bursty and often leave the processor partly idle while the graphics card does the work, so a mid-size radiator with a quiet curve usually delivers an experience indistinguishable from a larger one. Content creation, rendering, compiling, and simulation hold all cores at high power for minutes to hours, and there the radiator’s surface area and the case’s exhaust path decide whether temperatures stabilize or creep. Judge a cooler against your longest load, not your average one, and run that load for at least twenty minutes when you test, because coolant temperature, and therefore the whole system’s behavior, takes time to reach its plateau.
Ambient temperature is the silent variable in every comparison. A cooler tested in a cool room posts numbers your summer room will not reproduce, and the honest way to compare your own results is by the margin above ambient, not by absolute figures copied from elsewhere. If your room runs warm, radiator size and case airflow buy back that margin; if your room is cool, a smaller, quieter build loses nothing. This is also why chasing a few degrees with ever-larger radiators has diminishing value: the room sets the floor, and comfort, acoustic and thermal, lives in the margin.
Graphics-card heat shares the case with the processor’s cooler. A front-mounted radiator fed by air warmed by the graphics card, or exhausting into it, couples the two systems in ways builders underestimate. In powerful gaming builds, a top-exhaust radiator often keeps the processor’s coolant independent of the card’s heat, while in processor-heavy workstations the priorities reverse. There is no universal mount; there is only the mount that suits where your build’s heat is actually made.
Longevity and maintenance of a sealed loop
A sealed AIO asks for little maintenance and repays the little it asks. Dust is the main enemy: a radiator is a filter that the case’s air passes through, and a felted radiator loses performance and gains noise month by month. Clean it on the same rhythm as your case filters, with air and a soft brush, and keep intake filters in place even though they cost a degree or two, because they keep the radiator’s fins serviceable. Check tube fittings and the pump block at each cleaning for any sign of weeping or crust, which announce themselves early and politely before they become failures.
Coolant slowly permeates through tubes over years, which is why AIOs have a service life rather than an indefinite one, and why warranty length and the maker’s reputation for honoring it are genuine specifications in this category. A cooler from the families in this guide, installed with air managed correctly and kept clean, should be expected to serve across a processor generation or two; plan its replacement as part of a future platform upgrade rather than as an emergency, and keep the mounting hardware for other sockets in a labeled bag, because the bracket you need in four years is the one that vanished in the first month.
Software is maintenance too. Keep the control suite updated, export or note your fan and lighting profiles before major updates or a Windows reinstall, and after any update, verify that the pump and fans are following the profile you think they are. Most AIO horror stories that begin with overheating end with a reset profile running fans at a silent minimum; a two-minute check after changes prevents the entire genre.
Comparing the Corsair families in this guide for your build
The families compared here divide by control philosophy more than by cooling muscle. The simpler motherboard-controlled designs suit builders who want the loop to be an appliance: install it, set a fan curve in the BIOS, and never open a control suite again. The LINK ecosystem suits builders who are already composing a case full of coordinated fans and lighting and who value the single-cable tidiness and unified control enough to pay its premium and accept its software as part of the build. Neither philosophy cools dramatically better at the same radiator size; they differ in what the ownership feels like, which is a legitimate and durable difference.
Choose radiator size by case and workload together, using the guidance earlier in this guide, and choose the family by the rest of your build. A case already full of LINK fans makes the LINK cooler the natural citizen; a minimalist build with case fans controlled by the board makes the simpler family the coherent choice. Mixing ecosystems is possible and common, but every additional control system is another profile to maintain, and builders consistently underestimate that small, permanent tax.
Whichever family you choose, verify the exact variant before ordering: radiator size, fan type and count, whether the LCD or cap options are included or separate, and socket compatibility for your platform including any bracket you might need. The families share names across variants generously, and the difference between the box you intended and the box that arrives is usually one suffix read too quickly.
More questions about Corsair AIO coolers
How long should an AIO last compared with a large air cooler? A quality air cooler can serve almost indefinitely with fan replacements, while a sealed loop has a finite, multi-year life governed by coolant permeation and pump wear. The AIO’s counter-offer is case clearance, memory and graphics-card space, and a particular aesthetic and acoustic profile. Choose with both horizons in view: the builder who upgrades platforms every few years will never meet the loop’s limit, while the builder who keeps a system for a decade should weigh the air cooler’s permanence seriously.
Can I mount the radiator in the front if my case has no top mount? Yes, with the orientation care described above: radiator top above the pump, tubes at the bottom where the design allows, and attention to the graphics card’s length and its appetite for the warmed air. Test temperatures for both processor and graphics card after the build, since the front mount couples them, and adjust fan curves for the pair rather than for the processor alone.
What should I do if the pump becomes noisy after a move or a rebuild? Suspect air first. A transported PC often migrates the loop’s air bubble to the pump. With the system off, gently tilt the case to encourage the bubble toward the radiator, confirm the radiator’s position relative to the pump, then run the system and listen over a day as small bubbles settle. Persistent noise after the air has had its chance to move is a support conversation with the maker, and it is exactly what the warranty is for.
Planning the whole build around the cooler
An AIO is not an accessory added to a finished parts list; it is one of the build’s architectural decisions, and it should be made alongside the case, the motherboard, and the graphics card rather than after them. Choose the case for the radiator you intend, the memory for the clearance the pump block and tubes need, and the fan layout as one system in which the radiator’s fans may be the case’s main exhaust or intake. Builders who plan the cooling as architecture rarely meet the compatibility surprises that builders who shop sequentially collect, and their finished machines look, and sound, as if they were designed rather than accumulated.
Keep the build’s documentation as carefully as its cables: the cooler’s receipt and warranty dates, the mounting hardware for other sockets, the control profiles exported, and a photograph of the tube routing and cable order. A liquid-cooled build is a small system with a memory, and the builder who keeps its records owns a machine that can be maintained, upgraded, and warrantied without archaeology.
Troubleshooting temperatures: a calm diagnostic order
If a finished build runs warmer than expected, diagnose in the order of likelihood rather than of expense. First, the fan and pump profiles after any software change, the silent reset being this category’s most common fault. Second, dust in the radiator and case filters. Third, the mount’s contact, verified by re-seating the block with fresh thermal interface material if the evidence points there. Fourth, the case’s air path, tested with the side panel removed to see whether the loop is being starved or fed hot air. Only after those four should the cooler itself be suspected, because in practice it is the least likely culprit and the most expensive to accuse wrongly. A builder who works the list calmly will find the cause in the first three steps nearly every time, and will have learned the build’s real thermal character in the process.
FAQ: Do Corsair AIOs need iCUE?
No. Current NAUTILUS II coolers are designed for direct motherboard PWM control; ARGB models use standard motherboard ARGB connections. iCUE LINK TITAN models use a LINK System Hub and iCUE for the full control ecosystem. Check your exact model because Corsair’s product families and wiring differ.
FAQ: Are Corsair AIOs compatible with AM5?
Many current models list AM5 and AM4 support, but socket compatibility varies by model and product generation. Check Corsair’s current compatibility matrix and the exact quick-start guide. Some older models need a retrofit bracket for newer Intel sockets.
FAQ: What is the difference between NAUTILUS II and TITAN II?
NAUTILUS II prioritizes direct motherboard PWM and optional motherboard ARGB control. TITAN II is built for iCUE LINK, typically includes a System Hub, and supports Corsair’s software-managed LINK ecosystem. Pump, fan, lighting, warranty, and display details vary by SKU.
FAQ: Which Corsair radiator size should I buy?
Choose only a size supported by your exact case position. A 240 uses two 120 mm fans, a 280 uses two 140 mm fans, and a 360 uses three 120 mm fans. Compare real radiator-plus-fan dimensions with the case manual and check GPU, RAM, motherboard, and cable clearance.
FAQ: Can I use an older Corsair AIO on a new CPU socket?
Possibly, if Corsair lists the exact model as compatible and the correct bracket or retrofit kit is installed. AM4 and AM5 share a mounting pattern for compatible coolers, while some older Intel models need retrofit hardware. Confirm with Corsair’s current table.
Official specifications and further reading
Use the current manufacturer pages for the exact cooler and revision: Corsair TITAN II versus NAUTILUS II comparison; Corsair AIO socket compatibility matrix; Corsair TITAN RX RGB specifications; NAUTILUS II 240 RS product details; TITAN II 360 RX LCD product details; Corsair AM4/AM5 bracket guidance. Amazon product names and primary images were retrieved from Amazon Creators API; listing availability and package contents can change.
Corsair AIO examples to compare
ASIN: B0H4M26R4P

ASIN: B0H848NZG2

ASIN: B0D6BFBLTK
Certain content that appears on this site comes from Amazon. This content is provided “as is” and is subject to change or removal at any time. Product examples and images are supplied through Amazon Creators API; confirm specifications and availability on the current listing.