Best Saws for Laminate Flooring: Choose the Right Tool for Each Cut
The best saws for laminate flooring depend on what you need to cut. A jigsaw is versatile for notches and curves around pipes; a circular saw or miter saw makes efficient straight cuts across planks; a fine-tooth hand saw can handle a small installation without a power-tool setup; and an oscillating multi-tool is useful for undercutting door jambs or making a short, careful trim. No single tool is ideal for every stage of a floor installation. For buyers comparing the best saws for cutting laminate flooring, the practical choice depends on cut quality, board support, and whether the job involves straight crosscuts or detail work.
Laminate planks have a decorative surface and a dense core, so a blade that is too coarse, dull, or poorly supported can chip the visible edge. The installation instructions for the exact flooring product matter: cut direction and which face should point up vary by saw type and may vary by product. Expansion gaps, click-lock profiles, room layout, underlayment, transitions, and door trim also affect where and how cuts are made. This guide explains practical options without claiming hands-on tests or universal results. Always follow the flooring and saw manufacturers’ instructions.
Affiliate disclosure: DailyHomeDecorating.com may earn a commission from qualifying purchases through links in this article. This does not change the price you pay.
Amazon product examples to compare
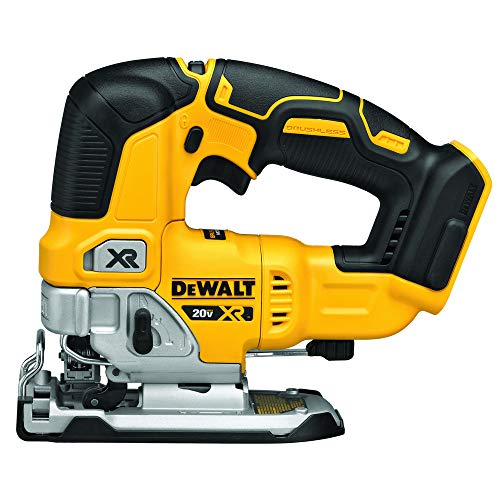
ASIN: B07JPFHQKG
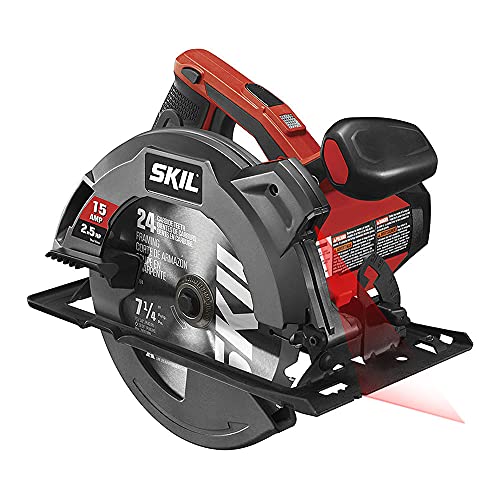
ASIN: B01BD81BLO

ASIN: B07VBB55X5
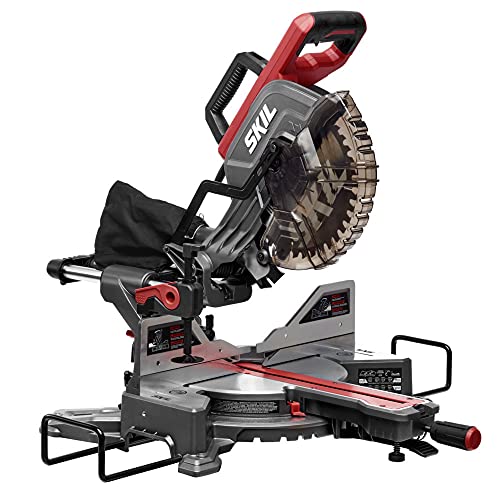
ASIN: B08J7N3VYW
Certain content that appears on this site comes from Amazon. This content is provided “as is” and is subject to change or removal at any time. Product examples and images are supplied through Amazon Creators API; confirm specifications and availability on the current listing.
Table of contents
- Quick tool guide
- What you cut during laminate installation
- Jigsaws for notches and curves
- Circular and miter saws for straight cuts
- Oscillating tools for door jambs and detail cuts
- Hand saws and manual flooring cutters
- Blades, cut direction, and edge quality
- Setup, dust, and safe workholding
- How to choose and buy
- Frequently asked questions
Quick guide: match the saw to the cut
| Tool | Best fit in a laminate project | Tradeoff |
|---|---|---|
| Jigsaw | Notches, curves, cutouts, and occasional crosscuts | Needs a suitable blade and support; can wander on long straight cuts |
| Circular saw with guide | Long straight rip cuts and repeated plank sizing | Needs stable support, a guide, and careful control of the finished face |
| Miter saw | Fast, repeatable square crosscuts on supported planks | Limited for long rip cuts and irregular cutouts |
| Oscillating multi-tool | Undercutting casing and short flush or detail cuts | Slow and unsuitable for routine long plank cuts |
| Hand saw | Small projects, isolated cuts, or quiet work without a power tool | More effort; a guide and sharp flooring-appropriate blade help accuracy |
| Manual laminate cutter | Many straight crosscuts in compatible plank products | Does not make every notch, rip, or irregular cut; verify product compatibility |
For many do-it-yourself installations, the practical combination is a jigsaw for shaped cuts and a straight-cutting option for plank ends. If the room has many long rip cuts, a circular saw with a guide can save effort. If the job is a single room with a few boards, a hand saw or rented tool may be sufficient. Do not buy a large saw simply because it is powerful; choose based on the number and geometry of cuts, where you can work, and how you will control dust.
Understand the cuts in a laminate-flooring project
Crosscuts across the plank
A crosscut shortens a plank at the end of a row. It is one of the most frequent cuts and usually benefits from a square guide and repeatable stop. A miter saw can make repeated crosscuts quickly if the board is fully supported and the saw’s capacity covers the plank width. A circular saw with a square or straightedge guide also works for many boards. A jigsaw or hand saw can handle a small number of crosscuts, though the cut may be less consistent unless you mark carefully and control the tool.
Measure the needed length while keeping the manufacturer-required expansion clearance at walls and fixed objects. Account for the locking profile and the direction in which the row assembles. Mark the waste side of the line, confirm which end retains the needed click profile, and make a test cut on a scrap or offcut. The offcut can help check fit, but do not rely on it to represent every condition if the wall is irregular.
Rip cuts along the plank
A rip cut narrows a plank along its length, often for the final row. It is one of the most challenging cuts to make straight because the board is long and narrow. A circular saw guided by a straightedge, a table saw with appropriate support, or a flooring-specific cutter that supports ripping can be more controllable than freehand cutting. A jigsaw can make a rip cut in some cases, but the blade may drift over a long distance, especially if the board is not flat and supported.
Measure the final-row width at several points because walls may not be parallel. Transfer those measurements carefully and account for the required expansion gap. Rip the plank to preserve the locking edge needed for installation. Before using any power saw, understand where the blade will exit, how the board is supported, and how the offcut will be managed. A narrow strip can bind or move if left unsupported.
Notches and cutouts around obstacles
Door stops, pipes, floor vents, and cabinet projections can require L-shaped, U-shaped, or curved cutouts. A jigsaw is a common choice because it can start from an edge or, when the tool and procedure permit, begin a cutout through a drilled starter opening. Oscillating tools can make localized adjustments or trim an edge in place, but are slower for long cuts. Measure obstacle positions from more than one reference edge, include movement clearance around fixed penetrations where the flooring instructions require it, and test the shape with a template when precision matters.
For pipes, many flooring systems require an oversized hole or a notch with a cover such as a rosette, while maintaining the product’s specified expansion space. Do not fill a floating-floor expansion gap with rigid material unless the floor maker directs it. Under-floor heating, plumbing, electrical conduits, and hidden fasteners can be present in existing floors; verify them before plunge or flush cuts into installed material.
Door jambs, casings, and transitions
Undercutting a door casing lets the laminate slide beneath the trim for a cleaner edge, when the installation method and clearance permit. An oscillating multi-tool with a suitable flush-cut blade is often used for this localized task. A scrap plank and the planned underlayment can act as a height reference, but check the exact floor thickness and manufacturer’s method. Keep the tool level and protect the surrounding wall and floor.
Doorway transitions may require a straight cut through a track, a change in flooring direction, or room for a transition profile. Follow the laminate and transition manufacturers’ directions and maintain required expansion gaps. Do not cut into a jamb or wall without checking for concealed wiring, plumbing, or structural concerns. A handsaw may work for some trim cuts, but a power tool requires the correct blade depth and a controlled, supported position.
Jigsaws: versatile for notches, curves, and cutouts
Why a jigsaw is useful
A jigsaw’s narrow reciprocating blade can turn and follow a marked line, making it useful for irregular shapes a circular saw cannot reach. It handles sink-like cutouts for pipes in a plank, small notches at door frames, and curves around an obstacle. Jigsaws are widely listed by flooring manufacturers among standard installation tools. Pergo’s installation information lists tools such as jigsaws, hand circular saws, hand saws, and crosscut saws, while EGGER describes jigsaw and circular/table saw options for cutting and fitting elements. Check your product’s exact instructions before selecting blade orientation or cut direction.
For long straight cuts, a jigsaw can wander because the blade flexes. A straightedge helps, but the shoe must remain flat and tight against the guide without forcing the tool. Use a blade suited to laminate or fine-tooth cutting and replace it when dull. The correct blade depends on the tool’s clamp, stroke, material thickness, and flooring construction. A reverse-tooth or down-cut blade may change which face shows the cleaner edge, but you must follow the manufacturer’s guidance and support the plank to prevent vibration or chipping.
Jigsaw buying criteria
Compare shoe stability, blade-change security, variable speed, orbital action adjustment, line of sight, dust extraction, and grip. Orbital action can make a cut more aggressive in some materials, but a delicate decorative surface may benefit from a controlled setting and a fine blade. The manual should describe how orbital action works and whether it can be disabled. A splinter guard or zero-clearance insert may help in some setups, but it cannot guarantee a chip-free edge on every laminate product.
For flooring, consider whether the jigsaw accepts common T-shank blades or another format and whether suitable replacement blades are easy to find. Tool-free blade changes save time, but the blade still must seat fully and lock. A corded model avoids battery changes during extended cutting; a cordless one can be convenient for room-to-room work. Both require good support and dust planning. See our oscillating saw guide for a different tool category used for trim and detail work.
Jigsaw setup for a clean cut
Read the flooring manual to determine which face should be up for your specific blade and saw motion. Pergo’s general laminate instructions, for example, say the patterned face should be down for a jigsaw, saber saw, or circular handsaw and up for a hand saw or crosscut saw. That is a manufacturer-specific instruction, not a universal rule for every product and blade. If your brand gives different instructions, use those. Make a test cut on a spare piece to confirm the visible edge before cutting installed boards.
Support the board close to the cut and prevent the waste section from dropping or vibrating. Clamp the piece if appropriate and keep clamps clear of the blade path. Set the jigsaw shoe flat on the work, start the blade before entering the material if the manual directs, and feed steadily without twisting. For an internal cutout, drill a starter hole only where the shape and product permit and where you have checked for hazards. Keep hands away from the blade and wear eye and hearing protection according to the tool instructions.
Circular and miter saws for straight cuts
Circular saws for long rips and flexible cutting
A circular saw can make long, straight rip cuts and crosscuts when guided properly. For laminate work, the blade should be appropriate for the material and compatible with the saw’s diameter, arbor, speed, and guard. A fine-tooth blade can help reduce edge chipping, but the right choice depends on the laminate core and the product maker’s directions. Do not use a blade with damaged teeth or a speed rating below the saw’s maximum.
A straightedge or guide rail can improve repeatability. Set the board on a sacrificial surface or another approved support so the blade does not cut into a finished floor or workbench. Adjust blade depth according to the tool manual and the board thickness. Secure both the workpiece and guide, and make sure the narrow offcut cannot shift into the blade. Keep the cord or battery clear of the cut path. For laminate flooring specifically, use the orientation advised by the flooring manufacturer; the clean face can depend on tooth direction and blade type.
A circular saw has a substantial exposed blade and can kick back if the work binds, shifts, or closes on the kerf. Keep the base plate flat, stand out of the likely kickback path, and do not reach beneath the board. Never hold a narrow plank by hand while making a rip cut. If the workpiece is too small or unstable to secure, use a different method or tool. For more on saw selection and safety considerations, see our circular saw guide and compact circular saw guide.
Miter saws for repeated crosscuts
A miter saw can be efficient when many planks need the same square crosscut. The fence supports the board, and a stop can help repeat lengths when set up correctly. The saw’s capacity must accommodate the full plank width. Keep the plank against the fence and flat on the table, and support long stock at the same height. Do not use a miter saw to rip a narrow strip along the length; that is not the tool’s purpose and can be unsafe.
Check blade compatibility, tooth count, arbor, and the saw’s rated speed. A blade designed for finish crosscuts may produce a cleaner edge on some materials, but laminate is abrasive and can wear teeth. Follow the flooring manufacturer’s face orientation and the blade maker’s directions. Wait for the blade to stop before raising the head or moving the board. Keep hands outside the marked no-hands zone and use a clamp where the saw manufacturer recommends one.
If your project has only a few crosscuts, buying a miter saw may not be worthwhile. A circular saw with a square guide or a hand saw can do the job. If you already own a miter saw, confirm that its blade and dust collection are suitable and make practice cuts on scraps. Our miter saw guide covers the category; laminate-specific blade and setup instructions still come from the flooring maker.
Table saws and flooring-specific cutters
A table saw can make repeatable rips, but it needs appropriate infeed and outfeed support, guarding, a riving knife where applicable, and safe handling of narrow stock. Many laminate planks are long and relatively narrow, which can make unsupported feeding difficult. Use a push device, fence setup, and procedure approved by the machine manual. Do not remove safety equipment to gain extra clearance. If you are unfamiliar with table-saw operation, choose a simpler tool or ask a qualified installer.
A manual laminate cutter presses or shears compatible planks rather than spinning a blade. It can reduce airborne dust and noise for straight crosscuts, and it avoids an electrical setup. It may not cut every laminate thickness, attached underlayment, or product construction, and many models do not make long rips or irregular notches. Test on an offcut and verify the flooring maker permits that kind of cutter. A cutter that crushes or delaminates the edge is not appropriate, even if it can physically break the plank.
Oscillating tools for door jambs and short detail cuts
Undercutting casing without damaging the floor
An oscillating multi-tool makes short, localized cuts with a blade that moves through a small arc. It is commonly used to undercut door casing so flooring can slide beneath the trim. Place a scrap of the actual plank and any planned underlayment beside the casing to set the reference height, then follow the flooring maker’s approach. The tool should be held level and guided carefully; a blade angled downward can gouge the subfloor, while a blade angled upward can leave too little clearance.
Use a blade appropriate for the casing material—wood, composite, or metal may require different accessories. Confirm the blade’s mount compatibility, speed setting, and intended use in the tool manual. Keep the plank and underlayment scrap stable and away from the blade path. Before cutting a jamb in an existing structure, check for nails, wiring, plumbing, or other hidden hazards. Do not cut structural components. If the casing contains metal or the substrate is unknown, investigate before starting.
Good uses and clear limits
An oscillating tool can trim a small edge, remove a short section of trim, or make a controlled flush cut where a larger saw cannot fit. It is not efficient for cutting every plank to length, and it does not replace a jigsaw for curves or a circular saw for long straight rips. The small blade can heat up or wander if pressured. Use light, controlled contact and let the accessory work. Stop if the blade binds or the tool overheats.
Dust extraction may be available for some tools and accessories, but a compact dust port does not guarantee complete capture. Laminate cutting can create fine particles from the core and surface layer. Use appropriate ventilation and cleanup. Follow the flooring product’s instructions for cutting and any safety information about its materials. Do not wet-cut a tool or material unless the tool manufacturer explicitly permits it.
Hand saws and manual flooring cutters
Hand saws for small jobs and simple setups
A fine-tooth hand saw can be a sensible option for a few crosscuts when you do not need a power tool. It is quiet, portable, and easy to set up. A square or miter box can help maintain a straight cut, while a sharp blade reduces effort. The board still needs stable support and a marked line. Allow the cut to proceed with controlled strokes; forcing a hand saw can cause it to jump, damage the decorative edge, or slip toward the other hand.
Hand saws vary by tooth geometry and whether they cut on a push or pull stroke. Read the product instructions and determine which plank face should be up. Pergo’s instructions illustrate that face orientation may change between a hand saw and a jigsaw or circular handsaw. Because laminate products and blade designs vary, confirm the rule with your specific flooring manufacturer and test a scrap piece. For tool-category context, see our coping saw guide; coping saws handle tight curves in thin stock and are not the first choice for routine straight plank cuts.
Manual laminate cutters
A flooring cutter can be attractive for indoor installation because it avoids a motor, cord, and powered blade. It can make quick straight crosscuts in compatible laminate planks. Before buying or renting one, check maximum plank thickness and width, whether attached pad or underlayment is allowed, the cut direction, and the expected edge quality. Some tools are designed for a subset of products and can chip brittle or dense cores.
Manual cutters do not solve every cut. A pipe notch, door casing, long rip, or irregular end may still require a jigsaw, oscillating tool, or another approved method. Keep hands clear of the pressing blade and follow the maker’s instructions for positioning and operation. If the cutter splinters or crushes a sample, it is not a good match for that floor. A rental center may let you test the exact flooring material before committing.
Blade choice, cut direction, and edge quality
Check the flooring maker’s cutting instructions first
Laminate product instructions can specify the tool, blade orientation, cutting face, safety equipment, and how to handle the locking edge. Pergo’s published general instructions, for example, recommend the decorative face down for jigsaw, saber saw, or circular handsaw cuts and face up for hand saw or crosscut saw cuts to obtain a clean cut. That example demonstrates why there is no single “pattern side up” rule for every tool. EGGER lists immersion saws, circular table saws, and jigsaws as possible cutting tools for its laminate products. These recommendations come from flooring manufacturers; follow the current guide for the exact product you are installing.
Read the saw manual too. A manufacturer’s guidance may differ based on whether the saw is blade-up or blade-down, the blade’s tooth direction, a scoring function, a splinter guard, or a zero-clearance insert. Do not invert a saw or use an unusual cut method unless the tool maker expressly supports it. Test a scrap piece from the same flooring batch before making visible or irreversible cuts.
Choose a sharp, compatible blade
Fine teeth and a sharp edge can help reduce chipping, but tooth count alone is not enough to choose a blade. Match diameter, arbor, maximum speed, blade type, and saw model. A blade designed for wood may not be suitable for laminate’s hard wear layer or composite core. Check whether the flooring maker recommends a specific blade material or tooth geometry. If the blade becomes dull, chipped, or coated with residue, replace or clean it according to its instructions.
Do not use a blade with missing teeth, cracks, warping, or an incorrect speed rating. Mount it in the marked direction and use only the flanges and hardware supplied or approved by the saw manufacturer. A blade that fits the arbor is not necessarily safe for the saw. Allow the blade to reach operating speed before cutting where the manual directs, and avoid twisting it in the kerf.
Prevent chipping with support and technique
Chipping often comes from a combination of blade direction, poor support, vibration, dull teeth, and incorrect feed. Support both sides of the cut so the board does not bounce or break away. Keep the work flat against the saw shoe, table, or guide. Mark the waste side, align the blade carefully, and use a steady feed rate. Painter’s tape may help make a pencil line visible, but it is not a substitute for a sharp blade or proper face orientation and may affect some finishes; test it on an offcut.
For visible cuts, trim to a hidden edge when the flooring design and required expansion clearance allow. The cut edge may be concealed beneath baseboard or a transition profile, but never use that expectation to ignore a correct cut, locking profile, or gap. A clean cut should not compromise the joint that must remain engaged. If the plank edge is damaged, replace the piece or use the flooring maker’s approved repair method rather than hiding a defect that affects the connection.
Safe setup, dust, and measuring
Make a cutting station before opening every box
Set up a stable work surface in a ventilated area away from finished walls, furniture, children, and pets. Use supports long enough for the plank and place them so the waste side remains supported without pinching the blade. Keep the floor underneath clear of cords and offcuts. Avoid cutting on top of installed flooring, underlayment, or a surface that could be damaged by the blade. If you must work indoors, plan dust extraction and cleanup before the first cut.
Laminate can produce dust when sawn. Wear eye protection and any respiratory protection specified by the product and tool instructions or required by the work setting. Use compatible dust collection where available and clean with a suitable vacuum rather than blowing particles around. Follow product-specific safety information; do not assume the dust is harmless because the board resembles wood. Do not use water to suppress dust unless the tool and flooring manufacturers permit wet cutting.
Measure twice and protect the click profile
Plan the first and last rows before cutting. Many floating floors need expansion clearance around walls and fixed obstacles; the required amount comes from the flooring instructions. Account for the wall’s shape, doorway transitions, and the direction of the click joint. Dry-fit a few rows and check the layout so the final row will not become an unreasonably narrow strip. If the product instructions provide minimum row widths or stagger requirements, follow them.
Mark each plank with its row and orientation before cutting. Confirm whether the cut removes the tongue, groove, or both, and which end must connect to the next board. Protect the decorative face from scratches and keep grit off the support surface. Use a sharp pencil or marking method approved for the finish. Recheck the measurement against the actual installed edge because walls and starting rows can vary.
Secure the board and control the offcut
Use clamps only where they hold the work without damaging the finish or interfering with the saw. A padded support or clean sacrificial board can protect the visible side. Keep your hands away from the blade path and do not reach under the plank to steady it. For long rip cuts, make sure both the board and offcut remain supported throughout the cut. An unsupported waste strip can twist, pinch the blade, or break the edge.
Before starting a power saw, check that the blade is clear of the floor, supports, and clamps. Keep the cord behind the tool or remove the battery when changing blades. Wait for the blade to stop before setting the tool down or repositioning the work. If the saw binds, release the trigger and follow the manual; do not pull a spinning blade backward through the kerf.
Use accessories only as intended
Check blade compatibility for the exact model and cut type. Do not mount a floor-cutting blade in an oscillating tool, or improvise a guide that interferes with the guard. Inspect clamps, rails, and fences for secure attachment. A laser or shadow line can help visibility but does not replace measuring and aligning the actual blade. Follow the tool manual for bevel settings, depth adjustments, and blade changes.
How to choose the right saw combination
For one room or a small repair
For a small room with mostly crosscuts and a few cutouts, a sharp hand saw or rental miter saw plus a jigsaw may cover the work. If you already own a circular saw, a guide can help with straight rips. A manual flooring cutter can reduce powered cutting for compatible products, but test an offcut before relying on it. Avoid buying specialized equipment for a single short job if renting or borrowing a suitable tool is practical.
For several rooms and repeated cuts
For a larger installation, a jigsaw handles cutouts and a miter saw or circular saw can speed repeated straight cuts. A table saw may be useful for long rips if the operator can support the plank safely and use the proper guarding. Consider dust collection, blade replacement cost, setup space, and whether the tool will be used beyond this project. The most capable tool is not automatically the easiest to control in a cramped room.
For trim and installed-floor adjustments
An oscillating multi-tool is useful for undercutting casing and making short flush adjustments, but it is not a general plank saw. For installed boards, check the location of underfloor utilities and the depth of the laminate and underlayment before using a plunge or flush cut. If the blade could contact the subfloor, wiring, plumbing, or a heating element, do not proceed until you know what is below.
Compare lifecycle costs and accessory availability
Compare the tool price with the cost of the correct blade, dust adapter, rail, clamps, replacement parts, and any required battery. A cheap saw can become expensive if suitable blades are scarce or wear quickly. Conversely, a high-end tool may be unnecessary for occasional laminate cuts. Check warranty terms and the manufacturer’s support for the exact product line, and verify that the tool accepts consumables you can readily replace.
Research method and scope
This guide compares tool categories by the cutting tasks involved in laminate installation, using primary flooring-manufacturer guidance for tool choice and cut-face orientation. Pergo’s installation resources identify saw types and explain that orientation can vary by saw motion; EGGER lists jigsaw and circular/table saw options. Tool safety and blade compatibility remain governed by each saw’s manual. This article does not claim hands-on testing, independent laboratory measurements, or current prices. Model availability, accessory compatibility, and flooring recommendations can change; verify the current documents for the exact product.
Primary references: Pergo’s laminate tool FAQ, EGGER’s installation tools guidance, and Pergo’s general laminate installation instructions. The floor maker’s current manual should take priority if a different product-specific instruction applies.
Frequently asked questions
What is the best all-around saw for laminate flooring?
There is no single best tool for every cut. A jigsaw is versatile for notches and curves, while a circular saw or miter saw is more efficient for straight cuts. An oscillating tool helps with door casing, and a hand saw may be enough for a few simple cuts. Choose based on the number and shape of cuts and the flooring maker’s instructions.
Can I cut laminate flooring with a jigsaw?
Yes, many flooring manufacturers list a jigsaw as an installation option. It works well for irregular shapes and some crosscuts. Use a blade compatible with the saw and material, support the plank, and follow the product’s instructions for which face should be up. Test an offcut to check the edge before cutting installed boards.
Which side of laminate should face up when cutting?
It depends on the saw, blade motion, and flooring product. Pergo’s general instructions give different face orientations for jigsaws, circular handsaws, hand saws, and crosscut saws. Check the exact product manual instead of applying one rule to every laminate plank.
Can I use a circular saw to cut laminate flooring?
A compatible circular saw can make straight crosscuts and rip cuts. Use a sharp blade approved for the saw, a stable guide, proper work support, and the flooring maker’s recommended cut-face orientation. Never freehand a long rip on an unsecured plank.
Is an oscillating tool good for cutting laminate planks?
It is useful for short flush cuts and undercutting door casing, but it is slow for routine long cuts. Use a suitable accessory, set the height carefully, and verify there are no hidden utilities or structural components where the blade will enter.
Will a manual laminate cutter work for every floor?
No. Compatibility depends on plank thickness, width, core, attached underlayment, and cutter design. Test a scrap and check both the cutter and flooring instructions. You may still need another saw for rips, pipes, and irregular shapes.
How can I reduce chipping?
Use a sharp compatible blade, support the plank on both sides, follow the correct face orientation, and feed the tool steadily without twisting. Make a test cut on a scrap. A hidden cut edge may be covered by trim, but it still must preserve the locking profile and required expansion clearance.
Do I need a special blade for laminate?
Use a blade approved for the specific saw and suitable for laminate or the flooring manufacturer’s recommended material category. Check diameter, arbor, speed rating, and tooth direction. A blade that fits physically may not be safe or appropriate.
Can I cut laminate indoors?
You can cut indoors if the flooring and tool directions allow it and you have a stable cutting area, ventilation, dust control, and appropriate protective equipment. A manual cutter may reduce airborne dust for compatible straight cuts. Avoid dispersing dust around the home, and clean it with a suitable vacuum.
Can I undercut a door jamb with a saw?
An oscillating multi-tool or an appropriate hand saw can undercut casing in some installations. Use a plank and underlayment sample as a height reference, follow the flooring maker’s instructions, and check for nails or hidden utilities. Do not cut structural framing or use a plunge cut where the substrate is unknown.
Conclusion
The best saw setup for laminate flooring matches each cut to a suitable tool: jigsaws for irregular shapes, circular or miter saws for straight cuts, oscillating tools for casing and detail work, and hand tools for small jobs. A flooring-specific manual cutter can help with compatible crosscuts. Before choosing, check the exact laminate instructions for cut-face orientation, expansion gaps, and locking profiles, then verify blade fit and saw safety requirements.
Careful measuring, stable support, a sharp compatible blade, and dust control do more for a successful installation than buying the most powerful saw. If you are unsure how to secure a plank or cut near hidden utilities, stop and get help from a qualified installer.
This is general product-selection information. Follow the flooring and tool manufacturers’ current instructions and applicable safety requirements.