Best Worm Drive Saws
The best worm drive saws are built for users who value a powerful-feeling circular saw, a long shoe, and a gear layout that suits framing, sheathing, and other demanding cuts. The name describes a drive arrangement: a worm gear transfers power from the motor to the blade arbor. That arrangement differs from the familiar sidewinder, where the motor sits beside the blade and drives it more directly. A worm-drive design often feels different in balance, stance, and handling, but the label alone does not tell you whether a saw is right for your projects.
This guide focuses on worm-drive and closely related hypoid-style circular saws. It explains gear construction, blade-side layout, torque and weight tradeoffs, corded and cordless choices, and intended work such as framing and sheathing. It is not a universal ranking or hands-on test: we did not compare current models, measure cut speed or accuracy, or verify present prices. Model specifications, blade position, and service requirements vary, so consult the exact product page and manual before buying.
Worm-drive saws are still circular saws. They make straight cuts through supported stock, and they do not replace a table saw for repeated ripping or a track saw for guided sheet cuts. For a broad comparison across circular saw styles, see our best circular saws guide. For guided cuts in sheet materials, compare our track saw guide. For stationary ripping and repeated woodworking cuts, see the table saw guide.
Affiliate disclosure: This article may contain affiliate links. If you purchase through one, DailyHomeDecorating.com may earn a commission at no extra cost to you. Selection should be based on the work, fit, and verifiable manufacturer information.
Amazon product examples to compare
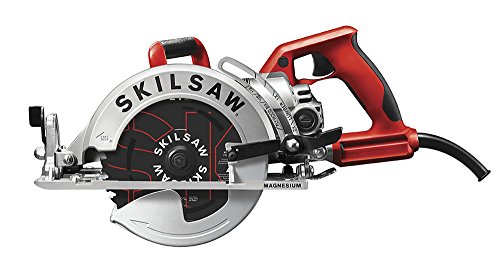
ASIN: B00B7EUS46

ASIN: B00HUCUKDS

ASIN: B017081GDO

ASIN: B0753QHKW7
Certain content that appears on this site comes from Amazon. This content is provided “as is” and is subject to change or removal at any time. Product examples and images are supplied through Amazon Creators API; confirm specifications and availability on the current listing.
Quick answer: choose by cut pattern and handling preference
A worm-drive saw may suit you if you make frequent long cuts in framing lumber or sheet goods, want a long shoe and a particular grip or sightline, and are comfortable handling a saw that may weigh more than a comparable sidewinder. A sidewinder may be easier for casual DIY use or overhead positioning if its lower weight and familiar layout are a better fit. Neither design automatically cuts straighter or lasts longer; the operator, blade, material support, and tool condition matter.
Before selecting a model, check blade diameter and cutting depth at 90 and bevel settings, arbor size, blade-side layout, shoe material and length, cord or battery system, total weight, and gear maintenance requirements. Then read the manual. Some products called worm-drive saws use hypoid gears, and manufacturers distinguish these systems by construction and service needs. Do not assume all gear cases require identical oil checks or changes.
What “worm drive” means
A worm drive uses a screw-like worm gear to transfer rotation to a mating gear on the blade arbor. The motor and blade are arranged differently from most sidewinders, which commonly have a motor alongside the blade and a direct drive. The gear train changes the direction of power transmission and can influence the saw’s shape, grip placement, balance, and feel under load.
People often associate worm drives with strong torque and framing work. That reputation reflects the gear design and the saws’ traditional use on construction sites, but it should not be treated as a performance guarantee. Real cutting ability also depends on motor design, blade sharpness and type, blade speed, cut depth, material, and whether the workpiece is supported correctly. A saw that feels powerful can still bind or kick back when used improperly.
The terms “worm drive,” “hypoid,” and “rear-handle” can be used loosely in retail descriptions. Check the manufacturer’s exact terminology. A rear-handle configuration describes where the handle sits; it is not by itself proof of the internal gear type. Similarly, a product may be marketed as a worm-drive-style saw even when the manufacturer identifies a different gear system.
Worm drive versus hypoid gears
Hypoid and worm gears are related in that both transmit power between shafts arranged at an angle, but they are not identical mechanisms. Manufacturer documentation may emphasize differences in tooth contact, materials, efficiency, wear, lubrication, and service. For instance, Makita’s FAQ distinguishes hypoid gearing from traditional bronze-alloy worm gears, and the brand describes some of its hypoid models as sealed and oil-bath lubricated. That describes those products; another manufacturer’s worm-drive saw may have different lubrication requirements.
When comparing a hypoid saw with a worm-drive saw, focus on the manufacturer’s description and maintenance instructions rather than assuming one design is inherently superior. Gear materials, housing, motor, blade capacity, weight, and warranty all vary. If a gear case requires oil checks or changes, include that maintenance in ownership costs. If it is sealed, learn what the maker says about service and warranty.
Do not use generic gear oil or an arbitrary substitute because two saws appear similar. Use only the grade and procedure identified in the exact manual. Incorrect oil, overfilling, running a dry gearbox, or opening a sealed housing without authorization can damage the tool and may affect warranty coverage.
Worm drive versus sidewinder circular saws
| Consideration | Worm-drive or rear-handle style | Sidewinder |
|---|---|---|
| Drive layout | Gear train redirects power to the arbor; motor and blade placement create a longer, distinctive body. | Motor is typically beside the blade with a more direct drive arrangement. |
| Feel and balance | Often has a different grip and balance point; may feel suited to long cuts for some users. | Often compact and lighter in many product comparisons, though exact weight varies widely. |
| Maintenance | Gear-case service depends on worm or hypoid design and model instructions. | Generally has no worm gear oil procedure, but still needs blade, guard, and shoe care. |
| Best reason to choose | Fit, handling preference, cut demands, and gear construction match the user’s work. | Lower weight, familiarity, availability, or fit better support the intended tasks. |
This comparison is a guide to questions, not a claim that every worm drive is heavier or every sidewinder is weaker. Some designs use lightweight materials; some compact saws still have substantial mass. Check the actual tool weight and hold the saw in a safe, powered-off position if you can inspect it in person.
Blade side, sightline, and cut direction
Blade-side layout affects how a user sees the blade and cut line, how sawdust exits, and how the shoe is positioned relative to the body. Some traditional worm-drive saws have the blade on the left; many common sidewinders have a right-side blade, but there are exceptions in both categories. Do not treat “worm drive” as a reliable proxy for blade position. Confirm it in the manufacturer’s photos and specifications.
A left-side blade may be easier for some right-handed users to see, while another user may prefer a different layout. Handle position and blade visibility are personal. Cut-line markings on the shoe, depth scale, bevel scale, and line-of-sight clearance can matter more than a broad category label. If possible, compare the exact model with the blade guard closed and the tool unplugged.
Dust and chips can obscure the line, and a shoe can drift if the operator focuses only on the blade. Use a clear layout mark, keep the shoe flat on the stock, and support the cut on both sides. For sheet goods, a straightedge or guide can improve repeatability if the saw is compatible and secured according to the maker’s instructions.
Torque, weight, and balance tradeoffs
Gear reduction and motor characteristics influence how a saw delivers power to the blade. A worm-drive design is often valued for torque under demanding cuts, but no design should be forced through material. If the saw bogs down, binds, or changes sound, stop and check for an unsuitable blade, incorrect depth, poor stock support, dull teeth, or an overloaded cut. Forcing a stalled saw can increase kickback risk.
Gear housing, motor, shoe, and handle layout affect total weight. Added mass can make a saw feel planted in a long cut, but it can also increase fatigue when working overhead, on a ladder, or throughout a day. The torque reaction is manageable only if the user can maintain a firm, balanced grip. Choose based on real handling, not marketing language about power alone.
Balance depends on more than scale weight. The position of the motor and handle determines how the saw feels in the hands. The shoe length and blade location affect how it rides over stock. A tool that feels comfortable for a ground-level rip may not feel comfortable when making a bevel cut or cutting a panel vertically. Consider the positions you actually use.
For a homeowner making occasional cuts, an easy-to-control saw may be more useful than a heavy-duty design with capacity that will rarely be used. For frequent framing or sheathing, durability and handling over long cuts may justify a larger tool. In either case, plan for fatigue and take breaks; tired hands make it harder to hold a straight line and manage kickback.
Corded versus cordless worm-drive saws
Corded tools
Corded models provide continuous power while connected to a suitable outlet and avoid charging or swapping batteries. They are practical in a shop or jobsite with power access. The cord can snag, cross the cut path, or become damaged, so route it behind and away from the blade. Use an extension cord only if the tool manual permits it and specify an appropriate cord for the load and length.
Cordless tools
Cordless saws add mobility and remove the cord from the immediate cut area. Their runtime depends on battery capacity, material, blade, cut length, and technique. Batteries, chargers, and bare-tool packages vary, so compare the full system cost and confirm platform compatibility. Do not assume that a cordless product using a rear-handle layout shares the exact gear design or maintenance routine of a corded worm-drive saw.
Choosing by jobsite conditions
Think about how often you work away from an outlet, how long the cuts are, and whether you already own a compatible battery platform. For repeated long cuts, battery management may matter. For a fixed workshop, a corded model may be simpler. Weight changes with a battery, and the pack may shift the balance. Check tool-only and ready-to-use weight when comparing, not just catalog headline specifications.
Framing, sheathing, and other intended work
Framing lumber
Worm-drive saws have a long history in framing because users often make repetitive crosscuts, bevel cuts, and cuts in dimensional lumber. A rafter hook, shoe scale, bevel range, and blade capacity may be helpful. A saw’s maximum capacity should be checked at each angle; beveling reduces the depth it can cut. Verify that the tool supports the lumber dimension and blade combination before buying.
Sheathing and sheet goods
A circular saw can cut plywood, OSB, and other sheet materials when equipped with a suitable blade. A long shoe and a guide can help with straight cuts, but full sheets are awkward and need support. Place the sheet on a stable cutting platform, support the offcut so it cannot pinch the blade, and position the saw so the cord or battery doesn’t interfere. For frequent precise sheet work, a track saw may offer a more controlled guide system.
Bevels, rafters, and angled cuts
Check bevel capacity and positive stops for the angles in your work. Positive stops can speed setup, but verify the angle if precision matters and follow the manual to adjust the shoe. A bevel cut changes the contact surface and cut depth. Keep the base flat and fully supported, and use the correct blade for the cut.
What it is not for
A handheld circular saw is not intended to rip narrow stock without a guide or to substitute for a table saw’s fence and guarding. It is not a masonry saw unless the manufacturer explicitly supports the blade and application. Do not install an oversized blade, remove guards, or use accessories that are not approved for the tool. For specialized materials, select the proper machine.
Features to compare
Blade diameter, arbor, and capacity
Confirm blade diameter and arbor size from the exact manual. Check cutting depth at 90 degrees and bevel angles, not just one maximum figure. A larger blade may expand capacity but may affect tool size and weight. Use only blades rated for the saw’s speed and intended material, and mount them in the specified direction.
Shoe and adjustment system
A rigid shoe supports the saw as it travels over the work. Compare shoe material, flatness, length, and how easily depth and bevel controls lock. Adjustment markings should be readable, but important cuts deserve verification. Make sure the shoe does not flex or rock during normal pressure and that bevel settings lock without excessive play.
Guard operation
The lower guard should move freely and return to its covering position. A guard that hangs up on a bevel cut, narrow offcut, or dusty tool requires attention. Never tie it back or remove it to make a cut easier. Read the manual for inspection and cleaning. If the guard is damaged, stop using the saw until it is repaired.
Visibility and dust handling
Look at the blade’s sightline, cut-line notches, work light, and chip direction. Some saws have dust ports, but their effectiveness varies with vacuum and material. Keep the layout mark visible and wear suitable eye protection. A chip stream should not be directed toward other people or a source of ignition.
Hook and storage
A rafter hook can keep the saw within reach on a framing site, but only hang it on a stable, approved surface and follow the manual. A blade guard or case helps protect the tool in transit. Check how the saw is stored and carried; a long or heavy tool can be awkward to lift through a hatch or up stairs.
Buying framework for the best worm drive saws
- List the cuts. Write down material, thickness, cut length, bevel angles, and how frequently the saw will be used.
- Verify the drive type. Confirm whether the manufacturer calls it worm drive, hypoid, or another gear design, and find its maintenance instructions.
- Choose blade-side layout. Compare the sightline and handle position with your dominant hand and stance.
- Check capacity. Match blade diameter, arbor, and cutting depth at the angles you actually need.
- Compare handling. Consider weight, balance, shoe length, grip, and fatigue in realistic work positions.
- Choose corded or cordless. Account for outlet access, runtime, batteries, charger, cord routing, and total system cost.
- Inspect adjustments. Confirm depth and bevel controls are accessible, lock securely, and can be calibrated.
- Assess protection and dust. Check guard function, dust options, blade brake if equipped, and included accessories.
- Read the manual. Confirm blade compatibility, safe cuts, gear service, and repair guidance before purchase.
- Match the tool to your experience. If this is your first circular saw, learn basic saw control with simple cuts and qualified instruction before tackling framing overhead or complex bevels.
Research method and source notes
This guide is a research-based buying framework, not a product test. We reviewed official manufacturer descriptions and manuals alongside OSHA guidance for portable circular saws. We did not test models, measure torque, compare cutting speeds, or validate current prices. Gear terminology and maintenance differ across products; any model-level recommendation should be checked against current official documentation.
Makita’s official gear FAQ explains how the company distinguishes its hypoid gear system from traditional worm-drive gears. The official Makita 5377MG product page describes that particular saw’s hypoid gearing, layout, and stated features. These are manufacturer claims about the named model, not independent test results or specifications that apply to every worm-drive saw.
The Makita 5377MG instruction manual is a model-specific source for safe operation, guards, blade changes, and maintenance. Use the manual for the actual saw you own, because even similar tools can differ in details.
OSHA’s handheld circular saw guidance discusses blade contact, kickback, correct blades, and saw maintenance. OSHA’s portable-tool requirements also describe upper and lower guards for portable circular saws in covered work settings. These are safety references and do not replace the manufacturer’s operating instructions or hands-on training.
Safe handling and setup
Inspect before each use
Disconnect power or remove the battery before adjusting the saw. Inspect the cord, housing, shoe, blade, arbor, and both guards. The lower guard should move freely without being forced and return when released. Check that the blade is sharp, undamaged, properly sized, and secured. If any part is damaged or the guard sticks, do not operate the saw.
Support the work correctly
Place lumber or sheet goods on stable supports so both the cut and offcut are controlled. Set supports to avoid pinching the blade as the kerf closes. Clamp stock when appropriate and keep the cut line clear. Do not cut material that can shift, roll, or collapse while the saw is engaged. For large panels, get help handling them, while keeping the helper away from the saw and cut path.
Set depth and bevel using the manual
Set the blade depth as directed by the saw maker and check that the shoe is flat against the work. Lock the bevel and depth controls before cutting. Confirm that the blade, guard, and shoe clear the work throughout the cut. Do not adjust while the blade is spinning or reach under the workpiece to check depth.
Control kickback risk
Kickback can occur when the blade binds or the kerf closes. Keep both hands on the handles as designed, stand in a balanced position, and keep your body out of the blade’s plane. Do not twist the saw to correct a drifting cut. If the blade stalls, release the trigger and hold the saw still until it stops; disconnect power before investigating. Maintain a sharp blade and use one intended for the cut.
Use protection and manage the cord
Wear eye and hearing protection and address dust exposure based on material and workplace conditions. Keep the cord or battery away from the blade path. Direct chips away from bystanders. Do not wear loose clothing or jewelry that can catch. Never operate with a damaged guard or while fatigued or distracted.
Start and finish in control
Let the motor reach operating speed before entering the cut if the manual prescribes it. Keep the shoe steady and move the saw at a pace that lets the blade cut without force. When complete, release the trigger and wait until the blade stops before setting the saw down. Do not set a spinning saw on a surface or attempt to catch it if it slips.
Maintenance and care
Clean sawdust from the shoe, guard, vents, and adjustment controls with the method described in the manual. Keep the lower guard free of buildup that could slow its return. Do not lubricate the guard or gear case unless the manufacturer specifies the product and procedure. Inspect the blade for pitch, wear, missing teeth, or cracks. Replace damaged blades and use the correct type for the cut.
Gear maintenance is model-specific. Some traditional worm-drive saws require periodic oil checks or changes. Some hypoid saws use a sealed gearcase or oil-bath design and may have different service instructions. Read the manual and use only the specified lubricant. Keep a record of required maintenance if the saw sees frequent use.
Store the saw dry, protect the blade, and secure the cord or battery separately. Before transporting, set the tool to the position the manual recommends. After a drop or hard impact, inspect the shoe, guard, arbor, and gear housing before use. Seek authorized service if the saw makes abnormal noises, leaks oil, overheats, or loses power.
Frequently asked questions
Are worm drive saws more powerful than sidewinders?
Not categorically. Gear design affects power transmission and feel, but motor, blade, condition, material, and technique also determine cutting performance. Compare current manufacturer specifications and real handling needs rather than relying on the category name.
What is the difference between a worm drive and a hypoid saw?
They are distinct gear designs, though both redirect power between angled shafts. Manufacturers may describe different gear materials, contact patterns, lubrication, and service. Check the exact product page and manual; do not assume a hypoid saw has the same maintenance schedule as a traditional worm drive.
Are worm drive saws always left-blade?
No. Blade position varies. Confirm the layout for the specific model. Choose based on visibility, grip, and balance in your working stance rather than assuming a blade side from the gear label.
Are worm drive saws good for framing?
They can be suitable for framing and sheathing when their capacity, bevel range, blade, weight, and handling fit the work. That does not make them mandatory for framing; a sidewinder may suit many users. Check the manual and learn safe circular-saw technique before making production cuts.
Do worm drive saws need oil?
Some gear cases require specified oil service; others, including certain hypoid designs, may be sealed or have a different maintenance procedure. Follow the exact manual. Do not add oil based on a generic recommendation.
Can a cordless saw be a worm drive?
Some cordless saws use a rear-handle or worm-drive-inspired layout, but the actual gearing varies. Verify how the manufacturer describes the mechanism. Also compare battery runtime, pack weight, capacity, and maintenance.
Is a worm drive saw too heavy for a beginner?
Not necessarily, but weight and balance matter. Handle the exact tool if possible and consider the positions you will cut in. A heavier saw may increase fatigue and make overhead work harder. Beginners should start with stable, well-supported work at a comfortable height and practice before attempting difficult cuts.
What blade should I use?
Choose a blade compatible with the saw’s diameter, arbor, speed rating, and material. Tooth count and geometry should match rip, crosscut, or sheet-good work. Follow both saw and blade instructions. Never install an oversized or damaged blade.
Can I use a worm drive saw to cut metal or masonry?
Only when the tool and blade manufacturers explicitly permit the specific material and method. A wood-cutting circular saw is not automatically suitable for metal or masonry. Check dust, sparks, blade speed, guard clearance, and PPE requirements in the official documentation.
How do I choose among the best worm drive saws?
Confirm the drive type, blade side, capacity, handling, power system, guard operation, gear maintenance, and intended work. Compare exact models using official documentation, then select the one that you can control comfortably and service correctly.
Final buying perspective
The best worm drive saws combine the gear layout and handling you prefer with the capacity and service routine your work can support. For frequent framing or sheathing, compare shoe, bevel range, sightline, balance, and blade capacity. For occasional homeowner cuts, a sidewinder may be lighter and simpler to manage. Distinguish traditional worm gears from hypoid systems, verify blade position model by model, and treat torque as a design characteristic rather than a reason to force a cut. A sharp, compatible blade, stable stock, working guard, and careful setup matter whichever saw you choose.