Best Dovetail Saws: How to Choose a Fine Joinery Hand Saw
The best dovetail saws make controlled, accurate cuts for fine joinery. They are designed for small parts and short cuts where a thin blade, a stiff back, and a fine tooth pattern help the saw follow a layout line. Dovetail joints are the classic use, but the same kind of saw can also cut small shoulders, tenon cheeks, rebates, and other joints that benefit from a precise hand cut.
A dovetail saw is not simply a miniature version of a general-purpose handsaw. The plate, back, tooth filing, kerf, handle, and cutting direction all influence how it behaves. Western backsaws usually cut on the push stroke and rely on a stiff spine to keep a thin plate straight. Japanese-style joinery saws cut on the pull stroke and may have a different handle and plate arrangement. Neither design is automatically best for every woodworker. Your experience, preferred stroke, joint size, sharpening skills, and workbench setup all matter.
This guide focuses on fine joinery saws and how to choose one for dovetail layouts. It explains plate depth, spine construction, rip and crosscut teeth, tooth pitch, set and kerf, handles, saw guides, and maintenance. It does not claim hands-on testing or rank specific saws. For waste removal between tails, see our guide to coping saws. For preparing square stock and accurate board ends before joinery, compare table saws and miter saws.
Affiliate disclosure: DailyHomeDecorating.com may earn a commission from qualifying purchases through links in this article. This does not change the price you pay.
Amazon product examples to compare

ASIN: B07314SWRF

ASIN: B07HYVW78L

ASIN: B0DRF48JFP
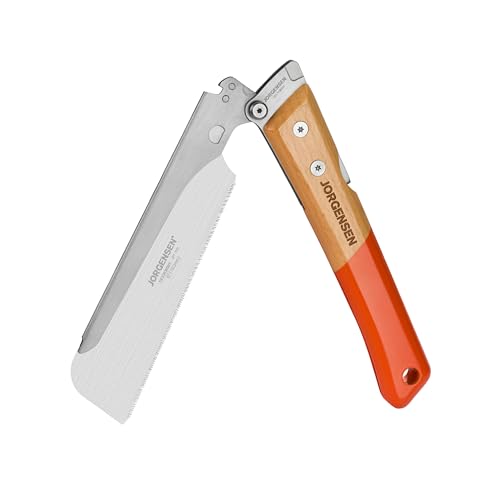
ASIN: B0CQSXWK9G
Certain content that appears on this site comes from Amazon. This content is provided “as is” and is subject to change or removal at any time. Product examples and images are supplied through Amazon Creators API; confirm specifications and availability on the current listing.
Table of contents
- What a dovetail saw is designed to do
- Western backsaw and Japanese joinery saw styles
- Blade plate, back, depth, and stiffness
- Tooth geometry, rake, and TPI
- Kerf, set, and cut accuracy
- Handle, balance, and grip
- How to choose a dovetail saw
- Matching a saw to dovetail layouts
- Care and sharpening
- Research-based selection method
- Frequently asked questions
What a dovetail saw is designed to do
A dovetail saw is a fine joinery backsaw used for short, controlled cuts. A typical Western design has a narrow steel plate reinforced along its back by a heavier spine. The spine limits flex and helps the thin plate stay straight. The blade is shallow enough for small joinery but deep enough to reach the shoulders and cheeks of common dovetail and tenon work.
Dovetail joints require repeated cuts that follow marked lines. The tails and pins interlock, so errors in angle, depth, or kerf position show up as gaps or a joint that will not fit. A backsaw is suited to this work because its short plate and stiff back give the user more control near a baseline than a large panel saw. A fine tooth pattern can leave a narrow kerf and reduce material loss, though a very fine saw can cut more slowly and may need a lighter touch.
The tool is specialized. It is not intended to rip long boards, crosscut large panels, prune garden branches, or cut curves through waste. It can make small crosscuts and shoulders, but a saw with a crosscut tooth pattern may perform better across the grain. For broad material preparation, a machine such as a table saw may establish thickness and straight edges; for the joint itself, layout and hand control remain essential.
Common joinery uses
- Cutting the sloped cheeks of through and half-blind dovetail tails.
- Cutting pin boards to a baseline after transferring the tail layout.
- Cutting small shoulders and cheeks on tenons and bridle joints.
- Trimming narrow shoulders, rabbets, and other small joint features.
- Making short, precise cuts on small furniture parts where a broad hand saw is unwieldy.
A dovetail saw generally excels at the straight cuts that define a joint. Removing the waste between tails is often done with a coping saw and chisel, which is why the two tools complement each other. Our coping saw guide addresses curved waste cuts and blade handling; a coping saw is not a replacement for the straight, controlled cuts made by a dovetail saw.
Western backsaw and Japanese joinery saw styles
Western push-stroke backsaws
Many Western dovetail saws use a stiff back and cut on the push stroke. The spine supports the plate against buckling as the user pushes. Handles are often pistol-grip or open-handle designs, though shapes vary. The saw is typically started with a light pull or positioning stroke and then guided through the kerf on the push stroke. Beginners should follow the saw maker’s instructions and practice on scrap rather than forcing the blade.
A Western backsaw’s spine adds rigidity but also limits cut depth. The plate cannot cut higher than the lower edge of the spine. That is usually acceptable for dovetail work, where the board thickness is modest, but deep stock or a joint far from the edge may exceed the available depth. Check the usable blade depth below the back, not just overall blade length.
Japanese pull-stroke joinery saws
Japanese saws typically cut on the pull stroke. Pulling keeps the blade in tension and can allow a thin plate to cut with less buckling force. Some Japanese saws used for fine joinery have a reinforcing back or are purpose-built dozuki designs; others, such as a ryoba, have no back and may carry different tooth patterns on opposite edges. A thin plate can create a narrow kerf, but it also requires a light, straight stroke. Pushing hard can bend or damage it.
The handle shape and stance differ from a Western backsaw. A Japanese saw is commonly held with a longer handle and drawn toward the user. The change in stroke may feel natural to some woodworkers and unfamiliar to others. Consider how you will hold the saw, whether your bench vise allows the pull stroke, and how you will support the workpiece without pulling it toward you.
Choosing between push and pull styles
Choose the stroke direction that you can control consistently. Neither tradition guarantees a better joint. A stiff Western back can feel reassuring when starting a cut, while a pull saw’s thin plate may leave a narrow kerf and respond well to a light stroke. The woodworker’s grip, body position, bench height, and the way the board is clamped all shape the result.
If possible, try each style on scrap before committing. Make a few shallow kerfs following a marked line, then observe whether you can keep the plate square and control the start. Do not judge only by the first cut: new tooth patterns take practice. If you switch between styles, label the cutting direction and use a consistent stance for each.
Blade plate, back, depth, and stiffness
Plate thickness
The plate is the flat blade body that carries the teeth. A thinner plate can reduce kerf width, meaning less wood is removed. It can also reduce friction in the cut. However, an extremely thin plate can be more sensitive to twisting and requires careful alignment. Plate thickness by itself does not establish quality; steel, heat treatment, tooth set, back support, and manufacturing consistency also matter.
For a Western backsaw, the back reinforces the plate and helps hold a straight line. A heavier brass or steel spine adds weight and may influence balance. Some modern saws use composite or molded backs. Compare the actual construction, not the material name alone, and check that the spine and plate remain aligned along their length.
Back depth and maximum cut depth
The back adds stiffness but reduces the plate depth available below it. If your typical stock is thicker than the exposed plate, the spine may contact the work before the teeth finish the cut. Manufacturers may provide a usable depth measurement, but product pages do not always use the same reference points. Measure the exposed plate or consult a dimensioned drawing.
For dovetails in thin drawer sides, depth is often not a concern. For thicker furniture parts, tenon cheeks, or cuts deeper from the edge, it can matter. Do not assume the total blade height is the same as usable cut depth. Consider both the board thickness and the location of the cut relative to the edge.
Spine fit and alignment
The back should reinforce the blade evenly without a visible twist or loose section. A crooked spine can make the saw track unpredictably. On a new saw, inspect the plate against a straight reference and check that the back is seated consistently. Do not attempt to bend or adjust a precision saw unless the manufacturer describes an approved method.
With use, resin or dust can collect near the spine and plate. Clean the saw gently. Avoid prying the back from the plate or using the spine as a lever. A backsaw is designed for cutting, not chiseling, scraping, or levering apart a joint.
Tooth geometry, rake, and TPI
Rip-filed teeth for dovetails
Dovetail cuts mostly run with the grain, so many dovetail saws use rip-filed teeth. Rip teeth act more like a row of small chisels that sever fibers along the grain. A rip profile can help the saw follow the sloped cheeks of tails and pins. Crosscut teeth are filed with alternating bevels so they can sever fibers across the grain. A dovetail saw may still make some short crosscuts, but a dedicated crosscut backsaw may be more efficient for repeated shoulder cuts.
Check whether a saw is filed rip, crosscut, or hybrid. Retail listings may simply state “fine teeth” without describing the filing. The manufacturer’s manual or care guide may clarify the intended cut and whether the teeth can be resharpened into another profile. Do not assume that tooth count alone tells you how the saw cuts.
Tooth pitch and material thickness
Tooth pitch is often expressed in teeth per inch (TPI) or points per inch (PPI). Manufacturers may count teeth and points differently, so compare like terms and inspect how the maker labels the specification. A finer pitch can leave a smoother cut and engage more teeth in thin stock, but it may cut more slowly and clog more readily in thicker material. A coarser pitch can clear waste faster but may feel more aggressive in delicate work.
One manufacturer’s small-joinery guide provides a useful example rather than a universal rule: Veritas describes its standard rip-filed dovetail saw at 14 TPI for stock in a typical thickness range, and its fine-tooth version at 20 TPI for thinner stock. Those are product-specific recommendations, not a law for every saw or wood species. Use the maker’s guidance for the saw you are considering and test the tooth pattern on your own material.
Rake and included angle
Rake describes how the teeth lean relative to the direction of cut. A lower or more relaxed rake can make a saw feel less aggressive and easier to start, while a more positive rake can cut more readily but may feel grabby for some users. The included tooth angle and filing affect durability and cutting behavior. These geometry numbers are most useful when comparing saws from the same maker or planning to sharpen a saw yourself.
Do not choose a saw solely because a specification lists a particular rake angle. Hand control, tooth set, wood species, and sharpness matter too. If you are new to dovetailing, a saw that starts predictably and can be resharpened by a local professional may be more practical than one with unusual geometry you cannot service.
Kerf, set, and cut accuracy
What kerf means for a dovetail joint
Kerf is the width of material removed by the saw. In layout work, the kerf must fall on the waste side of the line. A narrow kerf leaves more material for a precise fit, but it can bind if the plate is twisted or the wood closes on it. A wider kerf may be more forgiving and can remove material faster, but it requires attention to the layout so the cut does not cross into the finished side.
Kerf width depends on plate thickness and tooth set, as well as sharpening. The teeth are usually set slightly outward from the plate to create clearance. Too little set can cause binding; too much set creates a wider kerf and rougher sides. Exact set values are manufacturer-specific and may vary with wood and saw design.
Cut to the waste side
Mark the shoulder line with a sharp knife or marking gauge, then darken the waste area if helpful. For the angled cuts, establish clear baselines and tail slopes. Start with the teeth just outside the layout line, in the waste. The kerf should remove waste while leaving the knife line visible on the finished portion. If the saw drifts, stop and correct the angle before it crosses the line; do not force the plate sideways inside the kerf.
A thin plate and fine teeth cannot compensate for unclear layout or poor workholding. Use consistent marks, secure the board, and keep the saw’s reference face oriented the same way. A dovetail marker or guide can help repeat an angle, but the saw still needs a controlled stroke. Test on scrap until the blade tracks consistently.
Backed saw versus backless saw
A backed saw’s spine keeps the plate straight for short precision cuts. That rigidity is useful for dovetails but limits depth. A backless saw can cut deeper and may be more flexible in some operations, but the plate is more dependent on the user’s technique and the saw’s tension. A traditional ryoba has rip and crosscut edges without a back, while a dozuki commonly uses a reinforced edge for fine cuts. Not every Japanese saw follows the same design.
Choose based on joint depth and control needs. If the board thickness fits comfortably beneath the spine, a backed saw is a practical joinery choice. If the cut needs more depth or you already work with a pull saw, a suitable backless design may fit. Read the maker’s description of intended use instead of assuming “Japanese” or “Western” determines the best result.
Handle, balance, and grip
A dovetail saw should feel controllable during short, precise strokes. Handle shape affects wrist position and how much of the saw’s weight is supported. Western handles may have a pistol grip, closed tote, or open grip. Japanese handles are often longer and encourage a pull stroke. Handle size, material, surface finish, and balance all influence comfort, but personal hand size and technique matter more than a generic ergonomic label.
When possible, hold the saw in the position you use at the bench. Your index finger may rest along the side or top of a handle depending on design and maker’s instructions; never place it where it could meet the teeth. Keep the wrist relaxed and let the shoulder and forearm guide the stroke. A grip that forces a tight fist can make it harder to feel the plate’s angle.
Balance can change with spine material, plate dimensions, and handle mass. A saw that feels nose-heavy may make it easier to start a cut but tiring to hold level. A very light saw can feel responsive but transmit vibration or magnify small hand movements. Consider comfort alongside the blade specification.
How to choose a dovetail saw
Choose the joint scale first
Estimate the thickness of the parts you expect to join and the depth of the cuts. Small drawer sides and boxes use different proportions from larger casework. Confirm that the plate depth reaches below the required baseline and that the tooth pitch suits the stock thickness. If you make several sizes of joint, decide whether one saw can cover them or whether a second fine-tooth or crosscut saw would be useful.
Decide whether you prefer push or pull
Choose the stroke you can control steadily. If you have used Western backsaws, a push-stroke dovetail saw may feel familiar. If you already use Japanese pull saws, a dozuki-style joinery saw may fit your bench habits. The cut should not require you to pull the workpiece out of its vise or reach across the blade. Consider the direction of force relative to your workholding.
Match tooth pattern to the cut
For most dovetail cheeks, rip-filed teeth are appropriate because the cut follows the grain. For repeated cross-grain shoulders, a crosscut backsaw may be more efficient. Some joinery saws are filed in a hybrid pattern for mixed tasks, but verify the maker’s intended use. If the tooth profile is unfamiliar, request a sample cut or consult a local woodworking shop before buying.
A dovetail saw does not need to be the only saw in a joinery kit. A coping saw can remove the waste between tails, a chisel can pare to the baseline, and a separate crosscut saw can trim shoulders. Our coping saw guide explains the curved cuts that complement a dovetail saw.
Check usable depth and fence clearance
Measure your typical board thickness and compare it with the exposed plate below the back. For through dovetails, confirm that the spine will not strike the board before the cut reaches its baseline. Also consider a saw guide, if you plan to use one, and whether it can attach without interfering with the handle or workholding.
For half-blind dovetails, the pin board and socket board have different layout needs. The saw may need to reach a particular depth while leaving the face uncut. A depth stop or carefully controlled baseline can help, but a depth stop is not a substitute for practice. Check the saw’s available blade depth against the joint and follow the guide maker’s compatibility notes.
Consider maintenance and sharpening
Some backsaws are sold ready to use; others may need tuning or sharpening. Product documentation should explain whether the teeth are sharpenable, the file size or technique, and whether the saw’s set can be adjusted. Fine teeth can require a very slim file and careful work. If you do not sharpen saws, verify that a qualified sharpener can service the design.
Replaceable-blade saws can be convenient, especially for beginners or users who do not want to maintain teeth. Check that replacement blades remain available and that the handle locks securely. A replaceable blade still needs careful handling and protective storage. A fixed-blade backsaw may be serviceable for many years when maintained correctly.
Inspect the build and service options
Check that the plate is straight, teeth are uniform, and the back is aligned. For a replaceable blade, inspect how it attaches and whether the fastener is accessible. For a traditional saw, examine the handle fasteners and finish. A maker’s care guide, replacement-part page, and sharpening instructions can tell you more about long-term ownership than a product photo.
Also verify what is included. A saw guide, blade guard, sheath, or sharpening file may be shown in images but sold separately. Do not assume a kit includes accessories unless the listing says so. This article does not state current prices; availability and package contents can change, so check the current official listing or seller page.
Matching a saw to dovetail layouts
Through dovetails
Through dovetails show the joint on both sides. The saw cuts the sloped sides of tails and pins through the board’s thickness. A stiff-backed saw with enough exposed plate depth can be convenient for these cuts. Use a consistent reference face and clearly mark the waste. The back limits how deep the plate can enter, so confirm that the joint depth is compatible with the saw.
A saw guide can help hold the plate at a chosen slope for a beginner, but guides vary in the saws they accept and the angles they offer. Some use magnets or clamps; others reference the board face. Check that the guide will not damage the plate or interfere with the teeth. A guide supports practice but cannot keep the kerf on the waste side if the layout is wrong.
Half-blind dovetails
Half-blind dovetails hide the joint from one face, often in drawer construction. The saw must stop at a baseline without cutting through the visible front. This requires controlled depth as well as angle. A depth stop may help, but its fit and method should match the saw and guide. Practice on scrap with the same thickness and mark the stop line clearly before working on a finished board.
Because the visible face must remain intact, avoid relying on speed. Use short, measured strokes and check the cut frequently. If your hand position blocks visibility, adjust your light, bench height, or workholding. A fine saw and precise layout help, but patience is what prevents an overcut.
Board orientation and reference edges
Mark each board’s inside, outside, top, and waste side before cutting. Dovetail parts are often mirrored or rotated during layout, and a reversed piece can put a correct angle in the wrong place. Keep the reference edge against the same layout square or guide and make sure the workpiece is clamped securely.
When cutting tails, the layout can be marked on the end grain and face grain. After cutting, the tail board can be used to transfer the pin positions. A dovetail saw’s thin kerf helps preserve the line, but only if you distinguish the cut from the finished edge. Use a sharp marking knife and avoid widening the line with repeated pencil marks.
Practice sequence
- Set up scrap stock of the same thickness and species as the project.
- Mark a baseline and a small set of tails using a square and dovetail guide or template.
- Clamp the board so the line is visible and the work cannot move during the stroke.
- Start each cut with a light stroke and keep the plate aligned to the marked slope.
- Stop in the waste and check the kerf against the baseline before continuing.
- Remove waste with an appropriate coping saw and chisel, then test the joint fit.
- Adjust technique or layout one variable at a time and repeat before cutting finished pieces.
The sequence is for practice, not a complete woodworking lesson. Different dovetail methods and guides may call for different order. Follow the instructions for your layout system and maintain a safe hand position away from the teeth.
Common buying mistakes
Choosing TPI without considering stock thickness
A high tooth count can seem more precise, but it may cut slowly through thicker stock. A coarser saw may feel too aggressive on thin drawer sides. Compare the maker’s recommended material range, then test on scrap. TPI alone does not predict cut quality.
Ignoring plate depth below the back
The total blade height may include the spine. Check the exposed plate depth to ensure it reaches your joint baseline. A saw that is too shallow can force awkward repositioning or prevent a full-depth cut.
Assuming every dovetail saw is rip filed
Many traditional dovetail saws use rip teeth, but products can differ. Check the tooth description and maker’s guidance. If you need both dovetail cheeks and frequent cross-grain shoulders, consider whether a second crosscut saw is appropriate.
Buying a guide that does not fit
Saw guides can require a particular plate thickness, tooth set, handle position, or blade style. Confirm compatibility before ordering. A guide that interferes with the back or handle can make the saw difficult to use.
Expecting a new saw to make perfect joints immediately
Even a well-made saw needs practice. Starting the kerf, maintaining a vertical plate, and following a sloped line are learned skills. Use scrap, clear layout, and controlled strokes. Do not compensate for drifting by twisting the blade.
Overlooking sharpening support
Fine joinery teeth can be challenging to file. Check whether the saw can be resharpened and whether the required files or service are available. A saw that cannot be maintained conveniently may become a disposable purchase even if its initial cut is good.
Care and sharpening
After use, wipe the plate dry and remove resin or dust with a product approved by the maker. Carbon steel can rust if stored damp. A light protective coating may help, but keep it off the handle and remove any excess before cutting. Store the saw in a sheath, blade guard, or saw till that protects teeth from impact. Do not stack heavy tools on the plate.
Inspect the teeth for missing or bent points and check that the plate remains straight. On a backsaw, examine the spine for looseness or separation. On a replaceable-blade saw, confirm the blade attachment is secure. If the saw binds, wanders, or leaves a rough cut, check for dullness, pitch, improper set, or a technique issue before applying more force.
Sharpening a fine saw involves jointing teeth to consistent height, shaping the tooth profile, setting teeth, and honing. Exact files and angles depend on the saw. Lie-Nielsen’s official dovetail-saw instructions describe its own rip-filed teeth and a specific sharpening approach; that guidance is model-specific and should not be transferred blindly to another saw. Use the manufacturer’s instructions or a qualified saw sharpener.
Do not use a standard saw set or file on a fine saw without checking its compatibility. Excessive set widens the kerf and may make the saw wander. Too little set may cause binding. If you are learning to sharpen, practice on a dedicated practice plate before modifying a precision saw. Keep fingers away from teeth and secure the saw in a suitable vise during service.
Research-based selection method
This guide compares dovetail saws by documented design and intended use; it does not claim hands-on testing. The research method is to consult saw-maker specifications and care instructions for plate thickness, back construction, exposed depth, tooth filing, TPI/PPI terminology, rake, set, stock recommendations, and sharpening requirements. For example, Veritas publishes a guide to its small joinery saws that explains why its dovetail models use rip-filed teeth and how its standard and fine-tooth options correspond to different stock ranges. Lie-Nielsen publishes a separate description and care instructions for its dovetail saw. Those details are product-specific examples rather than universal rankings.
The selection criteria are then tied to the joint: the cut direction, wood thickness, required depth below the back, preferred push or pull stroke, and ability to maintain the tooth pattern. A product listing that gives only a tooth count is not enough to establish suitability. We recommend confirming the exact model and its manual, checking whether the blade is filed rip or crosscut, and verifying that replacement blades, files, or sharpening service are available.
For source material, see the official Veritas dovetail saw specifications, the maker’s Small Joinery Saws care and use guide, and Lie-Nielsen dovetail saw information. Specifications and stock recommendations differ by design. Prices and inventory change, so this guide does not quote current prices or assert that one saw is best for every woodworker.
Frequently asked questions
What is a dovetail saw used for?
It is used for short, precise cuts in fine joinery, especially the angled cheeks of dovetail joints. It can also cut small shoulders and other joint features. A coping saw and chisel are commonly used to remove the waste between the saw cuts.
Why does a dovetail saw have a back?
The back stiffens a thin plate and helps it track straight during short cuts. It also limits how deep the saw can cut because the spine contacts the work. Check exposed plate depth against the thickness and position of your joint.
Should I choose a rip or crosscut dovetail saw?
Many dovetail saws use rip-filed teeth because dovetail cheeks are cut largely with the grain. Crosscut teeth can be more efficient for repeated shoulders across the grain. Choose based on the cuts you make and the saw maker’s intended use; a general hybrid profile may be a compromise.
What TPI is best for dovetails?
There is no universal TPI. Fine teeth can suit thinner stock and a smoother cut, while a coarser pattern may clear material faster in thicker stock. Manufacturers differ, so use their material guidance and test the saw on your own wood.
Is a Japanese dovetail saw better than a Western backsaw?
Neither is universally better. Western backsaws typically cut on the push stroke and use a stiff spine; Japanese joinery saws commonly cut on the pull stroke and may use a thinner plate or different back design. Choose the stroke and handle that you can control comfortably and maintain.
Can I use a dovetail saw for crosscuts?
It can make short crosscuts, but many dovetail saws are rip filed and may not cut across the grain as efficiently as a dedicated crosscut backsaw. For occasional shoulders, it may be adequate. For frequent crosscut joinery, consider a saw designed for that tooth profile.
Do I need a dovetail guide?
No. A guide can help beginners establish a consistent angle, but many woodworkers cut by layout lines and practice. If you buy a guide, confirm it fits the saw’s plate, back, and handle. A guide does not replace clear layout or safe workholding.
How deep can a dovetail saw cut?
Usable depth is limited by the exposed plate below the back on a backed saw. Manufacturers may list that dimension. Measure your stock and confirm the spine will not contact the work before the cut reaches its baseline.
Can I sharpen a dovetail saw myself?
Yes, if the teeth are designed to be sharpened and you have the correct file, vise, and technique. Fine teeth require precise filing and set. Follow the manufacturer’s instructions or use a qualified sharpener rather than applying a generic method.
Final thoughts
The best dovetail saws fit the joint size, wood thickness, cut direction, and stroke that you can control consistently. Start with exposed plate depth, then compare backed and backless designs, rip or crosscut filing, tooth pitch, kerf, handle, and sharpening support. A thin plate or high TPI number is not a guarantee of accuracy; layout, workholding, and practice still determine the joint.
For most dovetail work, look for a saw whose teeth and depth match your material and whose handle lets you guide a short, relaxed stroke. Practice on scrap, cut to the waste side of a clear line, protect the teeth in storage, and maintain the saw using its maker’s instructions. A well-matched joinery saw becomes a precise hand tool through repeated, careful use—not through an unverified product ranking.