Best Table Saws for Beginners: A Practical First-Saw Guide
The best table saws for beginners are not necessarily the largest or most powerful models. A good first saw should be understandable to set up, stable in the space where it will be used, equipped with working safety features, and matched to the material and cuts a new woodworker can control. A machine that is difficult to assemble, awkward to support, or confusing to adjust can make learning harder before the first board reaches the blade.
A table saw can make accurate rips and crosscuts when it is correctly configured, but it is a high-risk woodworking machine. The blade remains exposed above the table during a cut, and stock can bind or kick back if the fence, blade, guard, or workpiece is misused. A buyer’s guide cannot replace hands-on instruction. Beginners should read the manual, learn the safety controls, and start with simple cuts on stable material. Do not begin with freehand cutting, narrow pieces without push devices, sheet goods that cannot be controlled, or complex joinery.
This guide focuses on the learning curve, setup, safety systems, fence usability, workspace, and realistic first projects. It does not claim to have tested or ranked models hands-on and does not use current prices or unsupported specifications. The research method is to compare manufacturer manuals and published product details for setup steps, guarding, alignment, stand or bench requirements, fence adjustments, included accessories, and stated capacities, then cross-check basic hazard guidance against OSHA’s Table Saws eTool. The specific manual for your saw must guide operation.
Affiliate disclosure: DailyHomeDecorating.com may earn a commission from qualifying purchases through links in this article. This does not change the price you pay.
Amazon product examples to compare
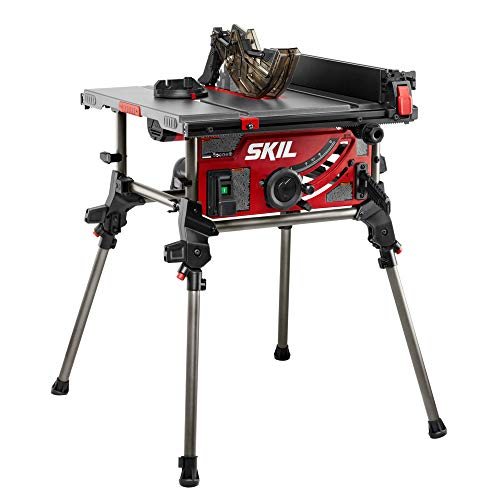
ASIN: B08F9RFJ2K

ASIN: B0CKS6G6TC
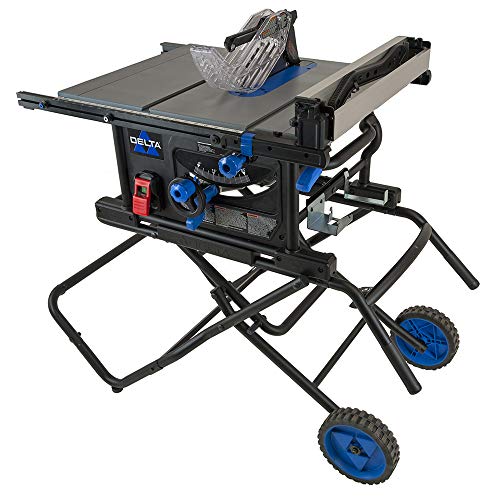
ASIN: B083ZKR6V6
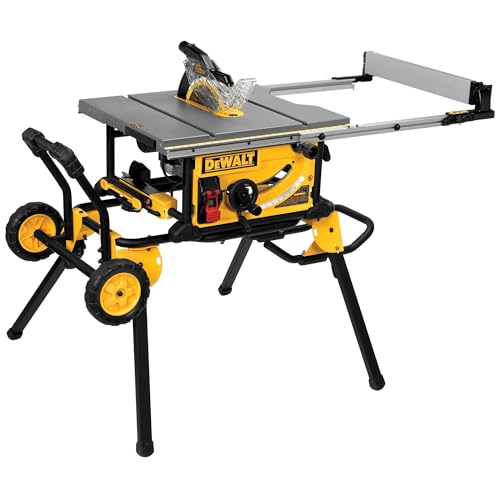
ASIN: B00F2CGXGG
Certain content that appears on this site comes from Amazon. This content is provided “as is” and is subject to change or removal at any time. Product examples and images are supplied through Amazon Creators API; confirm specifications and availability on the current listing.
Table of contents
- What a first table saw should help you learn
- Benchtop, jobsite, and stationary saws
- Safety systems and controls
- Fence usability and alignment
- Workspace, support, and dust
- Research-based comparison method
- Realistic first projects
- Frequently asked questions
What a first table saw should help you learn
A first table saw should make core operations easy to understand: identifying the blade and fence, setting blade height and bevel, installing the guard and riving components, aligning the fence, securing the saw to its support, and shutting the machine off. A beginner benefits from a clear manual, reachable controls, visible scales, and accessories that store with the machine. Fancy electronic features cannot compensate for unclear instructions or a setup that shifts during use.
Start by deciding whether a table saw is the right first tool for your projects. It is designed to guide stock against a fence or through a miter slot for straight cuts. It is not the easiest choice for cutting a full sheet of plywood by yourself; the sheet can be heavy, flexible, and difficult to keep flat across a small table. A circular saw or track saw can break down large panels while they remain supported, then the table saw can handle smaller pieces. See the site’s circular saw guide and track saw guide for those alternatives.
Beginner suitability is about the whole environment. A compact saw may fit a small garage, but needs a stable stand and support for long stock. A larger saw may offer more table area but demand more floor space and safe material handling. A saw that is easy to store may still be frustrating if it takes too long to assemble or lacks a secure fence. Think about where it will live, how often it will move, and what you can safely lift and operate.
Choose among benchtop, jobsite, and stationary designs
Benchtop saws
Benchtop saws are intended to sit on a bench or a compatible stand. They can be a practical starting point where storage space is limited and cuts are relatively modest. The bench or stand must be level, rigid, and secure; placing a saw on a folding card table or unstable stack is not a safe substitute. Check the manual for mounting holes, required fasteners, clearance, and whether the surface can withstand overhanging material.
Smaller tables can limit support around the blade. That matters when guiding long or wide stock, particularly for a new operator who is still learning how material reacts as it reaches the blade. If your typical project involves large panels, plan a safe breakdown method and helpers instead of assuming the tabletop will support them. A benchtop model may suit trim stock and small boards but still require an outfeed stand or a second person for longer pieces.
Jobsite and portable saws
Jobsite saws are designed to be moved and set up across locations. They may include a folding or rolling stand, storage for the fence and guard parts, or retractable support rails. These features can make transport more manageable, but the user must still lock the stand, secure the saw, and verify setup after moving it. Check whether the stand is included, how it folds, and whether the saw is intended to remain attached while being moved.
A portable configuration can be useful in a garage or shared workspace because the saw can be stored between projects. The tradeoff is that a lighter or more compact machine may need additional support and careful placement. A beginner should practice assembly and calibration at home before the first jobsite use. If the fence shifts during transport or the stand feels unstable, stop and resolve it before cutting.
Contractor and cabinet-style saws
Contractor or cabinet-style machines are more oriented toward a dedicated workshop and may offer a heavier base, larger table, or other features for repeated use. They require more permanent space, electrical planning, and sometimes professional assembly. A first-time woodworker should not buy one simply because it looks more capable. Consider whether the shop can support the machine and whether the work justifies the size, setup, and maintenance.
For a broader overview of how table-saw categories differ, use the site’s general table saw guide. A beginner’s priority is not maximum capacity; it is learning safely on a machine that fits their workspace and intended projects.
Safety systems beginners should understand
Before choosing a table saw, learn what each safety component does and how it fits the planned cut. A blade guard covers the exposed blade from above. A riving knife or splitter sits behind the blade to help keep the kerf open as stock passes through. Anti-kickback pawls can engage stock moving backward on compatible setups. A push stick keeps hands farther from the blade when feeding narrow material. Some saws include electronic braking or other safety technology, but features vary and none makes unsafe technique acceptable.
OSHA’s table saw guidance describes risks from blade contact, kickbacks, and flying particles, and discusses guards, push sticks, sharp blades, and supported stock. Its material addresses workplace machine safety and should not be mistaken for a complete consumer operating course. For a specific saw, read the manufacturer’s instructions for guard installation, riving-knife positions, permitted non-through cuts, push devices, and blade changes.
Some cuts require a different guard configuration, but a beginner should not remove a guard because it interferes or seems inconvenient. Learn only the manufacturer-approved setups and use a suitable jig or alternate tool when a cut requires unfamiliar or unguarded operation. If the saw’s manual does not explain a procedure clearly, ask the manufacturer or a qualified instructor rather than improvising.
Blade guard, riving knife, and anti-kickback pawls
The guard protects the area above the table and can help limit contact with the blade. A riving knife or splitter is intended to remain aligned behind the blade and reduce the chance that a kerf closes on it during through-cutting. Anti-kickback pawls are designed to resist backward motion in certain setups. These components must be installed, aligned, and maintained as directed. Never operate with damaged or missing parts.
Riving knives and guards can have multiple positions for different operations. Do not guess which position is right. The exact saw manual describes where the parts belong and which cuts they support. For example, the DEWALT compact table saw manual includes instructions for assembling and adjusting its guard, anti-kickback assembly, fence, and blade alignment. That manual is a model-specific example, not a universal procedure for other saws.
Emergency stop, switch, and restart behavior
A large, easy-to-reach switch can help the operator stop the saw without searching around the table. Learn its location before starting, and make sure no stored accessory blocks it. Some machines have features that affect what happens after power loss; the behavior depends on the model. Review the manual and never assume that turning power back on leaves the saw in a safe state.
Keep the work area clear so the operator can reach the switch and move away if stock binds. Do not place toolboxes, offcuts, or cords in front of the switch. If a switch sticks, fails to stop the blade, or behaves unexpectedly, disconnect power and stop using the saw until it is inspected.
Blade size, height, and bevel: learn the adjustments
Blade diameter and cutting depth determine what stock a saw can cut, but a beginner should compare the manufacturer’s stated capacity with actual projects instead of choosing the largest number. The blade height changes how much tooth is exposed above the work. The correct setting depends on the saw’s manual and cut; do not set the blade at maximum height by default. Learn how to raise and lower the blade and how to lock the bevel before operating.
Bevel adjustment tilts the blade for angled cuts. A beginner can start with simple square cuts and learn the bevel scale later. Scales may require calibration, and a small alignment error can create a joint gap. Practice on scrap and use a reliable square or angle gauge when an accurate bevel matters. Disconnect power before adjusting alignment or changing blades.
Use a blade approved for the saw and suited to the material and operation. Different tooth patterns are intended for ripping, crosscutting, or general-purpose work. A dull, damaged, cracked, or mismatched blade can cut poorly and increase risk. Do not exceed the saw’s maximum blade size or speed rating. Follow the manual for blade installation direction, arbor hardware, and wrench use.
Start with simple, repeatable cuts
For early practice, use straight, manageable pieces with a clean edge and predictable grain. Make one cut at a time and confirm the fence and blade settings before starting. Avoid knots, splits, warping, metal, and unstable stock while learning. Do not begin with thin strips, tiny parts, dados, rabbets, or complex jigs. Those operations add variables that can make it harder to understand what the machine is doing.
Never feed stock freehand without a fence or approved guide. Keep the stock flat against the table and fence, advance it steadily, and use the appropriate push device as the hands approach the blade. If the board binds or shifts, do not force it. Turn off the saw, wait for the blade to stop, and diagnose the setup before continuing.
Fence usability: a beginner needs repeatable setup
The rip fence guides stock parallel to the blade. For a new user, it should be easy to position, lock, and verify. The locking mechanism should hold securely without shifting the fence when engaged. A readable scale and fine adjustment can reduce setup frustration, but the scale must be checked against a measurement and test cut before precision work. Do not trust a fence that slips or locks out of parallel.
Compare whether the fence locks at one or more points and whether its rails need to extend for wider cuts. A rack-and-pinion system may be designed to keep the fence moving in a controlled way, while simpler designs use separate adjustments. The name of the mechanism matters less than whether you can make the adjustment, engage the lock, and confirm the fence stays put. Read the manual for calibration and alignment.
A fence is for guiding stock through a rip cut. It is not automatically a stop for crosscutting. Trapping a cutoff between the fence and blade can create a dangerous bind. Beginners should learn when to use the miter gauge or a crosscut sled instead, and follow a safe configuration described by the manufacturer or instructor. Do not use both fence and miter gauge in a setup that traps the piece unless an approved fixture specifically addresses the risk.
Rip capacity and narrow cuts
Rip capacity is a measurement of the greatest distance between the blade and fence in a stated direction. Larger capacity can help with wide stock, but it does not guarantee a beginner can safely manage a large sheet. Material support and handling often matter more. For narrow rips, use the saw’s intended narrow-rip setup and a push stick or push block that keeps hands away from the blade. If you do not know how to make a narrow cut safely, practice with an instructor or choose a safer alternative.
A push stick should be appropriate for the stock and saw, in good condition, and stored where it is easy to reach. A beginner should practice the hand positions and material path with the saw unplugged. Keep hands out of the line of cut and do not reach over the blade to retrieve a cutoff. Let the blade stop before clearing scraps.
Workspace, stand, and material support
Measure the space the saw needs both in storage and in use. Include the stand, handles, fence rails, outfeed support, dust hose, and room for the longest board to move. A compact saw may be easier to store but still require a clear path for long stock. A folding stand can help in a shared garage, but it must lock and remain stable on a level surface.
The saw should be secured to a rigid support according to its manual. The DEWALT manual is one example that specifies secure mounting on a stable support to prevent movement or overturning. Use the mounting method for your own saw. Do not place it on an unstable table, loose lumber stack, or surface that can tip when a long board overhangs.
Plan infeed and outfeed support for the stock you intend to cut. A roller stand or support table must be level with the saw table and aligned with the material path. If a support is too high or pushes sideways, it can cause binding. Check the path with the saw off, and ask a helper to support large stock only from a safe position. The helper should not pull the workpiece or place hands near the blade.
Large sheets can be especially difficult for a beginner. They flex, block the view, and require control across the full cut. For panel breakdown, a track saw or circular saw on a suitable support may be more manageable before cutting smaller parts on a table saw. The site’s track saw guide and circular saw guide describe those tool categories. Do not attempt to feed a full sheet alone if you cannot keep it flat and supported.
Dust, lighting, and electrical planning
Table-saw dust can obscure a cut line and irritate eyes or lungs. Check for a dust port and compatible extractor, but do not assume collection captures all particles. Use eye protection, hearing protection, and respiratory protection appropriate to the material and workspace. Keep dust from accumulating around vents and moving parts. If cutting treated or engineered stock, identify the material and follow its safety instructions.
Provide bright lighting so the blade, fence, and stock edge are visible without placing a light where it creates glare. Route cords and extractor hoses away from the operator’s feet and the blade area. Use a supply and extension cord consistent with the saw manual. Do not operate in wet conditions or with damaged electrical components.
Research-based methodology
This guide does not claim to have physically tested beginner table saws. The evaluation framework is based on official safety guidance and manufacturer documentation. It compares manual clarity and adjustment sequence; guard, riving-knife and anti-kickback setup; switch access; fence locking and calibration; stand and mounting requirements; table support; push devices and included accessories; and the manufacturer’s published cutting capacity. These criteria address the learning curve and safe setup rather than ranking products by unverified performance.
OSHA’s Table Saws eTool discusses blade contact, kickback, guards, push sticks, support, and keeping hands out of the cut line in workplace operations. DEWALT’s DWE7485 instruction manual illustrates model-specific instructions for assembly, mounting, guard components, fence adjustment, and blade alignment. Use those references for concepts only: follow the manual for the saw you purchase, and get hands-on instruction for operations you have not learned.
Current price and availability are intentionally excluded because they change by seller, region, and bundle. A product listing may show a stand, fence, or safety accessory that is sold separately. Confirm the exact model, included pieces, and accessory compatibility in the manufacturer’s current documentation before buying.
Realistic first projects
Choose early projects that use short, stable stock and simple square cuts. A small shelf, a basic shop spacer, or a simple box component can teach measuring, setting the fence, checking dimensions, and keeping stock flat. Select projects that do not require narrow strips, multiple complex setups, or full-sheet handling. Use material in good condition and make practice cuts on scrap before cutting parts that need to fit together.
Set a modest objective for each practice session. For example, first learn how the fence locks and how the blade height changes with the saw disconnected. Then make a test cut in scrap, measure the result, and compare it with the fence setting. The next session can practice a repeatable cut length or a simple bevel after you understand the manual’s procedure. Learning one control at a time makes it easier to notice when an adjustment is off.
Do not start with a project that depends on thin strips, stopped cuts, non-through operations, or a complex jig. Those may require a different guard or special setup. Learn the saw’s approved operations from the manual and an experienced instructor before attempting them. If a project’s directions use unfamiliar terms such as dado, rabbet, taper, or resaw, research the procedure and hazards before turning on the saw.
Keep a small log of fence settings, blade type, material, and test-cut results. This helps distinguish a measurement error from a setup issue. Do not treat one successful cut as proof the saw is calibrated for every angle, blade, or material. Recheck the setup after transport, blade changes, or impact, and verify accuracy on scrap when dimensions matter.
What a beginner should avoid
A new user should avoid freehand cuts on a table saw. The work needs a fence, miter gauge, or suitable fixture to guide it. Do not crosscut against the rip fence in a way that traps offcut material. Avoid cutting a board that is warped, split, twisted, or too small to support safely. Do not reach over a spinning blade, stand directly in the kickback path, or clear scraps before the blade stops.
Do not remove the guard because it blocks the view or makes a cut inconvenient. Learn how to position the guard and riving knife for the approved through-cut, and use only manufacturer-approved alternatives when a different operation is necessary. Never bypass an interlock or safety device. If you cannot install a safety component or understand the setup, stop and consult the manual or a qualified instructor.
Do not begin with sheet goods, narrow rips, dados, deep cuts, or large awkward stock without instruction and the correct support. A beginner should not use the saw from a ladder, in a cramped area with no emergency access, or while tired or distracted. If a board binds or the fence shifts, switch off the saw and investigate after the blade stops. For jobs that exceed your skill or ability to control the workpiece, hire a professional.
Maintenance and pre-use checks
Before cleaning or adjusting the saw, disconnect it from power. Keep the table and fence surfaces free of pitch, glue, and debris so stock slides predictably. Clean dust from the motor vents, guard, miter slots, and dust ports as the manual permits. Do not use solvents or lubricants that the manufacturer does not approve.
Inspect the blade for cracks, missing teeth, resin buildup, and correct installation. Keep it sharp and use a blade suited to the material and operation. Check fence locking and alignment, blade-to-slot alignment, guard and riving-knife condition, power cord, switch, stand latches, and mounting fasteners. Stop using the machine if a guard or other safety feature is damaged or if the saw moves during use.
Store push sticks, wrenches, fence, miter gauge, and guard parts in their intended holders. Keep the saw dry and protect the blade. If the machine is moved, recheck the stand, fence, and alignment before precise work. A short pre-use checklist is especially valuable for a beginner because it turns setup into a habit instead of relying on memory.
Frequently asked questions
What table saw should a beginner start with?
Choose a saw that fits the workspace, provides clear instructions and working safety components, and can be mounted securely. A compact benchtop or jobsite model may suit a smaller shop, but confirm support needs and included accessories. Capacity should match likely projects rather than the largest advertised cut.
Is a portable table saw good for a beginner?
It can be, if it is stable, set up according to the manual, and paired with appropriate support. Portability can help in a shared workspace, but the user must lock the stand and recheck alignment after moving it. A compact saw may not safely support large stock without additional planning.
Do beginners need a riving knife and blade guard?
Use the guard, riving knife or splitter, and anti-kickback components as the saw maker specifies. They are important safety parts, not optional accessories to discard. Learn the approved configuration for each operation and do not bypass safety systems.
Is a larger saw safer?
Not automatically. A larger machine may offer more support or capacity but can demand more space and stock handling. Safety depends on setup, guards, operator training, stable support, and using the machine within its rated capacity. Choose a saw that you can set up and operate correctly.
What is the easiest first cut to learn?
A simple straight cut on stable scrap is a sensible first practice task after you understand the manual, safety features, fence, and switch. Do not use small pieces or narrow cuts at the start. Ask a qualified instructor to demonstrate safe hand position and feed technique.
Can I cut a full sheet of plywood on a small table saw?
Only if the saw and support system are suitable and you can control the sheet safely. Full sheets are awkward and may block visibility. Many users break them down on a supported surface with a track or circular saw, then cut smaller parts on the table saw.
How do I know the fence is aligned?
Use the calibration procedure in the manual and verify the position with a measurement or test cut. Check that the fence locks without shifting and remains parallel as specified. Recheck after moving the saw or if a cut binds.
Should I remove the blade guard for a cut?
Do not remove it casually or because it is inconvenient. Follow the exact manual for any operation requiring a different setup and use only approved procedures. If you are unfamiliar with a configuration, ask an experienced instructor or choose a different tool.
What protective equipment should I use?
Use eye and hearing protection and dust protection appropriate to the material and workspace. Tie back hair, secure loose clothing, and avoid jewelry that could catch. Follow the manual and local workplace rules where they apply. PPE does not replace guards, safe technique, or training.
What should I do if the board binds?
Do not force it or reach near the blade. Switch off the saw and wait until the blade fully stops, then disconnect power before inspection. Check stock condition, support, fence alignment, blade condition, and setup. If you do not know why it bound, ask a qualified person before restarting.
Does a safety brake make a table saw safe for beginners?
A brake or other safety technology may reduce certain risks on some models, but it does not prevent every injury or make poor technique safe. Understand what the feature does and does not do, keep other safety components in place, and learn proper operation. Do not select a saw solely because it advertises a brake.
Conclusion: choose a saw that supports learning
The best table saws for beginners make the basics clear: stable mounting, usable fence adjustments, accessible controls, properly functioning guards, and instructions that explain setup. A smaller or portable machine can fit a home workspace, but its table and stand may need extra support. A larger saw can offer more workspace but requires room and careful material handling.
Use manufacturer manuals and official safety guidance to compare setup, safety components, fence alignment, and accessories. Start with stable scrap and simple cuts, verify settings, and learn one operation at a time. Do not remove guards or attempt work beyond your training. If you cannot support or control the stock safely, choose a more suitable tool or ask an experienced professional to help.