Amazon product examples to compare

ASIN: B0C9QCCBVWView on Amazon

ASIN: B000X05G1AView on Amazon

ASIN: B0002YVQA2View on Amazon
Certain content that appears on this site comes from Amazon. This content is provided “as is” and is subject to change or removal at any time. Product examples and images are supplied through Amazon Creators API; check the current listing for specifications and availability.
As an Amazon Associate, DailyHomeDecorating.com earns from qualifying purchases.
A submersible sump pump works out of sight, sitting in a pit below your basement floor and moving groundwater away before it can flood the room above it. When it works, you may hear only a brief, muffled hum during a storm.
This guide is written specifically for the submersible type, not for pedestal pumps that keep their motor above the pit. It explains how to judge flow at your real lift height, why switch design matters as much as power, and how pit size quietly limits your options.
In this guide
What to Look for First
Start below the floor, not at the store shelf. Measure your pit, look at how water enters it, and trace where the discharge pipe goes. A powerful pump in a narrow pit with a float that cannot move freely will be less reliable than a modest pump that fits properly and cycles cleanly every time.
Flow Rate
Flow rate is the volume a pump can move in a given time, commonly shown in gallons per hour or gallons per minute. The important number is not maximum flow at zero lift, but the flow the pump still delivers at the height of your discharge.
Think in terms of worst normal conditions, not an average dry week. During a long storm or rapid snowmelt, inflow can rise sharply for hours. Your pump needs enough delivered flow at working head to keep ahead of that inflow with some margin, without being so oversized that it empties a small pit in seconds and short-cycles.
Head Height
Head is the vertical lift from the water level in the pit to the highest point of the discharge, plus resistance from elbows, fittings, and the check valve. This total is often called total dynamic head. As head rises, delivered flow falls, so two pumps with the same headline flow can perform very differently in your basement.
Measure the lift honestly, follow the pipe rather than estimating from floor height alone, and count sharp bends. Then use the manufacturer’s flow-versus-head chart when one is published: find your head on the chart and read the flow available there. Choose a pump that still meets your needs at that point, rather than one that must run at its absolute limit, where flow drops sharply.
Power and Motor Size
Motor power, often expressed in horsepower, is a rough guide to capability, not a guarantee of delivered flow. A well-designed smaller motor with an efficient impeller can outperform a larger motor with poor hydraulic design at your specific head.
Consider duty as well as size. A home that pumps for long stretches in wet seasons needs a motor rated for repeated, demanding use. Because a submersible motor is cooled by the water around it, it also needs to stay submerged while running; a pump that regularly runs in very shallow water can overheat.
Materials and Build Quality
A sump pump lives in damp, gritty water that may carry sand, small stones, and debris from footing drains. Housing and impeller materials therefore affect how long it lasts. Cast metal housings tend to be heavy, durable, and good at shedding heat, while engineered thermoplastic housings resist corrosion and are lighter to lift out for service.
Check the intake design as well. A clogged intake will starve even a strong pump, and a pump that draws from the bottom needs clearance so it does not sit in sediment. Also look at cord length: it must reach a protected outlet without an extension cord, and a damaged cord on a submerged appliance is a reason to stop using the pump, not to tape it.
Pit Size and Switch Clearance
Pit diameter and depth limit which pumps and switches will work reliably. A submersible pump plus a tethered float needs room for the float to rise and fall in a wide arc without catching on the pit wall, the pump, or the incoming drain tile.
Depth matters too. A deeper pit allows a longer on-off range, so the pump moves more water per cycle and runs less often. A shallow pit forces short cycles and leaves less buffer if inflow suddenly spikes.
Types of Submersible Sump Pumps Explained
All submersible sump pumps share the same basic arrangement: a sealed motor and impeller sitting in the pit water. They differ mainly in how they sense water level and turn on, and that difference drives much of their real-world reliability.
Submersible vs. Pedestal: Why the Distinction Matters
A pedestal pump keeps its motor on a column above the pit, with only the impeller below. It can be easier to service, but the motor noise is fully exposed to the room and the column needs clearance above the floor.
Tethered Float Switch Pumps
A tethered float is attached by a flexible cord and floats on the surface, tilting to start and stop the motor as the level changes. The design is simple and allows a wide pumping range, which suits larger pits.
Vertical Float Switch Pumps
A vertical float slides up and down on a fixed rod or guide attached to the pump. Because its travel is contained, it needs far less side clearance and is often the better answer for narrow pits.
Electronic and Sensor Switch Pumps
Some pumps use electronic sensors rather than a moving float to detect water level. With no swinging or sliding part to jam, they can work in very confined pits. Their considerations are different: sensors must stay clean to read correctly, the electronics add complexity, and behavior in dirty water varies by design.
Primary Pumps and Backup Systems
The primary pump is the everyday, line-powered pump this guide focuses on. Many homes at real flood risk add a backup: a battery-powered secondary pump or a second pump set slightly higher. A backup only helps if it has its own float, a correctly arranged discharge path, and regular testing.
Key Features That Actually Matter
The Check Valve Connection
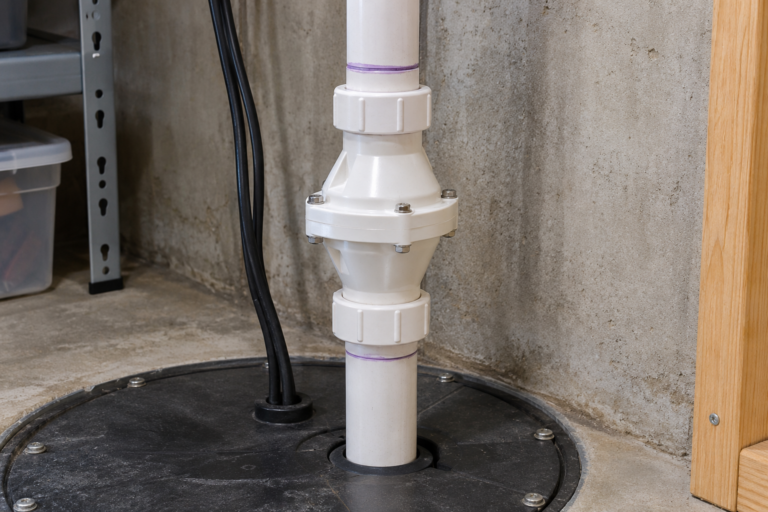
Every submersible installation needs a check valve in the discharge line to stop water in the vertical pipe from flowing back into the pit when the pump stops. Without one, the same water gets pumped again and again, wasting energy and multiplying cycles.
Discharge Size and Solids Handling
Discharge outlets on residential submersible pumps are commonly sized for standard sump discharge piping, and reducing that size with improvised adapters adds resistance and cuts flow. Keep the line as direct as the house allows. Solids handling matters too: pumps differ in the size of small debris they can pass without clogging.
Thermal Protection
Look for built-in thermal overload protection, which shuts the motor down if it overheats rather than letting it burn out, and for clear guidance on duty cycle. Note how the pump restarts after a thermal stop or power cut. A pump that protects itself and restarts predictably is worth more than a slightly higher flow figure.
Noise, Vibration, and the Pit Lid
Submersible pumps are the quiet option, but they are not silent. Noise usually comes from vibration transferred into rigid piping, the check valve closing, and water turbulence in the pit. A snug pit lid reduces airborne noise, keeps out debris, and helps keep children and pets away from the pit.
Cord, Plug, and Switch Serviceability
A switch is a moving or sensing part immersed in dirty water, and on many pumps it is the first component to fail. Consider whether the switch can be replaced without discarding a working motor, and how the manufacturer expects you to test it. A design that lets you test the motor directly can be a genuinely useful diagnostic feature.
How to Choose by Use Case
Finished Basements and Living Space Above
If the pit is under or near living space, prioritize quiet operation, a contained vertical or electronic switch that cannot snag, and a fitted lid. Reliability still comes first, but a pump you can hear through the floor at night will tempt someone to unplug or ignore it.
Unfinished Basements With Heavy Inflow
Where inflow is strong and the pit is generously sized, focus on delivered flow at your head, a switch with a wide range to avoid short cycling, and construction that tolerates grit. A tethered float can work well here precisely because there is room for it.
Narrow or Shallow Pits
Space dictates the choice. Measure first, then favor a compact pump with a vertical float or electronic sensor, and verify the on and off levels fit within the pit depth so the pump neither runs dry nor lets water rise into the drain tile inlets before starting.
Homes That Lose Power in Storms
The moment a sump pump is needed most is often the moment power fails. If outages are common, make the primary pump decision together with the backup decision: a battery backup pump with a maintained battery, an alarm that alerts you when the backup runs, and a habit of testing before storm season.
Safety: Electricity and Water Together
GFCI Protection and the Right Outlet
Plug a submersible sump pump into a ground-fault circuit interrupter (GFCI) protected outlet, as electrical codes for this kind of location generally require. The GFCI monitors for current leaking where it should not go and cuts power quickly to reduce shock risk.
Use a single, properly rated outlet rather than a power strip or extension cord. Extension cords add connections that can fall into the pit, overheat, or cause voltage drop that strains the motor. If the nearest suitable outlet is too far away, the correct fix is to have an electrician install one in the right place.
Disconnect Power Before Any Work
Always unplug the pump and confirm power is off before opening the pit, lifting the pump, adjusting the float, or working on the discharge line. Water in the pit can be energized by a fault you cannot see. Never reach into pit water while the pump is connected to power, and never handle a pump by its cord to lift or lower it.
Keep the Area Safe for Others
Fit the pit lid whenever the system is in service. An open pit is a trip and fall hazard and an invitation for objects to drop in and jam the float. Tell everyone in the household where the pump plugs in and why it must never be unplugged to free up the outlet.
Installation Tips That Prevent Problems
Good installation is mostly careful placement and honest testing. Set the pump level on a firm, flat base in the pit, such as a clean paver or the manufacturer’s recommended stand, so it does not tip, vibrate against the wall, or sink into sediment.
Install the check valve in the discharge line in the orientation and position the manuals specify, typically on the vertical run above the pit, and use the correct pipe size throughout. A small relief detail is required on some installations to prevent air lock, where trapped air below the check valve stops the pump from moving water; follow the pump manual on this point exactly, because the right arrangement depends on the design.
Arrange the cord with slack for service but no loose loops that can fall into the water or foul the float, and keep the plug connection above the pit, dry, and accessible. Once everything is connected, test with real water: fill the pit until the pump starts, watch the full cycle, confirm the check valve prevents a rush of backflow at shut-off, and repeat several times.
Care and Maintenance
Submersible pumps usually give warning before they fail: longer run times, new noises, or a float that hesitates. Every few months, open the lid, inspect the pit, and remove grit, stones, and debris that could jam the impeller or float. Pour in enough clean water to run the pump through a full cycle and confirm it starts and stops at sensible levels.
Once or twice a year, with power disconnected, lift the pump out and clean its intake, check the impeller for trapped string or debris, inspect the cord and housing, and clean the float or sensor surfaces so they move or read freely.
Keep a brief note of test dates and anything that changed. In homes where a failure would be costly, consider proactive replacement of an aging primary pump before storm season rather than waiting for it to fail during the storm it was bought for.
Common Mistakes to Avoid
The most common buying mistake is shopping by maximum flow or horsepower alone and ignoring flow at your head, so the installed pump moves far less water than the box suggested. The second is ignoring the pit: fitting a tethered float into a narrow basin where it must eventually hang up, or placing the pump so the float rubs the wall on every cycle.
Installation mistakes are just as predictable. Omitting the check valve, installing it backwards, reducing the discharge size, or leaving no way to disconnect the pump for service all create work for later. So does plugging the pump into a shared, unprotected outlet or an extension cord. Finally, many owners never test the system until a storm tests it for them.
Why submersible design changes the questions you ask
A submersible pump lives in the water it pumps, and that single fact rearranges the buying checklist. Cooling comes from the surrounding water, so the pump depends on staying submerged to the level its maker specifies; a pit that routinely drains to near the pump’s base asks more of the motor than a deeper pit does. Sealing becomes a lifetime issue rather than a detail, because the motor housing, the cord entry, and the shaft seal are all that stand between the water and the electrics for years at a time. And because the pump sits under a lid at the bottom of a pit, you will not casually inspect it the way you might a pedestal unit — which is why the testing routine matters more for submersibles, and why build materials deserve weight in the decision.
Cast iron housings shed heat into the water well and shrug off the knocks of installation and service; thermoplastic housings are lighter, resist corrosion in aggressive water, and suit shallower duty. Neither material is a verdict on quality by itself. What matters is the match: iron where heat and longevity dominate, quality thermoplastic where the water chemistry attacks metal or the pump will be lifted in and out for utility work. The examples in this guide span both approaches deliberately, because pits and water differ more than marketing categories suggest.
The quiet advantage, used honestly
Submersibles are chosen again and again for finished spaces because water and a pit lid muffle them. But quiet is a system property, not just a pump property. A silent pump under a hollow lid, discharging through a check valve that slams, will still announce every cycle to the bedroom above. When you plan a submersible installation under living space, budget attention for the lid seal, a gently closing valve, and discharge pipe secured so it cannot drum against a joist. Done together, those details deliver the near-silence the design promises; done piecemeal, owners often conclude wrongly that the pump itself is noisy.
Matching the examples to pit shapes and duties
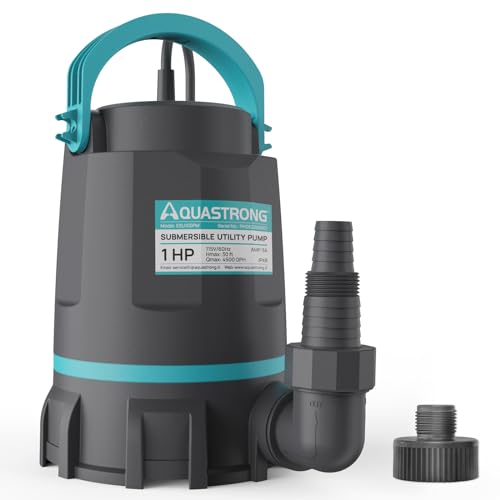
The AQUASTRONG example represents the high-flow end of this guide: a pump for pits with serious inflow, where the priority is moving a large volume against a real lift without falling behind in a storm. The WAYNE example occupies the classic middle — a dedicated sump pump sized for the standard residential pit and the standard storm, with a switch arrangement chosen for reliability in that setting. The Liberty example, with its vertical magnetic float, answers a specific geometry problem: the narrow pit where a tethered float cannot swing and a wide switch differential is impossible. Its lesson generalises — in a tight pit, switch design is the purchase, and motor size is secondary. The Superior Pump example is a utility design rather than a dedicated automatic sump pump, and it earns its place in the comparison for a different reason: many households first meet submersible pumping through a utility pump used for draining, transferring, and emergencies, and understanding where a utility pump’s manual operation and shallower draw-down help — and where an automatic sump pump’s switch and continuous-duty design are non-negotiable — prevents the expensive mistake of installing the handy pump in the critical role.
Reading flow claims across brands
Every brand in this category prints a large flow number, and every one of those numbers is measured at little or no lift. Your basement imposes a specific lift: the vertical distance from the pit’s water level to the discharge exit, plus friction from elbows and the check valve. To compare the examples fairly, find each maker’s published flow at the head height closest to yours and compare those figures instead. A pump that looks weaker on the box can be stronger at your lift, because pump curves have different shapes. If a listing does not publish a curve or a flow-at-head table, treat that absence as information and favour the maker who shows their working.
Installation details specific to submersibles
Set the pump on a flat, solid base — a brick or a purpose-made stand keeps it off the pit floor’s sediment and holds the intake clear. Route the cord so it cannot drift into the float’s travel path, and never lift the pump by its cord when servicing; that habit quietly damages the seal the whole design depends on. Drill the small relief hole in the discharge pipe just above the pump if the maker directs it, to prevent air lock, and confirm the check valve’s arrow points away from the pump before the lid goes on. Then run the system through several full cycles with a hose or buckets before you call the job finished, watching the float through its whole travel for any contact with the pit wall, the inlet, or the cord.
When the pit itself is the problem
Sometimes the honest conclusion of a pump search is that the pit needs work first. A pit too small for the inflow will short-cycle any pump you install; a pit with a crumbling base feeds grit into every intake; a pit with no lid in a finished room is a humidity and safety problem no pump solves. Enlarging or relining a pit is unglamorous work, but it is done once, while a pump fighting a bad pit is replaced repeatedly. If two pumps in a row have lived short lives in the same pit, suspect the pit and the discharge before suspecting the third pump.
Living with the pump: a realistic service calendar
Quarterly, lift the lid and look: water clarity, sediment depth, float freedom, and any oily sheen that would suggest a seal weeping. Twice a year, run the pour test described in this guide and exercise any backup system in the same visit. Annually, clean the intake screen, check the discharge exit outside for blockage or ice damage, and confirm the alarm still sounds. Keep the pump’s manual, the install date, and the measured lift recorded together. Submersible pumps typically serve for years without attention, which is precisely why a light calendar matters — the failure mode of a forgotten pump is to be discovered by water, and a ten-minute routine is what keeps the discovery on your terms instead.
Solids, sediment, and what your pit water is really like
Sump water is rarely clean water. It carries silt from the foundation drains, grit from the pit base, occasional debris that arrived with construction or a flood, and in some homes the discharge of a water softener or a laundry. Each contaminant argues for a different detail in the pump. Silt argues for an intake that sits clear of the pit floor and a base that resists clogging. Grit argues for impeller materials and clearances that tolerate abrasion. Debris argues for the solids-handling capacity the maker states — and for honesty about whether your pit ever produces anything like it. Read the examples in this guide against your pit’s actual water, which you can inspect any time you lift the lid after rain: if the water runs clear and the base is clean, you are buying for the gentle case and can prioritise quiet and efficiency; if it runs cloudy with sediment, buy for that instead.
The weep hole, the air lock, and other small mysteries
Owners sometimes meet a pump that runs but does not pump after a service or replacement, with the motor sounding healthy and the pit staying full. A common cause is air lock: air trapped in the pump volute because the small relief hole the maker specifies in the discharge pipe was never drilled, or has clogged with sediment. The fix is in the manual — a small hole in the pipe just above the pump, angled as directed, which bleeds the air and shows itself as a small stream into the pit while the pump runs. That stream alarms owners who do not know it is deliberate. Knowing about it in advance turns a midnight panic into a nod, and checking the hole during annual maintenance prevents the problem entirely.
Two pumps in one pit: the primary-and-backup arrangement
Where the risk justifies it, the strongest arrangement is two pumps sharing one pit with staggered switches: the primary set to handle ordinary inflow, the backup set a few inches higher so it runs only when the primary is overwhelmed, has failed, or the power arrangement differs between them — typically a battery unit as the second pump. The staggering is the intelligence of the system: the higher float is simultaneously a capacity reserve, a failure detector, and, if wired to an alarm, an announcer that the primary needs attention. Installation discipline matters more here than anywhere: both floats must travel freely without fouling each other, the discharge lines and check valves must be arranged so one pump cannot pump water backward through the other, and the pit must be large enough for the hardware — a cramped double installation that tangles its floats is worse than a single pump installed well.
Sizing the backup honestly
A battery backup does not need to match the primary’s full performance in most homes; it needs to hold the line against ordinary inflow for the expected outage duration, because the extreme storm and the long outage rarely peak together. Size it from your observed inflow in steady rain and the runtime arithmetic of its battery at that duty, and be honest about the age of the battery in that arithmetic — a three-year-old battery is not the capacity its label promised when new. Where inflow is genuinely heavy, the calculus changes and a larger backup or a second power strategy earns its cost. The pit’s behaviour in your notes, gathered across a season, is what separates that decision from a guess.
Noise travels: isolating the installation from the house
Even a quiet submersible can be heard if the installation couples it to the building. The discharge pipe rigidly strapped to a joist transmits vibration into the floor above; a pit lid that fits loosely drums; a check valve closing sharply sends a thump through the water column and the framing together. The remedies are small and cumulative: secure the pipe firmly but with the maker’s clearances, seat the lid on a gasket or seal, choose a valve designed for gentle closing where night-time cycling bothers sleepers, and keep the pump standing true on its base rather than leaning against the pit wall, which turns the whole pit into a sounding board. Do these together and a submersible installation approaches the silence its design promises — the pump becomes something you verify by lifting the lid, not something you hear through the floor.
When replacement beats repair, stated plainly
Submersible sump pumps are largely sealed units, and most internal failures — motor, seal, windings — are not economical repairs for a homeowner, even where parts exist. Switches, floats, and check valves are the serviceable layer, and a pump whose problem is confined to them deserves the repair. A pump with a breached seal, oil in the pit water, persistent tripping of its protection, or a history of overheating has told you its service is ending; replace it on your schedule, in dry weather, with the measurements already recorded. Keeping the old pump’s model and the pit dimensions on file makes that replacement a shopping trip instead of a research project conducted standing in water.
A buyer’s final walk-through before ordering
Before ordering, state the four facts this guide has built its advice on: your pit’s dimensions, your measured lift, your water’s character — clear or sediment-bearing — and the switch geometry your pit allows. Check the candidate against each in turn: flow at your lift from the maker’s curve rather than the box’s headline, materials against your water, switch travel against your pit’s width with the float’s path drawn mentally through its full arc, and the discharge size against your existing pipe. Add the service layer — check valve, relief hole, lid — to the same order rather than to a later intention. A submersible bought against four facts and installed with its service layer complete is the version of this purchase that owners forget about for years, which is the highest praise anything in a pit can earn.
The sound of a healthy system
Learn your installation’s normal sounds in its first week: the soft start, the steady run, the switch’s click, the valve’s gentle close. Submersible systems are quiet by design, so changes carry information — a longer run, a new vibration, a valve that has begun to thump. You will not need a schedule to notice; you will notice because you know the baseline. That is the final argument for the testing routine threaded through this guide: it is not maintenance for its own sake, but the calibration of the owner’s ear, which is the monitoring system that never sleeps.
A short history of the pit you are standing over
Before the new pump goes in, spend five minutes learning the pit’s own history, because pits remember what owners forget. Look at the waterline stains on the wall: they record the highest the water ordinarily stands, and a stain far above the switch’s on-level tells a story of a past failure or a past flood worth knowing about. Look at the base for the sediment’s depth and character, at the inlet tiles for their condition, and at any previous pump’s abandoned fittings for evidence of how the last installation was arranged and why it may have ended. If the house is new to you, the pit is one of the few honest documents it keeps. Read it, photograph it, and let what it says — about inflow, about sediment, about the last failure — have the final word in the choice this guide has been building toward.
Submersible pumps in outbuildings, crawl spaces, and second pits
The guidance in this guide was written for the basement pit, but submersible pumps serve the same design in other stations around a property, and the differences are worth naming. A crawl-space pit fights access: choose the pump and switch for reliability over refinement, because every service visit is an expedition, and fit the alarm you will actually hear in the house above. An outbuilding or garage pit fights temperature: freezing reaches it sooner, so the discharge review from the winter section applies with double force. A second pit serving a separate wing or an addition fights neglect — it is the pit nobody lifts a lid on — and deserves the lid log and the pour test most of all. The sizing discipline does not change: pit, lift, water, switch. What changes is which neglect the installation must be designed to survive, and naming that neglect in advance is most of designing against it.
Effluent, sewage, and the boundary of this guide
A necessary boundary deserves plain statement: the pumps in this guide are sump pumps, built for groundwater and drainage water, and they are not sewage pumps. A pit that must handle sewage or true effluent — with solids, fibrous material, and the pathogens that come with them — requires a pump designed, rated, and plumbed for that duty, with the discharge and venting arranged to code, because the failure modes are sanitary rather than merely wet. Homeowners sometimes discover a bathroom has been plumbed toward a sump pit by a previous era’s improvisation; that discovery is a plumbing correction waiting to happen, not a reason to buy a stronger sump pump. Keep the categories clean — sump water to sump pumps, effluent to effluent pumps, sewage to sewage pumps — and each system will do its own job with the reliability its design intends. Where you are unsure which water your pit receives, that uncertainty itself is the finding to resolve first, before any purchase in this guide is made.
More questions about submersible pumps
Can a submersible pump handle a laundry discharge in the same pit?
It depends on the pump’s design and the local rules, and the distinction matters. A dedicated sump pump is built for groundwater; laundry water carries lint, detergent, and warmth that some sump designs tolerate poorly, and some jurisdictions require laundry discharge to be handled as effluent by a pump rated for it. If your pit receives laundry water, choose a pump whose maker explicitly rates it for that duty, keep the intake screened against lint, and shorten your inspection interval, because lint builds quietly and a float fouled by it fails silently.
Why does my pump sometimes run for a few seconds with no rain?
Short, weather-independent cycles usually mean water is returning to the pit: a check valve leaking the riser’s column back after each cycle is the classic cause, and a slowly dripping supply line or a water heater’s relief discharge into the pit are the others worth ruling out. Watch the pit after a cycle ends — if the level climbs without inflow from the drain tiles, the water is arriving from the house side, and the fix is plumbing, not pumping.
Is a bigger discharge pipe always better?
Within reason and the maker’s specification, a full-sized, short, straight discharge preserves the pump’s rated performance; an oversized or convoluted one adds cost and sometimes air-trapping rises without adding flow, because the pump’s outlet and curve set the ceiling. The gains live in removing elbows and restrictions, not in diameter for its own sake. Follow the maker’s stated discharge size and spend your effort on the route.
How do I know the float is set at the right levels?
The on-level should sit below the drain-tile inlets with margin, so the tiles never stand full, and the off-level should keep the pump submerged to the depth its cooling requires, as this guide’s installation section sets out. Observe three full cycles: if the pump gulps air at the end, the off-level is too low; if water stands near the inlets between cycles, the on-level is too high. Adjust within the maker’s method, one change at a time, and re-observe.
The pit as part of the house’s structure
It is worth ending the technical discussion with the pit itself, because owners treat it as a hole and it behaves as a component. Its depth decides the switch geometry available to you; its diameter decides which pumps and how many can live in it; its base decides how much sediment the intake must be lifted above; and its lid decides noise, humidity, safety, and whether radon and soil gas have an open path into the house where local conditions make that a concern. A sealed, gasketed lid on a sound pit improves every one of those at once, and it is among the cheapest upgrades in this entire subject. When a submersible system disappoints, the experienced eye checks the pit with the same suspicion as the pump — and a surprising share of the time, the pit is where the answer was waiting.
Keeping a service log on the lid
Tape a card inside the pit lid and write on it, in pencil, the pump’s model, its install date, the measured lift, and the date of every test and what the test showed. Five lines a year. That card converts the next decade of ownership — and the next owner — from archaeology into reading. It is the smallest recommendation in this guide and, across a house’s life, possibly the most valuable one.
Frequently Asked Questions
Are submersible sump pumps quieter than pedestal pumps?
Generally, yes. A submersible motor runs underwater beneath a pit lid, which muffles its sound, while a pedestal motor sits above the floor in the open room. Installation quality still matters: rigid piping, a slamming check valve, and a pump vibrating against the pit wall can make a submersible system noticeable, and those are fixable installation issues rather than a flaw of the type itself.
What size pit do I need for a submersible sump pump?
The pit must fit the pump body plus clear working room for its switch. A vertical float or electronic sensor needs the least side clearance, while a tethered float needs room for a wide swinging arc. Measure your pit’s inside diameter and depth before shopping, and check any candidate pump’s stated minimum pit dimensions in its manual.
How do I choose between a tethered and a vertical float switch?
Choose based on space and cycling. A tethered float gives a longer on-off range and fewer starts, but needs a wide, unobstructed pit to swing safely. A vertical float works in narrow pits and moves predictably, at the cost of shorter, more frequent cycles. Cleanliness matters for both: grit and slime that coat a float or its guide can cause sticking in either design.
How long should a submersible sump pump run in each cycle?
There is no single correct run time, because it depends on pit size, switch range, inflow, and delivered flow. Very short runs of a few seconds repeated constantly suggest short cycling from a shallow switch range or an oversized pump, while a pump that runs without lowering the water level may be undersized at your head, air-locked, or blocked.
Do I really need a battery backup pump?
If your basement is finished, stores valuables, or has ever flooded during a power outage, a backup is strongly worth considering. Storms that bring the heaviest inflow are the same storms that cut power. A backup pump with a maintained battery and an alarm covers that gap for a limited period, and a simple high-water alarm is the minimum addition for any home that cannot afford a wet basement.
When should I replace a submersible sump pump instead of repairing it?

Replace it when the cord or housing is damaged, the motor trips protection repeatedly, the switch fails and cannot be serviced separately, or delivered flow has clearly fallen despite cleaning. Also consider planned replacement when a pump is aging and your basement’s risk is high: failing during a storm costs far more than the same pump bought and installed on a dry weekend.
Submersible Sump Pump to Compare
- Liberty Pumps Model 257: A 1/3-hp cast-iron sump and effluent pump with a vertical magnetic float, suited to compact pits. Compare the 10- or 25-foot head version against the discharge height. Amazon exact-model search · Manufacturer specs.
Check flow at actual lift and confirm the float moves freely in the basin.
Conclusion
The best submersible sump pumps are the ones matched to the pit in front of you: enough delivered flow at your real head height, a motor and materials suited to your water, and a switch style that can move freely in the space you actually have. Measure the pit and the lift first, read flow at head rather than headline flow, insist on GFCI protection and a proper check valve, and test the finished system with real water before you trust it. Shortlist a few pumps that meet those criteria and compare their manuals, switch designs, and service options. Chosen that way and tested a few times a year, a submersible pump stays what it should be: quiet, hidden, and ready on the one night it really matters.