Best Bone Saws for Hunting: How to Choose a Saw for Field Processing
The best bone saws for hunting are small, controllable tools that help with specific game-processing cuts: opening a brisket, splitting a pelvis when appropriate, or portioning bone-in sections. They are not used for every step of field dressing. A sharp knife is usually the more suitable tool for skinning and careful work around organs and meat. The saw should come out only when a bone cut is useful, and its teeth should stay clear of meat intended for the table whenever possible.
For hunters, saw selection is about more than tooth shape. A compact folding saw may pack easily, while a rigid frame can keep a blade under tension. Replaceable blades can simplify maintenance, but the replacement must fit the exact handle and task. A cleanable, corrosion-resistant design matters because the tool may encounter blood, moisture, cold, and field debris. This guide covers those tradeoffs, safe handling, cleaning, transport, and what distinguishes a game saw from a medical bone saw or a general-purpose hacksaw.
This is a research-based buying guide. It does not claim hands-on testing or rank named models by unverified performance. Check the current manufacturer documentation, hunting regulations, and local wildlife guidance for the species and area where you hunt.
Affiliate disclosure: DailyHomeDecorating.com may earn a commission from qualifying purchases through links in this article. This does not change the price you pay.
Amazon product examples to compare

ASIN: B008T2M65I

ASIN: B002LMKRTE

ASIN: B09Y74B2HB
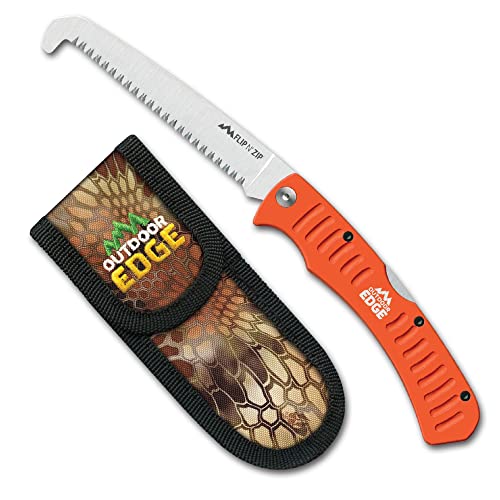
ASIN: B003ZSHCJG
Certain content that appears on this site comes from Amazon. This content is provided “as is” and is subject to change or removal at any time. Product examples and images are supplied through Amazon Creators API; confirm specifications and availability on the current listing.
Table of contents
- Quick guide: choose by field task
- Types of hunting bone saws
- How to choose a bone saw
- Blade teeth, length, and replacements
- Using a saw during field processing
- Food hygiene, cleaning, and corrosion
- Transport, storage, and maintenance
- How hunting saws differ from other saws
- How to compare options
- Frequently asked questions
Quick guide: choose by field task
| Field need | What to consider | Limit to remember |
|---|---|---|
| Light pack and occasional bone cuts | Compact folding or detachable saw, secure lock, sheath | Small handles and short blades can be tiring on larger bones |
| Blade tension and controlled strokes | Rigid or takedown frame with compatible replaceable blade | Frame size may be bulkier to carry and clean |
| Remote hunt and repairability | Common replacement system, protected spare blade, simple fasteners | Brand-specific blades may be difficult to source in the field |
| Hygienic processing at camp | Easy-to-disassemble handle, corrosion-resistant materials, cleaning access | Crevices and sliding mechanisms can trap tissue and residue |
| Many animals or processing at home | Comfortable grip, serviceable parts, dedicated meat-processing setup | A specialized butcher’s saw may be more appropriate than a pack saw |
First decide whether the saw will travel in a pack, ride in a vehicle, or stay at a processing station. Then decide which cuts you expect to make. The smallest tool may be enough for occasional, limited cuts; a full-size frame may be easier to control during repeated use. If your method avoids splitting bones and you plan to debone, a saw may be optional. Field methods vary by species, regulation, terrain, and personal training, so use local wildlife-agency instructions rather than assuming every cut is required.
Types of hunting bone saws
Compact folding saws
A folding hunting saw stores its blade inside a handle, reducing the chance that teeth snag clothing or puncture a pack. A positive lock should hold the blade open during the cut and keep it closed during transport. Check how the lock releases when hands are wet or gloved, and inspect for play at the pivot. A blade that folds under load can injure the operator or contaminate the cut.
Compact saws suit a light field kit when only occasional bone cuts are anticipated. Their short blade and handle may require more strokes and can be less comfortable on large animals. Avoid choosing solely by folded length; consider blade reach, grip clearance, tooth direction, the area around the cut, and whether the tool can be thoroughly cleaned. A folding pivot can collect debris, so the design should permit inspection and cleaning without exposing the user to sharp teeth.
Rigid-frame and bow-style saws
A rigid frame holds a relatively narrow blade under tension. The frame can help keep the blade straight through a cut and keep the user’s fingers farther from the teeth. A frame saw may offer more leverage and a longer stroke than a tiny folding model. It can also be awkward to pack and may be difficult to maneuver where the carcass is still intact or the cut is near surrounding tissue.
Look at how the blade is tensioned and replaced. A loose or damaged frame, poorly secured pin, or blade that is not seated can twist or release during use. The frame should have smooth surfaces and accessible joints for cleanup. If the saw disassembles for transport, confirm that reassembly is straightforward with cold hands and that the blade cannot fall out if the tool is bumped.
Take-down and replaceable-blade systems
Some hunting saws use a handle or frame that accepts interchangeable blade types. A dedicated bone blade can be swapped for a wood blade or another purpose-built accessory where the system permits. This can make one handle serve more than one camp task, though it also increases the need to label, store, and keep the blades clean and separate. Always verify the exact handle-to-blade compatibility. Similar-looking connectors may not interchange, and a blade must lock positively before use.
For example, TRUE’s official Swift Edge replacement blade page describes a hunting bone blade and identifies the handles with which it is compatible. That manufacturer-specific system illustrates why an exact compatibility list matters; it does not establish that every hunting saw uses the same interface. See the maker’s replacement blade information and confirm the current model number and instructions before buying a spare.
Dedicated butcher’s and meat-processing saws
A larger butcher’s saw may be more comfortable for repeated processing at home or in a clean, controlled camp setup. Such saws may use longer blades and a frame designed for frequent bone-in cuts. They are less suited to a minimal backcountry pack. If you process several animals, compare cleanability, blade availability, handle ergonomics, and the ability to sanitize the frame, rather than treating a compact field saw as an all-purpose shop tool.
Use separate tools for different hygiene stages when practical. A saw used on a hide, skull, or potentially diseased tissue should not be casually returned to cuts intended for meat. Local wildlife agencies may recommend specific precautions for chronic wasting disease or other animal-health risks. Check the rules for your region and species.
How to choose a hunting bone saw
1. Define whether you need to cut bone at all
Field dressing and butchering approaches differ. Some hunters use a knife and remove quarters without splitting the carcass; others make a small number of bone cuts to open the brisket, pelvis, or backbone. The animal’s size, the intended pack-out, available time, weather, and local requirements may influence the technique. A saw is useful when its cut solves a real problem, but adding one to the kit does not mean it must be used for every animal.
Before selecting a tool, review the species-specific guidance from your wildlife agency. Washington Department of Fish and Wildlife, for example, lists a game saw among possible equipment and emphasizes keeping meat clean and utensils clean. Its recommendations are regional guidance and should not be assumed to replace local regulations. Review the agency’s food-safety guidance for game meat and your state or provincial equivalent.
2. Balance packed size and cutting control
A short folding saw takes little room, but the handle must still give a secure grip and enough clearance for the knuckles. A longer blade may cut more smoothly but occupy more space. A frame saw can offer stable blade tension but needs room to maneuver and transport. Handle shape, glove compatibility, and whether the saw can be controlled with the user’s non-dominant hand are worth evaluating before the hunt.
Weight is only one factor. A slightly heavier tool with a rigid lock and accessible cleaning surfaces may be easier to use safely than an ultralight model with a cramped grip. Think about the clothing and gloves you will wear, cold and wet conditions, and whether you can deploy and stow the saw without touching the teeth. For a broader look at compact manual saws carried outdoors, see our camping saw guide. Its cutting applications differ, but its portability and blade-protection considerations can help frame pack decisions.
3. Inspect the lock, frame, and grip
For a folding model, inspect the hinge, lock engagement, and blade play. The blade should remain fixed under normal cutting pressure and should not close unexpectedly. For a framed saw, check how the blade seats at both ends and whether the frame resists twisting. For a detachable-blade handle, verify the locking mechanism and make sure the release is protected from accidental activation. A secure attachment is a safety feature as well as a convenience.
Grip texture should remain useful when damp without creating deep grooves that are difficult to clean. Smooth, rounded transitions and a handle that can be disassembled may be easier to wash and dry. If the handle contains hollow cavities, examine whether fluid can enter and whether it can be fully drained. A design that feels good in a store should also be usable with gloves and cleanable after contact with blood, fat, and tissue.
4. Check blade length, kerf, and tooth pattern
Blade length controls reach and stroke. A blade too short for the cut may cause the frame or hand to bump the carcass; a longer blade may be harder to guide in a confined space. Tooth patterns vary: some are intended to cut on the pull stroke, push stroke, or both, and some are shaped to reduce binding or clear material. Follow the manufacturer’s description rather than inferring direction from appearance.
Kerf—the width of material removed—can influence control and effort. A wide kerf may clear debris readily but remove more bone. Tooth geometry can affect cutting behavior, but claims about “faster” or “cleaner” cuts need support from reliable testing under comparable conditions. Choose the blade for the intended bone and saw system; do not substitute a wood pruning blade just because it fits. If the maker offers multiple blades, check each one’s task and compatibility.
5. Consider replaceable blades and field spares
Replaceable blades make it possible to install a fresh edge instead of sharpening a small, specialized blade in the field. They can also allow task-specific blades on a shared handle. The tradeoffs are ongoing supply cost, compatibility dependence, and the need to keep spares protected from moisture, dirt, and puncture. A spare blade should be labeled and stored in a rigid sheath or package, not loose with food, clothing, or other tools.
Check whether the maker sells replacement blades individually, how they attach, and whether the connection is serviceable without a special tool. Confirm the exact model compatibility; do not assume that “universal” means every handle. If a blade becomes dull, bent, corroded, or damaged, replace it. Forcing a dull blade takes more effort and can make the saw harder to control. Avoid sharpening coated or specially treated blades unless the maker permits it, since sharpening may remove a coating or alter the tooth geometry.
Blade teeth, length, and replacement choices
Bone-saw teeth versus wood-saw teeth
Bone saw blades are designed for animal bone, but product designs differ in tooth size, shape, spacing, and direction. A wood saw commonly has teeth intended to clear wood fibers or cut across grain; those teeth may clog, bind, or behave unpredictably in bone and soft tissue. A hacksaw blade designed for metal is also not automatically a good game-processing blade. Select a blade clearly designated for the intended game-processing task and compatible with the saw.
Some bone saws use a blunt or rounded tip intended to reduce accidental puncture of organs during particular cuts. That feature can be useful only when the blade design and the maker’s directions support it; it does not eliminate the risk of puncturing tissue. A sharp-toothed edge still requires a controlled stroke and a clear path. Do not cut blindly through a carcass or push a blade toward organs or the operator’s hand.
Blade material, coating, and corrosion
Blades may be made from stainless or other steels and may include a surface coating intended to improve wear or corrosion resistance. A coating does not make a blade immune to rust, and it can be damaged by abrasive cleaners, sharpening, or rough storage. Stainless steel can still corrode when left wet or exposed to salts and organic residue. Rinse, clean, dry, and store the blade as directed by the manufacturer.
Compare corrosion resistance as one part of the maintenance plan, not as a reason to skip cleaning. Crevices around a blade mount, folding hinge, and frame pin can retain moisture and biological material. If the saw cannot be opened sufficiently to inspect those spaces, consider whether its design fits your hygiene expectations. For food-contact surfaces, follow applicable local guidance and manufacturer cleaning instructions. Do not apply lubricants or corrosion inhibitors to blade surfaces that will contact meat unless their label explicitly permits food-contact use.
Replacement convenience and compatibility
Blade replacement is useful only if a compatible spare is accessible when needed. Research whether replacement parts are sold through multiple dealers, how often models or mounts change, and whether the blade is specific to a single handle. Keep one or more spares in a sealed, rigid container appropriate for transport. Store used blades separately from clean spares and food. A replacement system with a tool-free lock can be convenient, but it must still lock securely and be easy to clean.
When choosing a kit, check what is actually included: saw handle, frame, bone blade, wood blade, spare, sheath, or storage case. Product listings can change, and accessory compatibility may differ between generations. Verify model numbers on the current maker page. If buying online, ensure that photos and compatibility statements match the exact listing. Do not use a substitute blade simply because its advertised length is close.
Using a bone saw during field processing
Prepare a clean, stable work area
Use a stable position that keeps the carcass from rolling or shifting. A clean tarp or other appropriate barrier can help separate meat from soil, leaves, and debris. Keep knives, saws, gloves, bags, and clean cloths organized so that a tool used on hide or a potentially contaminated area does not touch meat without cleaning. Work away from standing water and mud. Avoid placing cuts of meat directly on the ground or on the exterior of a dirty pack.
Wear clean disposable or rubber gloves if recommended by the local wildlife agency, especially when handling organs or animals with possible disease concerns. Gloves do not replace handwashing or equipment cleaning. Use a clean, sharp knife for careful soft-tissue work. The saw is for planned bone cuts; switch back to the knife for trimming rather than dragging a toothed saw through meat unnecessarily. Washington DFW advises keeping meat clean, cooling it promptly, and cleaning utensils; its game-meat food-safety guidance is one example of agency advice hunters should adapt to local rules.
Plan the cut and keep the blade path visible
Before sawing, identify the target bone, the intended direction, and where the blade will exit. Move loose tissue and clothing clear of the path. Keep the non-sawing hand out of line with the teeth and do not place it behind the cut as a backstop. Maintain a firm grip on both the work and tool, and use short, controlled strokes until the blade tracks securely. Avoid excess force, which can cause a blade to jump or bind.
Do not make a cut if the carcass cannot be stabilized or if the saw’s frame cannot fit safely. Change the position, use an approved alternative method, or ask an experienced partner for help. Never hold a bone in the palm while sawing toward the hand. If the blade binds, stop, relieve pressure, and reposition rather than jerking or twisting it. Keep the teeth away from the other hand and from any part of the animal you want to keep clean.
Keep organ contents and contamination away from meat
Field dressing requires attention to the stomach and intestines. Avoid puncturing them; if contents contact meat, follow local agency recommendations for removing the contaminated portion and cleaning. A bone saw should not be used as a shortcut through organs or unknown tissue. If it becomes contaminated, separate it from clean tools and food until it can be thoroughly cleaned and dried. Do not wipe a dirty saw on clothing or a game bag.
Separate tools used for head removal, skull work, or suspected diseased tissues from those used for meat when local guidance calls for it. Chronic wasting disease (CWD) management and carcass-part transport rules vary by jurisdiction. Check the wildlife agency’s current CWD guidance for the area where the animal was taken and where it will be transported. If an animal appears sick or has abnormal tissue, do not assume meat is safe; contact local wildlife authorities and follow official advice.
Respect species-specific methods and regulations
Some jurisdictions require proof of sex or other identifying parts to remain attached during transport. Rules for carcass movement, edible portions, and disposal also vary. Before hunting, review regulations and plan cuts that preserve required evidence and comply with transport requirements. A saw method that is common in one area may not be legal or appropriate in another.
Wildlife agencies publish practical instructions for field dressing and transport. North Carolina Wildlife Resources Commission describes field-dressing practices and the importance of keeping the carcass clean; see its field dressing and transporting wild game guidance. Alaska Department of Fish and Game also provides big-game field-dressing materials, including a bone saw among possible equipment. These resources teach process and hygiene; they do not endorse a particular commercial saw.
Food hygiene, cleaning, and corrosion control
Clean promptly after contact with game
After the cut, remove visible tissue and debris promptly using the method and supplies appropriate for the setting. If clean potable water is available, wash the blade, handle, frame, and any removable parts with soap and water according to manufacturer directions. Use a small brush only if it can be cleaned and stored separately. Rinse as appropriate, then dry the tool fully before sheathing or packing it. Avoid leaving a wet saw closed in a sealed pouch where moisture is trapped.
Cleaning and sanitizing are different steps. Food-safety guidance commonly calls for removing soil and organic material before applying a sanitizer. Follow the sanitizer label for concentration, contact time, and whether it is suitable for food-contact surfaces. Do not mix chemicals or use a concentrated solution that could damage the saw or create a hazard. If no clean water is available in the field, keep the dirty tool isolated in a labeled, leak-resistant container and clean it properly as soon as practical; do not treat a quick wipe as sanitation.
Penn State Extension explains the importance of temperature control and preventing cross-contamination in wild game handling. It recommends cleaning surfaces and utensils that contact raw meat or juices and keeping meat at safe temperatures. See Penn State’s field-dressing and handling guide. Safe meat handling depends on the whole process, from field to cooler and kitchen; a clean saw alone cannot make contaminated meat safe.
Keep the carcass cool and dry
Tool choice is only one part of meat care. Field dressing promptly when appropriate, protecting meat from dirt and insects, and cooling the carcass as soon as possible help reduce spoilage risk. Washington DFW advises keeping game clean, cool, and dry and cooling it below 40°F as quickly as possible. Local conditions, species, and travel time affect the plan, so carry game bags and a suitable cold source when needed. USDA’s outdoor food-safety advice emphasizes keeping perishable foods at 40°F or colder and packing meat with a cold source; see the USDA FSIS outdoor food guidance.
Do not use a creek, lake, or untested water source as though it were clean potable water for food-contact cleaning. Pack suitable water and cleaning supplies. Keep raw game separate from food that is ready to eat. Clean and dry the saw before storing it near clean bags or food in a vehicle or pack.
Protect against rust without contaminating food
After washing, dry the blade and pivot or frame joints thoroughly. Inspect for rust, pitting, loose fasteners, and damage to any coating. Store the saw in a dry sheath that does not trap moisture. If the manufacturer recommends a protective oil, apply it as directed and remove any excess before the blade is used where it might contact meat. Choose only products labeled for the intended surface and use. Do not assume a general-purpose tool oil is food-safe.
Salt, blood, moisture, and residues can accelerate corrosion. After a wet hunt, do not simply close the saw and leave it in a pack overnight. Open or disassemble it as instructed, clean the inaccessible areas, and allow it to dry. If a blade is pitted, bent, cracked, or difficult to secure, replace it rather than relying on it for a later hunt.
Transport, storage, and maintenance
Pack the saw so it cannot puncture or contaminate
Use a rigid sheath, protective cover, or locking folded position designed for the saw. Teeth should not contact clothing, food packaging, game bags, or bare skin. Keep clean spare blades in separate packaging, and label used or contaminated equipment. If the saw must be packed before it can be washed, use a leak-resistant container separate from clean gear. Avoid placing sharp blades loose in a pouch with knives, fire-starting equipment, or food.
When transporting meat, keep the saw and other dirty field gear physically apart from edible portions. A truck bed, cooler, and storage box can all become contamination points if they hold raw meat or dirty tools together. Use clean surfaces and barriers, and clean the saw outside the meat cooler. Penn State’s game-handling guidance discusses the importance of keeping raw juices from contaminating other food and surfaces.
Inspect before and after the trip
Before each hunt, inspect the blade for corrosion, missing teeth, cracks, bending, and secure attachment. Test a folding lock or blade-tension mechanism without placing fingers in the tooth path. Check frame fasteners and handle condition. Verify that your spare blade fits and that its package remains intact. A small, sharp tool that locks correctly is safer than an improvised replacement or a badly rusted blade.
After a hunt, wash and dry the saw, inspect the lock and pivot, and lubricate only where the manufacturer permits. Replace a blade that has lost its useful edge or shows damage. Store the saw closed and protected, but only after it is dry. Keep it away from children and out of reach of anyone who may mistake it for a general-purpose tool.
Use a separate system for shop processing if needed
For frequent processing at home or a dedicated camp, a larger meat saw with a cleanable frame may be more ergonomic and easier to maintain. Keep tools used on hides or heads distinct from tools used on meat when practical and consistent with local disease-control guidance. Establish a cleaning routine for the work surface, gloves, knives, saws, and containers. If you use powered equipment, follow its specific food-contact and sanitation requirements; a hunting hand saw article does not cover powered butcher saw operation.
How hunting bone saws differ from other saws
Not a medical bone saw
A medical or surgical bone saw is designed for clinical procedures, specialized sterilization, and use by trained medical professionals. A hunting bone saw is a field-processing hand tool. Its blade, handle, hygiene expectations, regulatory context, and intended users differ. Do not use a hunting saw for medical care, and do not interpret the shared phrase “bone saw” as meaning the tools are interchangeable.
Not every hacksaw or pruning saw is a game saw
A hacksaw is generally designed around metal-cutting blades; a pruning saw is designed for branches and wood fibers. Some frames can accept different blade formats, but fit alone does not establish safe use on animal bone or food-contact suitability. A wood blade may carry sap, dirt, coatings, or residues; a metal blade may have teeth and materials unsuited to game processing. Choose a saw specifically intended for game or meat processing and follow its maker’s instructions.
If you also pack a wood saw for shelter or camp tasks, keep it cleanly separated from food-processing tools. Our hand saw guide and pruning saw guide cover garden and branch-cutting applications; those saws should not be assumed suitable for bone or meat. The camping saw guide covers general outdoor wood-cutting tools and packability, while this article focuses on food-related game processing.
How to compare options before buying
Make a comparison sheet with exact product and replacement-blade model numbers. Record saw type, folded or packed size, weight, blade length, locking method, replacement compatibility, included sheath, cleaning access, corrosion-related materials or coatings, and warranty or spare-part availability. Do not compare weight figures without checking whether the maker includes the sheath or spare blades. For online listings, confirm that the images and compatibility text refer to the exact model being sold.
Then compare the features with your hunt. Will the saw fit inside a pack without contacting food? Can you deploy it with cold or gloved hands? Can the blade reach the planned bone cut without the frame hitting surrounding tissue? Can you clean it with the water and supplies you carry? Can you protect a spare blade? Is the cut necessary for your field method, and does local regulation allow the planned transport configuration? These practical questions are more useful than a generic “best overall” label.
This guide relies on official wildlife-agency and university extension guidance for field dressing and hygiene, plus manufacturer documentation for an example of a replaceable-blade interface. It does not claim hands-on testing, laboratory measurements, or current product prices. A manufacturer’s specifications describe its own product and should be checked against the current model page and instructions. Local regulations and wildlife-health notices can change, so verify them before each season.
Relevant references include Washington Department of Fish and Wildlife’s food-safety guidelines for game meat, North Carolina Wildlife’s field dressing guidance, Penn State Extension’s wild-game handling recommendations, USDA FSIS’s outdoor food-safety advice, and TRUE’s replacement blade compatibility information.
Frequently asked questions
Do I need a bone saw for hunting?
Not necessarily. Some field-processing methods use a knife to remove quarters and avoid splitting bone. A saw is useful for selected cuts when your method calls for them. Learn species- and region-specific methods from your wildlife agency or experienced instruction, and carry only tools you can use safely.
What makes a hunting bone saw different from a regular saw?
A hunting saw is intended for game-processing cuts and may have a compact handle, a blade designed for bone, a protective sheath, or a replaceable blade system. A wood or metal hacksaw may fit a frame but can have unsuitable teeth, coatings, cleanability, or food-contact concerns. Use a tool specifically made for the job.
Are folding bone saws safe?
They can be used safely when the blade locks securely, the hinge is in good condition, and the operator uses controlled strokes with the work stabilized. Inspect the lock before each use. Keep hands outside the blade path and do not continue if the blade shifts or the lock feels loose.
Should I choose a replaceable-blade saw?
It can be convenient if compatible spares are easy to obtain and the attachment locks securely. Confirm exact handle compatibility and store spares protected from moisture and contamination. If replacement blades are difficult to source, a different system may be more practical for remote trips.
How do I clean a hunting bone saw?
Follow the manufacturer’s instructions. Remove visible residue, wash with soap and clean potable water where available, rinse as directed, and dry fully before storage. Pay attention to hinges, mounts, and frame joints. Use any sanitizer only according to its label and food-contact directions. Keep a contaminated saw separate until it can be cleaned properly.
Can I use the same saw for bone and branches?
Only if the manufacturer specifically supports the blades and tasks involved. If one handle accepts separate bone and wood blades, keep them labeled and stored separately. Do not use a dirty branch blade on meat, or a game blade on wood and return it to meat without proper cleaning.
Can a hunting saw be used on a human bone in an emergency?
No. A hunting saw is not a medical device and is not appropriate for emergency surgery. For a serious injury, contact emergency services and follow trained first-aid guidance. Do not attempt to cut bone or perform invasive treatment.
How should I transport a used saw?
Close or cover the blade as designed, then place it in a leak-resistant container separate from clean food and gear. Avoid storing it wet in a sealed sheath. Clean and dry it as soon as possible, and keep clean replacement blades separate from used equipment.
Does a bone saw make meat safe?
No. Food safety depends on clean field dressing, avoiding contamination, prompt cooling, clean tools and surfaces, safe transport, and proper cooking. Follow your wildlife agency and food-safety authorities. A saw is only one tool in that process.
Conclusion
The right hunting bone saw is the one that suits your planned field cuts, fits your transport system, locks or tensions securely, and can be cleaned and dried after use. Compact folding models prioritize packability; frame and takedown designs can offer a longer, more stable stroke; replaceable blades help only when compatible spares are available. Keep a sharp knife for delicate work, reserve the saw for appropriate bone cuts, and keep dirty tools separate from clean meat and gear.
Before the hunt, review local field-dressing, transport, and wildlife-disease guidance. In the field, stabilize the work, keep the blade path visible, and avoid contamination. Afterward, clean, dry, inspect, and store the saw safely. Those habits matter more than an unsupported claim that one product is universally best.
This article is general buying and field-care information, not a substitute for local hunting regulations, wildlife-health guidance, food-safety training, or manufacturer instructions.