Best Oscillating Saws: How to Choose an Oscillating Multi-Tool
The best oscillating saws are better understood as oscillating multi-tools: compact power tools that move a blade or accessory through a short side-to-side arc. With the right attachment, one tool can make controlled plunge or flush cuts, remove grout, scrape adhesive, and sand small areas. The same versatility can make the tool easy to overestimate. An oscillating multi-tool is not a full-size reciprocating saw for rapid demolition, not a jigsaw for long curved cuts, and not a dedicated sander for finishing a large surface.
Choosing one involves more than comparing a speed dial. Oscillation angle, oscillations per minute, accessory mount, blade orientation, grip, vibration, power source, dust handling, and available attachments all affect how well a tool fits the work. This research-based guide explains those criteria and the limits of common accessories. It does not claim hands-on testing or that one model cuts faster or lasts longer. Check the exact manufacturer manual and accessory compatibility information before purchase.
Affiliate disclosure: DailyHomeDecorating.com may earn a commission from qualifying purchases through links in this article. This does not change the price you pay.
Amazon product examples to compare

ASIN: B07VBB55X5
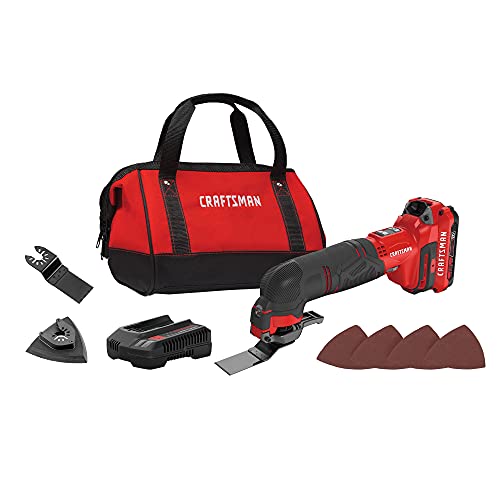
ASIN: B092RM6HJF

ASIN: B0BFFVM7P8
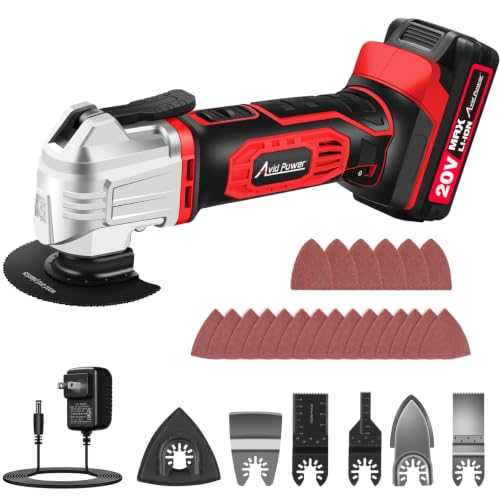
ASIN: B0CZP39W53
Certain content that appears on this site comes from Amazon. This content is provided “as is” and is subject to change or removal at any time. Product examples and images are supplied through Amazon Creators API; confirm specifications and availability on the current listing.
Table of contents
- Quick comparison
- What oscillating tools do
- How to choose
- Accessory mounts and blades
- Corded vs battery
- Dust and safe setup
- FAQs
Quick comparison: oscillating multi-tool priorities
| Task | What to compare | Limit to keep in mind |
|---|---|---|
| Flush or plunge cuts | Speed control, blade interface, depth control, grip | Short arc is controlled but may be slow through thick stock |
| Grout removal | Compatible grout blade, guide or depth accessory, dust control | Blade type must suit grout width and tile hardness |
| Scraping adhesive or caulk | Scraper shape, angle, speed setting, surface protection | Too much pressure or wrong edge can gouge the substrate |
| Small-area sanding | Pad shape, abrasive availability, dust extraction | Not efficient for large panels or whole-room finishing |
| Remote or mobile work | Battery platform, weight, runtime, charge time | A spare battery adds cost and weight |
| Long stationary sessions | Cord length, outlet access, rated extension cord | Cable routing can restrict movement |
What oscillating saws do—and what they do not
An oscillating multi-tool drives an accessory through a small arc rather than spinning a circular blade or moving a long reciprocating blade back and forth. That short motion lets a user position a narrow blade near a wall, floor, jamb, or fastener. Accessories can be designed for wood, metal, grout, scraping, sanding, and other tasks. The tool’s exact applications depend on the attachment, its mount, and the material.
The tool is often valuable because it can make a cut where other saws are too large or have too much blade travel. A flush-cut blade can trim a projecting piece near a surface; a plunge blade can start an opening at a marked location when the manual permits; a scraper can remove a thin layer of residue; and a sanding pad can reach a corner. These are limited, local operations rather than a fast way to remove a large volume of material.
A reciprocating saw uses a longer stroke and is generally better suited to faster rough cuts through larger stock or demolition tasks. A jigsaw uses a narrow vertical blade and is better suited to curves and shaped cuts through supported material. For broader demolition and cut-capacity comparison, see our reciprocating saw guide. For saws with a long reciprocating blade but battery power, see the cordless reciprocating saw guide. Those tools serve a different cutting motion and workload.
Oscillating tools are not magic access tools. A blade can still hit hidden wiring, plumbing, fasteners, or a fragile surface. A grout blade can damage tile if it wanders; a scraper can gouge wood; a sanding pad can round a corner. The small housing does not eliminate vibration, dust, noise, or the need for eye protection and controlled workholding.
How to choose among the best oscillating saws
1. Start from the accessories you will actually use
Write down the main jobs before comparing tools: trimming a door jamb, making a short plunge cut, removing grout, scraping adhesive, cutting a nail, or sanding a tight corner. Then identify the accessory made for that task and check that it fits the tool’s mount. If one job accounts for nearly all use, a dedicated saw or scraper may be faster, cheaper, and easier to control than buying a multi-tool and a set of attachments.
Accessory selection has as much effect as the motor. A wood blade is not the right choice for metal; a grout blade is not interchangeable with a sanding pad; and a scraping edge needs a suitable angle and substrate. The manufacturer’s charts describe what an accessory is intended to cut and which tools accept it. Avoid choosing based only on a large accessory bundle if many pieces are incompatible or unnecessary.
2. Understand oscillation angle
Oscillation angle describes how far the accessory moves through its side-to-side arc. Manufacturers may state the angle per side or as a total, so figures should not be compared until the definition is clear. A larger angle can increase how far a tooth or edge travels in each cycle, but it does not guarantee faster or cleaner work across every material and attachment.
Consider the task and control. An aggressive cut through accessible wood may tolerate a more active setting, while detail work near tile, trim, or a finished surface may benefit from deliberate speed and light pressure. Use the adjustment range specified in the manual. Do not assume that the highest angle is a performance setting for all jobs.
3. Compare speed control and oscillations per minute
Oscillations per minute, variable-speed range, and trigger control describe how quickly the accessory moves. These specifications may be reported differently by each maker. A range of speeds can help adapt to scraping, sanding, and cutting; it is not a substitute for choosing the correct accessory. If speed is set too high for a delicate surface, the tool can wander, heat material, or remove more than intended.
Look for a speed dial or trigger that is easy to reach while keeping a stable grip. Some tools use a dial, some use trigger modulation, and some combine both. The manual should explain recommended settings and any limits for specific attachments. Start on scrap or an inconspicuous area when possible. Use the minimum speed and pressure that produces controlled progress, rather than leaning hard on the tool.
4. Evaluate power and electronic control
Manufacturers may list input power, battery voltage, motor type, or speed range. These values are not direct substitutes for one another and do not establish cutting speed by themselves. A brushless motor, electronic feedback, soft start, or load response may be offered on some models; check what the manufacturer says the feature does and whether it matters for your tasks.
Consider sustained use and heat. A tool used for a short flush cut has different demands from a long grout-removal session. Follow duty guidance in the manual, keep vents clear, and stop if the housing becomes unusually hot, the accessory binds, or the tool vibrates abnormally. Do not force a multi-tool through a cut it is not designed to handle.
5. Check vibration, grip, and fatigue
Oscillating tools can transmit vibration to the hands. Manufacturer vibration values, if available, should be compared only when test conditions and units match. Anti-vibration features can reduce discomfort but do not eliminate exposure or fatigue. Grip shape, weight, trigger position, and the tool’s balance with an accessory installed all matter.
If possible, handle the tool with its battery removed or unplugged and follow store rules. Check whether the grip is comfortable in likely orientations: flat work, vertical walls, and overhead access should be treated differently. Plan breaks for repetitive work. OSHA notes that repeated exposure to vibrating hand tools and awkward wrist posture can create ergonomic risks; see its hand and wrist ergonomics guidance. If you have numbness, tingling, or pain, stop and reassess the task and work duration.
6. Inspect the accessory interface
Oscillating-tool accessory mounts are not all the same. Common interfaces include multi-hole or open-back mounts and proprietary or semi-proprietary systems such as Starlock. Some adapters allow cross-compatibility, but not every accessory fits every tool or transfers power the same way. Check the manufacturer’s compatibility chart for the exact tool model and accessory.
Tool-free clamps can make changes faster, while wrench-based mounts may use a different retention design. In either case, the accessory must be seated, secured, and oriented according to the manual. A loose blade can vibrate, slip, or damage the mount. Compare the cost and availability of replacement blades in the interface you choose. FEIN’s official multi-tool accessory guide and Bosch’s Starlock compatibility information illustrate why checking mounts matters; other systems may use different rules.
7. Decide between corded and battery power
A corded oscillating tool can run from a suitable outlet without waiting for a battery to recharge. It can suit a stationary workshop, repeated renovation work, or long sessions where cable routing is manageable. The cord can snag on framing, furniture, or the blade path and may limit reach. Check attached cord length, strain relief, voltage, current, and any extension-cord requirements in the manual.
A battery model is easier to carry between rooms or work away from outlets. Runtime depends on battery capacity, material, attachment, speed, pressure, temperature, and pack condition. Compare the exact battery platform and included kit. A bare tool may not include a battery or charger, and a larger pack adds weight. A spare battery can reduce pauses but increases total cost and equipment to manage.
Neither power source is automatically stronger or better. Compare the specific models’ documented settings, runtime or electrical requirements, weight, vibration, accessory fit, and service. For broader renovation finishing after a cut or repair, our guide to paint sprayers for cabinets covers a different tool stage.
8. Review dust extraction and accessory support
Some multi-tools offer dust-extraction accessories or shrouds for sanding. A dust port can help but does not guarantee that all fine dust is captured. Check which pads, shrouds, hoses, and extractors fit, and follow material-specific controls. Grout and masonry dust may have silica exposure concerns; use the manufacturer’s dust-control recommendations and applicable workplace rules rather than sanding dry without a plan.
For cutting, dust collection may be limited by the accessory’s shape or the work area. Keep vents clear and avoid blowing debris toward the operator. Check whether the tool can attach a dust adapter without blocking the cutline or interfering with the guard. Clean the tool and extraction system as the manuals direct.
Blades, accessory mounts, and common tasks
Plunge-cut blades
Plunge blades can start a cut in a panel or trim when the material and tool allow it. Mark the cut, check the area for hidden utilities and obstructions, and use a depth stop if the system provides one. The blade can cut through more than the visible surface, so set depth carefully. Do not plunge into a wall or floor without understanding what is behind it.
Different plunge blades are intended for wood, wood with embedded metal, plastic, or other materials. A blade that is not rated for nails can be damaged if it strikes one. Follow the blade chart, use an appropriate speed, and avoid forcing the accessory sideways. A short blade can create a neat opening, but long straight cuts are usually more efficiently handled by another saw and a guide.
Flush-cut blades
Flush-cut blades can trim protruding material close to a wall, floor, jamb, or other surface. Blade offset and accessory orientation affect the cut. Use a spacer or sacrificial piece when appropriate to protect the finished surface, and test on scrap. Keep the accessory flat and avoid levering the tool against trim or tile.
Grout-removal accessories
Grout blades may use carbide or diamond abrasive, and their width should be selected to match the joint. A blade too wide can damage tile edges; a narrow one may require more passes. Set depth so the accessory removes grout without contacting the substrate or tile edges. Use dust extraction and respiratory controls appropriate to the material. Stop if the blade catches, wanders, or begins chipping tile.
Grout removal generates dust and fragments. Protect nearby surfaces and isolate the work area as needed. Follow the blade and tool instructions for speed and angle. A multi-tool is not automatically the fastest choice for a whole room; a dedicated grout tool, professional service, or alternative method may be more efficient depending on scope.
Scrapers
Scraper attachments remove materials such as caulk, adhesive, paint residue, or flooring remnants when the blade and surface are appropriate. A flexible scraper can follow a surface, while a stiffer scraper can remove more stubborn material; attachment designs vary. Too much force can gouge wood, damage tile glaze, or bend the blade.
Before scraping, identify the material being removed. Older coatings or adhesives may have special handling requirements. Do not sand, heat, or scrape unknown hazardous materials without first determining the appropriate controls. Use a low, controlled setting, keep the blade angle shallow when directed, and test a small area.
Sanding pads
Triangular sanding pads reach corners and small areas that a larger sander may not. Check the pad interface and abrasive size. Use dust extraction where compatible, and avoid pressing hard enough to stall the tool or round edges unintentionally. A multi-tool sander is best for local touch-ups and detail work, not broad finishing across a tabletop or room.
Change abrasive sheets when clogged or worn. Keep the pad flat and move it steadily. If heat, swirl marks, or uneven removal appear, check the abrasive, speed, pressure, and dust collection. Do not use an abrasive attachment on a material unless it is rated for that use.
Oscillating multi-tools compared with reciprocating saws and jigsaws
A reciprocating saw moves a longer blade through a longer stroke and is often used for demolition and rough cuts through larger stock. A jigsaw moves a narrow blade up and down and can follow curves or patterns in sheet material. An oscillating multi-tool moves a small accessory through a short arc, offering control near surfaces and in tight access but removing material more slowly in many larger cuts.
Choose by cut geometry, not by the word “saw.” For a long cut across a board, a circular saw, track saw, or table saw may be more suitable. For a curved cut in plywood, a jigsaw may be the better tool. For removing a short section of trim without disassembling the surrounding finish, an oscillating tool may be more practical. The site’s reciprocating saw guide discusses the longer-stroke category, while the cordless version focuses on battery-powered choices.
Safe setup, dust, and workpiece control
Read the exact tool and accessory manuals before use. Wear eye protection and other task-appropriate protective equipment. Secure the workpiece when practical and keep hands away from the attachment’s path. Remove the battery or unplug the tool before changing accessories, adjusting a depth stop, clearing debris, or servicing it as directed. Verify the accessory is locked before starting.
Do not force a blade into a cut or twist it to make a tight turn unless that operation is approved. A blade can bind, flex, break, or kick the tool back. Keep bystanders clear of the accessory and debris. Hold the tool with the grip specified for its design, maintain a stable stance, and stop if vibration or sound changes unexpectedly.
Dust and fragments depend on the material. Cutting grout, sanding coatings, or scraping adhesive may require specific controls. Check safety data and manufacturer directions, use a compatible dust extractor, and follow workplace requirements. Do not assume a vacuum adapter captures all dust. OSHA’s general hand and power tool resources discuss guarding and safe operation; the OSHA hand and power tool hazards page is a useful starting point, while the manufacturer manual governs tool-specific use.
Research-based comparison method
A practical comparison records exact model number, corded or battery platform, speed range, oscillation angle and how it is defined, vibration data and test method if published, weight with the installed battery or cord, accessory interface, clamp type, included blades and pads, dust attachments, warranty, and service support. A product page can describe features, but the manual and accessory compatibility chart should confirm how the tool is meant to operate.
Then match the tool to actual tasks: cut length and depth, grout-joint width, scraping material, sanding area, work position, outlet access, battery availability, dust controls, and required precision. A high oscillation rate is not by itself a quality measure. A large accessory kit is not useful if the attachments do not fit or suit the planned work. This article does not claim comparative testing or current prices.
Manufacturer sources help clarify interfaces and task-specific accessories. FEIN describes its multi-tool accessory range, and Bosch explains its Starlock interface. Compatibility varies across manufacturers and generations; verify the exact tool and attachment before buying. OSHA resources on hand-tool ergonomics and vibration provide general context, not a model ranking.
Common buying mistakes
Assuming every accessory fits
Mount systems vary. Check the interface, tool generation, adapter, and accessory chart for the exact model. A blade that attaches loosely should not be used.
Buying the most aggressive setting
More speed or angle may remove material faster in some tasks but can reduce control or damage a surface. Start within the manual’s recommendations and adjust carefully.
Using the tool for large cuts
Multi-tools excel at access and detail, not every long or deep cut. A reciprocating saw, jigsaw, circular saw, or dedicated scraper may be more appropriate depending on the task.
Ignoring dust and vibration
Small tools still create dust and transmit vibration. Use appropriate collection, breaks, and controls for the material and duration.
Overlooking kit contents
Some listings sell a bare tool; others include batteries, charger, case, or accessories. Verify the exact SKU and included parts.
Frequently asked questions
What are oscillating saws best used for?
They are useful for short controlled cuts, flush trimming, plunge cuts within the manual’s limits, grout removal, scraping, and small-area sanding with the correct accessory. They are not the fastest choice for every long or deep cut.
Are oscillating tools the same as reciprocating saws?
No. A reciprocating saw moves a longer blade through a longer stroke. An oscillating tool moves an accessory through a short arc. They serve different cut styles and workloads.
What oscillation angle is best?
There is no universal best angle. Manufacturers may report the angle per side or as a total, so verify the definition. Match angle and speed settings to the accessory and material, using the manual.
Do I need a tool-free accessory clamp?
A tool-free clamp can simplify accessory changes, but clamp designs differ. Compare how securely it holds accessories, compatibility, and whether you can change blades safely. Follow the maker’s procedure for any clamp style.
Are Starlock blades compatible with every oscillating tool?
No. Compatibility depends on the specific mount, adapter, tool generation, and accessory. Check the manufacturer’s compatibility information rather than relying on a broad label.
Can an oscillating multi-tool remove grout?
Some grout accessories are designed for that job. Match width and material to the joint, set depth carefully, use dust controls, and avoid damaging tile edges. For large areas, a dedicated tool or professional may be more efficient.
Can I use an oscillating tool for sanding?
Yes, with a compatible sanding pad and abrasive for small areas and corners. It is generally a detail tool rather than a substitute for a larger sander on broad surfaces.
Should I buy a corded or cordless oscillating tool?
Corded tools suit work near outlets and longer sessions without battery changes; cordless models improve mobility but require charged batteries. Compare the exact models, runtime, weight, cord routing, and kit contents.
How do I reduce vibration?
Use a suitable sharp accessory, secure the work, keep the tool maintained, and take breaks during repetitive work. Compare manufacturer vibration data only when test methods match. Stop if vibration changes suddenly.
Can an oscillating saw cut metal?
It can when the tool and blade are rated for the material and thickness. Choose the correct accessory and speed, secure the work, and use eye protection. Do not assume a wood blade can cut metal.
Final decision: choose the interface and task first
The best oscillating saws match the accessory mount, cut or removal task, control range, power source, vibration, and dust needs. Start by listing the work you will do most often, then check which blade or attachment is designed for it and whether it fits the tool. Compare speed controls and oscillation angle only after confirming the tool can use the accessory you need.
An oscillating multi-tool is valuable for detail and access, but it does not replace a reciprocating saw for all demolition or a jigsaw for all curves. Use it with stable work support, appropriate dust control, and manufacturer-approved attachments. If the task is larger than the tool’s intended use, choose another saw or method.
This guide is general product research, not a substitute for manufacturer instructions, formal tool training, material safety information, or applicable workplace requirements.