Best Scroll Saws: A Practical Guide to Choosing a Saw for Curves and Detailed Work
The best scroll saws help woodworkers cut tight curves, decorative shapes, and enclosed openings that are difficult to make with a straight-cutting saw. A thin blade moves up and down through a small opening in the table, allowing the operator to turn the workpiece around the blade while following a pattern. That makes a scroll saw useful for puzzles, fretwork, small signs, ornaments, letters, model parts, and other projects where the shape matters as much as the finished edge.
A scroll saw is a specialty tool, not a substitute for every saw in a shop. It is designed for controlled, relatively small cuts and intricate paths, rather than ripping long boards or quickly breaking down sheet goods. Before buying, consider the size of the work you plan to cut, the materials and thicknesses involved, how often you will use the saw, and the amount of space available for a stable setup. The table, blade system, vibration, lighting, and dust management can affect the experience as much as motor power.
This guide explains how scroll saws work, how to compare throat capacity and blade types, which features are practical, how to set up a cut, and how to use and maintain the tool carefully. It is a buying and technique guide, not a lab-tested ranking of current models. Product listings and included accessories may change, so verify the manual, dimensions, blade compatibility, warranty, and current listing details before purchasing.
Affiliate disclosure: DailyHomeDecorating.com may earn a commission from qualifying purchases through links in this article. This does not change the price you pay.
Amazon product examples to compare
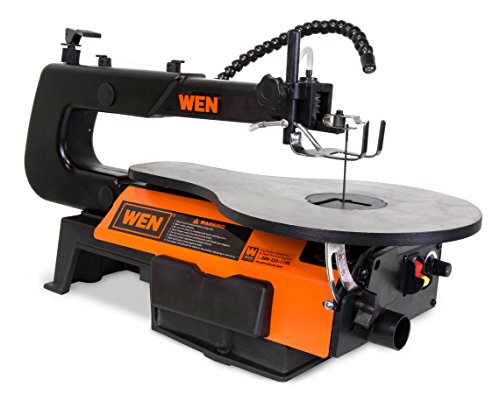
ASIN: B07MC1HLNP

ASIN: B0BFQY114K
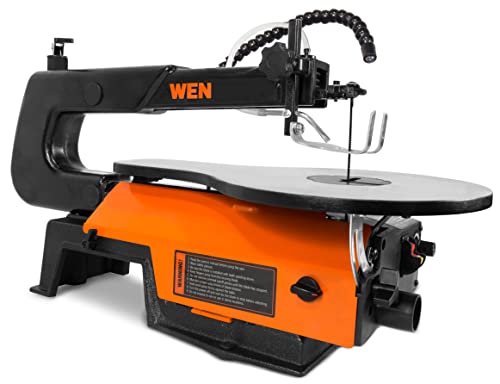
ASIN: B09XWV7FJT
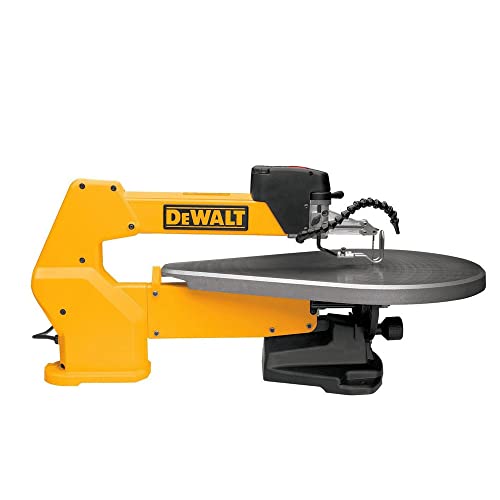
ASIN: B000022313
Certain content that appears on this site comes from Amazon. This content is provided “as is” and is subject to change or removal at any time. Product examples and images are supplied through Amazon Creators API; confirm specifications and availability on the current listing.
Best scroll saws for beginners: a quick-start choice
For a first scroll saw, make blade setup, steady work support, and speed control your first checks. A beginner benefits from a clear manual, a table that tilts and locks securely, accessible blade clamps, and blade types that are easy to source. A larger throat or higher motor rating does not guarantee easier learning; it may add cost and capacity the first projects do not need. Confirm how the exact model handles pinned and pinless blades, how the blade is tensioned, and whether the clamp design fits the work you plan to do.
Start with simple exterior curves in thin, flat stock that the saw maker approves. Practice guiding the work slowly without twisting or forcing it, then move to tighter turns and interior cutouts after you can thread, tension, and track the blade consistently. Use the hold-down and guard as instructed, keep fingers clear of the blade path, and support small parts so they cannot lift. Follow the manual for speed, thickness, blade selection, and workholding; a scroll saw’s small blade can still break or catch if the work is forced.
When comparing the best scroll saws for beginners, look for features that reduce setup friction rather than promises of instant precision. Variable speed can help match the machine to the material and blade, but settings are model-specific. A work light, dust blower or collection port, low-vibration stand, and easy access to blade clamps can improve visibility and workflow. Check these functions in the current manual and product listing, then choose a stable saw that fits your projects, workspace, and budget.
What a scroll saw does and where it fits
A scroll saw uses a narrow reciprocating blade held between upper and lower arms. The blade passes through a small opening in a flat table, and the workpiece rests on the table while the user guides it into the moving blade. Because the blade is narrow, the work can be turned gradually to follow curves and detailed outlines. Many scroll saw blades can be installed with their teeth facing in a chosen direction, allowing some users to cut from the underside of a project or manage the cut path in a way that suits a pattern.
The scroll saw’s strengths are small-radius curves, delicate cutouts, and interior openings. To cut an opening inside a shape, the maker can drill an access hole, remove one end of the blade from its clamp, thread the blade through the hole, and reinstall it. That technique lets the saw cut a closed internal shape without entering from the edge. It takes patience and careful tensioning, but it is central to fretwork and many puzzle designs.
The tool’s limits matter too. A scroll saw generally cuts more slowly than a band saw or a handheld saw when removing substantial material. It is not ideal for long straight rips, construction framing, thick stock beyond its stated capacity, or jobs requiring a rough demolition cut. A circular saw guide covers portable straight cuts, while scroll saws are intended for curves and fine patterns. For larger curved work, a bandsaw may be more appropriate, depending on the workpiece and required finish.
Scroll saw work is often described as precise, but the machine does not make every cut precise automatically. The operator must select a suitable blade, establish a pattern, control the feed, and keep the material flat on the table. Thin blades can deflect if pushed too hard or turned too abruptly. Good results come from matching blade and stock, practicing on scrap, and taking time through tight curves rather than forcing the work.
Start with the projects you want to make
Before comparing models, list the first few projects you expect to cut. Include the outline size, material, thickness, number of internal cutouts, and whether you will work mostly on curves, small details, or long gentle arcs. A saw used for small ornaments and a saw used for full-size decorative panels may need different throat capacity, table support, and workspace.
- Puzzles and names: Look for steady control at slower speeds, blade availability for thin stock, and good visibility around the blade.
- Fretwork and ornaments: Consider easy blade changes, reliable tension adjustment, and a work light that can be positioned without casting distracting shadows.
- Small model parts: Low vibration, a stable table, and fine blades can help maintain control over small shapes.
- Decorative panels: Check throat depth, table size, stock thickness capacity, and whether the saw can support the panel comfortably.
- Occasional hobby use: Simple setup and readily available blades may matter more than a long feature list.
Also consider how often you will make interior cuts. If a design contains many closed shapes, blade changes and access-hole drilling will be part of the workflow. A quick-release mechanism can save time, but the blade still needs to be installed securely and tensioned according to instructions. If most of your patterns enter from an outside edge and use broad curves, the convenience of tool-free blade changes may matter less than table stability and line visibility.
Estimate how much room the entire setup needs, not just the base footprint. The workpiece must move and turn freely in front of the blade; a large panel needs open table space and room for your hands. The stand or bench should be rigid, level, and positioned at a comfortable height. If the saw will live in a shared room, consider noise, dust collection, storage for blades, and how quickly the setup can be put away safely.
Compare throat depth and work capacity
Throat depth is the distance from the blade to the rear frame of the saw. It describes the maximum distance the stock can extend from the blade toward the back of the machine while still fitting under the arm. A deeper throat can accommodate broader panels and allow the user to rotate a larger workpiece, but it does not by itself determine the quality of a cut. Table dimensions, arm clearance, workpiece shape, and your available bench space all affect usable capacity.
Think about the largest pattern you expect to make. A small ornament or puzzle may fit comfortably on a compact table. A wide decorative panel may require more throat depth and room to maneuver without hitting a wall, lamp, or tool cabinet. The blank’s size can exceed the pattern because you need material around the design to hold it securely while guiding it. If the available workspace is tight, measure the full path the panel must travel and turn before selecting a machine.
Maximum stock thickness is another specification to check. Capacity limits can depend on the saw design, blade, material, and cut type. Do not assume that the machine can handle any board that physically fits beneath the arm. Consult the manufacturer’s manual and stay within the stated limits. Thick stock may also require a different blade, a slower feed, and more practice; the saw’s ability to accept a thickness does not mean that every cut through it will be clean or easy.
Table size, tilt, and support
A stable table helps the work stay flat as it turns around the blade. A larger table can support broader stock, but it also takes up more space. Check whether the table is flat, how it locks, and whether it remains stable when tilted. Many scroll saw designs tilt the table for bevel work, while others use a different arrangement. If angled cuts matter to your projects, examine how the angle is set and verified. A scale is a convenient reference, but a test cut and square or angle gauge can help confirm the actual result.
Consider whether the table surface lets wood slide smoothly without catching. A rough, dusty, or damaged surface can make delicate steering harder. Keep the table clean and flat, and do not add coatings, waxes, or lubricants unless the manufacturer allows them. A workpiece that slides too freely can also be difficult to control, so the goal is predictable movement rather than maximum slickness.
Some saws include a stand; others are intended to mount on a bench. A rigid stand can reduce rocking and may place the table at a convenient height, while a heavy bench can help absorb vibration. The mounting surface should be level and secure. If the saw rocks during a test cut, stop and address the stand, fasteners, or floor before continuing. Adding an unstable platform or stacking loose material under the feet can make control worse.
Choose the blade system before buying
Scroll saw blades are narrow and are available in many sizes and tooth patterns. The right blade depends on the material, stock thickness, pattern detail, desired finish, and whether you need to make internal cuts. Blade numbering and geometry are not perfectly intuitive for a beginner, and labeling conventions can vary. Read the blade maker’s chart and the saw manual rather than assuming that a larger number or more teeth is automatically better.
Two broad blade-end styles are common: pin-end and plain-end blades. Pin-end blades have small cross pins at each end and are often intended for saws designed around that system. Plain-end blades are held by clamps, which can make them useful for threading through small drilled access holes for interior cuts. Some machines accept only one type; others can accommodate more than one with a compatible clamp setup. Confirm compatibility before ordering blades, especially if you plan to do fretwork.
| Blade characteristic | What it can affect | How to choose |
|---|---|---|
| Blade size and width | Curve radius, stiffness, and stock thickness | Use the blade chart for the material and detail level. |
| Tooth geometry and spacing | Cut speed, finish, and chip clearance | Match the tooth pattern to the material and direction of cut. |
| Plain or pinned ends | How the blade mounts and whether it can pass through an access hole | Buy only the type supported by the saw and project. |
| Material and coating | Durability and suitability for specific stock | Follow the blade maker’s guidance; do not assume all blades suit all materials. |
Thin blades can turn tighter curves but may be more vulnerable to deflection or breakage when pushed or twisted. Wider blades can be more stable for broader curves but may not turn sharply without leaving the pattern line. Fine teeth may suit thinner stock and detailed work, while coarser patterns can clear chips in thicker material more effectively. These are general tendencies, not universal rules; follow the blade maker’s recommendations for the exact stock.
Tooth direction and cutting from the underside
Many scroll saw blades cut on the downstroke, though blade options and methods vary. Some users orient a blade to cut on the upstroke for particular projects or to manage tear-out on a surface. Do not change blade orientation without confirming that the saw, clamps, and blade are designed for it. Follow the machine manual, maintain secure clamping, and test the technique on scrap. If the saw’s hold-down foot or guard behaves differently with a reversed blade, stop and ask the manufacturer rather than improvising.
Blade orientation affects which face of the wood receives the cleaner edge, but it does not eliminate tear-out. Material grain, blade sharpness, feed pressure, and the direction of the cut all play a part. Protect the visible face with masking tape where appropriate, select a suitable blade, and make a practice cut. If the project has a finished front and back, inspect both faces after the test.
Blade tension and clamping
A properly tensioned blade follows a pattern more consistently than a loose blade. Too little tension can allow wandering; too much can shorten blade life or damage the blade and mechanism. Use the tensioning method described in the manual. Some machines use a lever or dial; others require a manual adjustment and a sound or feel check. Do not rely on a single trick from a video unless it agrees with the manufacturer’s procedure.
Both ends of the blade must sit fully in their clamps and point in the intended direction. Remove power before threading or changing a blade. Check that the blade is straight and not twisted in the clamps. A blade that is installed incorrectly can break, cut poorly, or behave unpredictably. Keep fingers away from the teeth while handling it, and dispose of broken pieces safely because tiny fragments can be sharp.
Motor, speed control, vibration, and noise
Scroll saw motors move the blade in a rapid up-and-down stroke. For intricate work, the ability to control the rate can be more useful than a headline power number. Variable-speed control lets the operator adjust the pace to the material, blade, and experience level. Slower operation can make it easier to practice and negotiate tight curves, while a suitable higher speed may help with other stock. Always stay within the saw and blade maker’s limits.
Do not assume that the highest setting is best. A fast blade can remove material quickly but may make it harder for a new user to follow a small pattern. A very slow speed can also be inappropriate for some blades or materials. Start with a conservative setting that allows control, make a test cut, and adjust based on the result. Keep a steady feed without pushing the stock hard into the blade.
Vibration can affect accuracy and comfort. The saw’s design, blade condition, tension, mounting, stand, and floor all influence vibration. A model’s vibration rating, when available, can help comparisons, but the actual setup still matters. Mount the machine securely on a rigid surface and check that fasteners stay tight. If vibration changes suddenly or becomes severe, stop the saw and inspect blade installation, tension, mounting, and workpiece support.
Noise can include motor sound, blade contact, and vibration in a bench or stand. Hearing protection may be appropriate, especially during longer sessions. A noisy or resonant stand can sometimes be improved by following the maker’s mounting instructions or choosing a more stable surface, but do not add improvised pads that make the saw rock or move. Test the setup before beginning a long project.
Work light, blower, and dust port
A focused light can illuminate the pattern near the blade and reduce shadows from your hands. Check whether it can be aimed without obstructing the work or shining into your eyes. A blower may direct dust away from the line, improving visibility, while a collection port can connect to suitable dust extraction. These features can make detail work more comfortable, but they do not capture all dust or replace respiratory and eye protection.
Dust from wood and engineered materials can irritate eyes and lungs. Use extraction appropriate to the material and workspace, keep the area ventilated, and wear protective equipment as needed. Avoid sweeping fine dust into the air. Follow the material maker’s safety guidance, especially for treated or composite stock. If a dust hose interferes with the workpiece or pulls at the machine, adjust the setup or disconnect it if the manual permits.
Set up a scroll saw for controlled work
Place the saw on a stable, level bench or stand and secure it using the manufacturer’s mounting points. Make sure the workpiece can move freely and that the operator has a clear view of the blade. Arrange lighting, dust collection, and power before starting. Keep cords and hoses away from the moving arms and from where the workpiece will turn.
Disconnect power while installing a blade, adjusting the hold-down foot, changing the table angle, or threading a blade through an access hole. Install the blade in the correct clamps and direction, set tension as directed, then reconnect power only after hands and tools are clear. Confirm that the hold-down foot is positioned to help control the work without preventing it from turning. A foot set too high may allow the workpiece to lift; one set too low can make steering difficult.
Lay out the pattern clearly. Attach a printed pattern with suitable adhesive or tape, transfer it with a marking method that will not obscure the line, or draw directly on the stock. Keep the pattern securely attached so it cannot shift as the work moves. If you need to remove the pattern later, choose a method that will not damage the finished face. For an important project, make a test from scrap to confirm the pattern scale and cut approach.
Check the blade-to-table relationship. The blade should be aligned as specified by the saw maker, and the table should be level or set to the intended bevel. Use a square or test piece to confirm an angle when fit matters. Check that the blade runs freely through the table insert and that the workpiece does not catch on the insert opening. Replace worn or damaged inserts according to the manual.
Choose a feed rate and turn gradually
Start the saw before bringing the stock to the blade if the manual recommends it. Keep the work flat and feed it forward smoothly. Turn the material gradually as you approach a curve; trying to pivot too sharply can bend the blade or widen the cut. The blade must have room to clear chips, so occasional slight back-and-forth motion may help in suitable materials, but follow the maker’s guidance and do not force the blade sideways.
Practice on offcuts of the same species and thickness. Try straight lines, broad curves, gentle S-shapes, and small circles. Observe how the blade responds to different feed pressure and speeds. If it drifts, stop and diagnose rather than compensating by pushing harder. A dull or unsuitable blade, excess pressure, poor tension, or a line of sight problem may be the cause.
For tight turns, slow down before reaching the curve and let the stock rotate in small increments. A relief cut from the waste area to the pattern can remove material and make it easier to turn the remaining piece. Plan relief cuts so they do not enter the finished design. On intricate work, mark these cuts on the pattern before starting so you are not improvising near the blade.
Use cases for a scroll saw
Puzzles and small figures
Scroll saws can cut interlocking puzzle pieces and small silhouettes from suitable stock. Begin with a simple outline that avoids fragile narrow sections, and secure the pattern so the line remains visible. The blade, speed, and stock thickness should suit the detail. A smooth cut is easier to sand than one with deep scallops, so keep the feed steady and let the blade do the work. For puzzles, test how pieces fit before applying finish because finish can slightly change the feel of close-fitting edges.
Fretwork and interior openings
Fretwork often includes enclosed openings. Drill an access hole inside the waste area, disconnect the saw, release one end of a plain-end blade, pass it through the hole, and clamp it again as directed. Check tension and orientation before starting. Work through each opening methodically, disconnecting power for every rethread. Organize the pattern so you do not lose track of which holes are complete, and avoid rushing blade changes.
Small drilled holes require careful positioning. A hole too close to the design can weaken the finished piece or break into the pattern line, while one that is too far away makes the internal cut longer. Use a drill bit appropriate to the blade and stock, clamp the work securely, and keep hands clear of the bit. If the opening is very small, test the blade threading process on scrap first.
Letters, signs, and decorative panels
Letters can be cut as separate shapes or as openings in a panel. Choose a font and layout with enough material connecting the parts; delicate serifs and narrow bridges can break during cutting or sanding. A scroll saw can cut curves, but it cannot restore a section that has become too thin to support. Make a full-size test pattern and review the negative spaces before cutting the finished blank.
Model pieces and craft components
Small components can be difficult to hold and see. Use a workpiece large enough to keep fingers a safe distance from the blade, and avoid cutting tiny loose pieces without an appropriate holding method. A zero-clearance or auxiliary table may help with small stock only if it is designed for the saw and does not interfere with the guard or hold-down. Check the manual and use push aids or fixtures only when appropriate.
Safety when using a scroll saw
Read the manual for the exact machine and blades. Wear eye protection, and use hearing and respiratory protection as appropriate to the stock and session. Tie back hair, secure loose sleeves, and remove jewelry that could catch. Keep fingers on the sides of the workpiece and away from the blade path. Do not place a finger directly in front of the blade to steer a tight curve.
- Disconnect power before threading, changing, or adjusting a blade.
- Secure the machine to a stable surface and check that all mounting fasteners are tight.
- Keep the work flat on the table and use the hold-down foot as described in the manual.
- Never force the stock through the blade or twist the blade by pushing sideways.
- Keep guards and safety features installed and functional; do not bypass them.
- Wait for the blade to stop before removing waste pieces or inspecting a cut.
- Keep bystanders, especially children, away from the work area.
Broken blades can leave sharp fragments. Turn off and disconnect the saw before retrieving a piece, and use a tool or protective method rather than reaching blindly around the mechanism. Inspect both clamps and the work area for fragments. Replace a blade if it shows damage, bends unexpectedly, or repeatedly breaks under normal technique. Repeated breakage may indicate an installation, tension, feed, or blade-selection problem.
Do not wear loose gloves near a moving blade. Gloves may be useful for handling stock away from the machine, but they can reduce fingertip control or become caught. Keep hands dry enough to maintain a stable hold. If the workpiece is too small to control safely, redesign the cut, use a larger carrier piece, or select a more appropriate tool rather than placing fingers close to the blade.
Use dust collection and ventilation suitable for the material. Some finishes, treated woods, and engineered boards produce hazardous dust. Do not cut unknown materials until you identify them and understand the precautions. Keep food and drink away from the work area, clean dust from surfaces, and wash hands after handling treated stock or finishing products. Follow product safety instructions rather than relying on the saw alone to manage exposure.
Maintenance and troubleshooting
Before maintenance, unplug the saw or disconnect it as specified by the maker. Remove dust from the table, blade clamps, and accessible areas with a brush or vacuum. Keep the table free of dried adhesive and debris that could catch the stock. Do not lubricate the blade or moving components unless the manual calls for it; some lubricants can collect sawdust or affect the material.
Inspect the blade for dull teeth, bends, cracks, or missing sections. Check the clamps for wear and confirm that screws and fasteners remain tight. Inspect the cord, switch, guard, hold-down foot, table insert, and mounting hardware. Stop using the saw if a safety feature is damaged or a moving arm has unusual play. Use an authorized repair provider or manufacturer support for electrical or structural issues.
If a cut wanders, first verify blade installation, tension, sharpness, and suitability for the stock. Reduce feed pressure and practice a broader curve. Confirm that the workpiece is flat and the hold-down foot is not preventing movement. If a blade breaks, check that the stock is not forcing it sideways and that the cut path does not turn more sharply than the blade can manage. Change one variable at a time on scrap.
Store blades in labeled packaging or a container that keeps them from tangling and protects their teeth. Separate sizes and types, and discard damaged blades safely. Keep the machine covered when not in use if the cover does not trap moisture. Protect the work light, power cord, and adjustment knobs from impact. A short inspection before each session can find loose hardware or a damaged blade before it affects a finished project.
How a scroll saw differs from other saws
A scroll saw follows tight, detailed curves and can make internal openings by threading its blade through a drilled hole. A band saw has a continuous blade and may be more efficient for larger curved shapes or thicker stock, but its blade and setup differ. A jigsaw is portable and can cut curves in larger panels, while the operator moves the tool rather than rotating a small workpiece on a table. A circular saw is designed mainly for straight cuts and is not a replacement for delicate fretwork.
For straight portable cuts and sheet breakdown, see the site’s circular saw guide. For tree limbs and pruning, the pole saw guide covers a different use case, and the gardening hand saw guide discusses manual pruning tools. These tools are not interchangeable; choose based on stock, cut shape, work position, and safe support.
If your project begins with lumber preparation, a circular saw or table saw may cut blanks to a manageable size before detailed scroll work. Make sure the blank is square and stable before placing it on the scroll saw. Do not attempt to use a scroll saw to remove large amounts of stock simply because its blade can fit the material. A separate rough-cutting step can reduce strain on the small blade and make the pattern easier to follow.
Frequently asked questions
What is a scroll saw best for?
It is best suited to small, detailed cuts, tight curves, fretwork, puzzles, ornaments, and interior openings in material within the saw’s capacity. It is not designed for fast ripping of long boards or general construction cuts.
Should a beginner buy a scroll saw with variable speed?
Variable speed can help a beginner practice at a controllable pace and adapt to different stock, but it does not replace a suitable blade or steady technique. Compare how the speed is adjusted and whether the manual gives guidance for materials.
Are plain-end or pin-end blades better?
Neither is universally better. The saw must accept the blade type, and the project can influence the choice. Plain-end blades are often used for internal cuts because they can be threaded through a drilled access hole. Check the manufacturer’s compatibility information before buying.
Why does my scroll saw blade keep breaking?
Possible causes include incorrect tension, a blade installed improperly, unsuitable blade size, excessive feed pressure, sharp turns, or a damaged blade. Disconnect power, inspect the machine, and test a new blade in scrap using the manual’s setup procedure. Repeated failures deserve a careful review of both technique and machine condition.
How tight should the blade be?
Use the saw maker’s tensioning procedure. Too little tension can let the blade wander; too much can cause breakage or damage. Do not rely on a generic sound test if it conflicts with the manual for your model.
Can a scroll saw cut metal or plastic?
Only if the saw and blade are explicitly rated for that material and the manufacturer’s procedure is followed. Material type, thickness, speed, heat, and dust all matter. Do not assume a wood blade or ordinary setup is suitable for metal or plastic.
How do I cut an interior opening?
When the saw and blade system support it, drill an access hole in the waste area, disconnect the saw, release one end of the blade, thread it through the hole, and reclamp it according to the manual. Verify installation and tension before cutting. Repeat for each opening and disconnect power before every rethread.
How do I reduce tear-out?
Use a sharp blade suited to the stock, support the work, feed steadily, and practice on scrap. Pattern placement, grain direction, blade orientation, and the visible face can affect the edge. Follow the material and blade makers’ recommendations; no single method eliminates tear-out for every project.
Do I need a stand?
The saw needs a stable, level, securely mounted surface. A dedicated stand can provide a comfortable height and reduce movement, while a rigid bench may work well if it is properly secured. Stability matters more than the stand label. Follow the mounting instructions and stop if the machine rocks or shifts.
Is a scroll saw safe for children to use?
A powered saw is not a toy. Any use by a young person requires age-appropriate judgment, direct adult supervision, training, and compliance with the manufacturer’s instructions. If the user cannot maintain safe hand placement and understand the controls, choose a non-powered craft method instead.
Conclusion: choose for detail, capacity, and control
The best scroll saws combine enough throat and stock capacity for your patterns with a stable table, compatible blades, predictable tensioning, manageable vibration, and clear visibility. A quick blade-change system can help with interior work, while variable speed may support controlled practice. Neither feature guarantees a clean result without proper setup and a steady feed.
Before buying, measure your typical work, compare blade systems and table arrangements, and consider how the saw will mount in your shop. Test on scrap, keep the stock flat, follow the manual, and stop if the blade binds or breaks. Scroll saws reward patience: the right setup lets you guide curves and cut detail without forcing the work. When a project exceeds the saw’s capacity or calls for a different cut, use a more suitable tool.