Best Circular Saws: A Practical Guide to Choosing the Right Saw
The best circular saws make straight, repeatable cuts without requiring a full table saw setup. They can break down plywood, cut framing lumber, trim boards, and handle many remodeling tasks with a portable tool. The right choice depends less on a long feature list than on the material you cut, how often you work, whether power is available at the job, and how accurately you can guide the saw.
A circular saw rewards careful setup. Blade depth, support under the workpiece, a visible cutting line, and a stable stance influence both cut quality and safety. Before shopping, identify the cuts you actually make. A homeowner making occasional shelving has different needs from a carpenter cutting sheet goods all day, and both differ from someone who needs a compact saw for trim or repairs.
This guide explains circular saw sizes, blade choices, corded versus cordless power, useful features, setup, safe handling, and maintenance. It does not claim that any model was lab-tested. Product specifications and bundles can change, so confirm current details in a listing and in the manufacturer’s manual before buying.
Affiliate disclosure: DailyHomeDecorating.com may earn a commission from qualifying purchases through links in this article. This does not change the price you pay.
Amazon product examples to compare

ASIN: B01KJJQ1MCView on Amazon
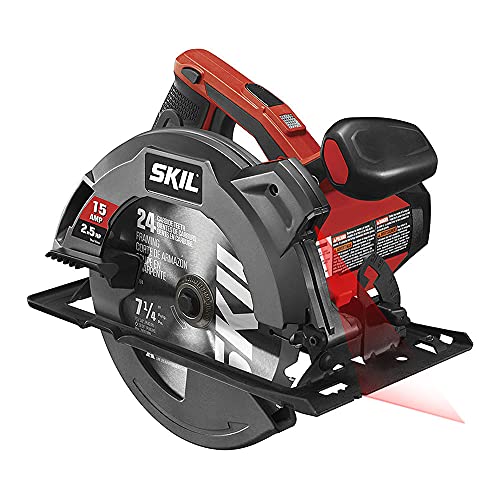
ASIN: B01BD81BLOView on Amazon

ASIN: B007NVSTO8View on Amazon
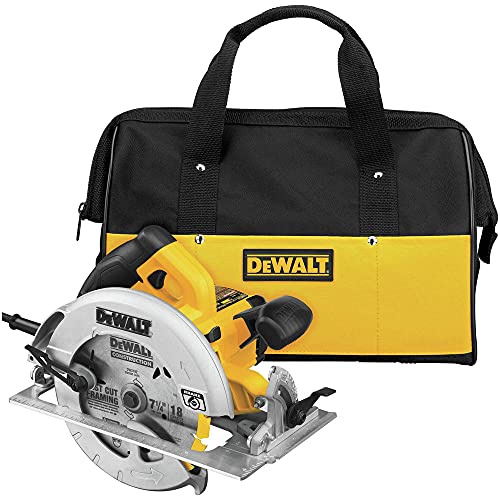
ASIN: B007QUZ16AView on Amazon
Certain content that appears on this site comes from Amazon. This content is provided “as is” and is subject to change or removal at any time. Product examples and images are supplied through Amazon Creators API; confirm specifications and availability on the current listing.
What a circular saw does well
A handheld circular saw uses a rotating toothed blade to cut stock as the operator moves the saw across the work. The base plate, often called the shoe, rides on the material and helps hold the blade at a chosen angle. A guard covers much of the blade when it is not engaged in a cut. The motor may sit beside the blade in a conventional sidewinder design or above it in a worm-drive style. Compact battery models use smaller blades and a smaller body.
The main advantage is portability. You can take the tool to lumber, a driveway work area, or a room under renovation instead of carrying every workpiece to a stationary machine. With a guide rail, straightedge, or carefully aligned rip fence, a circular saw can make long cuts in sheet goods. It is not automatically a precision cabinetmaking tool, though. The operator still needs to support the stock, control the saw, and verify the layout.
A circular saw is a general-purpose cutting tool, not the right answer for every cut. Curves call for a jigsaw or bandsaw. Repeated narrow rips may be easier on a table saw. Accurate trim miters are usually more convenient on a miter saw. For yard work involving limbs rather than lumber, a battery chainsaw guide covers a different tool class. Choose a saw for the material and cut geometry rather than forcing one tool into every job.
Start with the work you expect to do
Before comparing brands, write down a few real projects. Note material, thickness, cut length, location, and how many cuts you expect in one session. “Cut lumber” is not specific enough: an occasional crosscut in a 2-by-4 is different from ripping multiple sheets of plywood or cutting dense hardwood boards.
- Basic repairs: A straightforward, comfortable saw may be more useful than a large professional model.
- Framing and deck work: Think about repeated cuts, outdoor power access, cord management, and long sessions.
- Plywood and panels: Prioritize stable support, a visible line of sight, an accurate shoe, and guide compatibility.
- Finish work: Blade quality, low vibration, shoe stability, and controlled feed matter because tear-out is noticeable.
- Tight spaces: Weight, grip shape, and balance may matter more than maximum depth.
Consider storage and transport too. A saw that fits your shelves and can be carried safely is more likely to be ready when a project starts. Occasional use may justify a simple model; frequent work can justify a robust shoe, convenient adjustment controls, or a compatible battery platform you already own. If several people will use the tool, try the grip and control locations. Hand size, strength, handedness, and experience vary, so a comfortable hold for one person may feel awkward to another.
Choose blade diameter and cutting capacity
Blade diameter determines potential cutting depth, but the advertised depth is not the only practical consideration. The saw must have enough capacity for the material at the angle you need. Bevel cuts reduce depth compared with a 90-degree cut, and models can differ even when they use the same nominal blade diameter. Check the manufacturer’s cutting-depth table at both 90 and 45 degrees.
A full-size saw is commonly used for framing and sheet goods because it can cut common construction stock in one pass when properly set. Smaller blade formats are lighter and easier to maneuver, but reduced depth can mean changing sides or choosing another method for thick stock. A compact saw can be useful for flooring, trim, thin panels, and repairs when capacity matches the work; do not select one solely because it feels small in a store.
Compare maximum depth at the angles you use, blade diameter and arbor specification, and bevel range. Confirm that the saw accepts readily available blades for the material. Never install a blade exceeding the size or type specified by the manufacturer. A larger blade does not make an undersized saw safe or capable; it can create dangerous clearances and mechanical loads.
Depth adjustment and saw design
A tool-free depth lever can speed setup, but it should lock firmly and remain consistent. Set only enough blade exposure to pass through the stock and an intended sacrificial layer. Excessive exposure increases the blade below the work and can make kickback more severe. Verify depth with the saw unplugged or battery removed.
Sidewinder models place the motor beside the blade and are common for general home and jobsite work. Worm-drive designs use gearing that changes motor orientation and may feel different in weight and balance. Neither layout is automatically best for everyone. Compact saws reduce bulk but commonly have smaller blades and less depth. Compare the maker’s intended use and published specifications.
Match the blade to the material and finish
The blade supplied with a saw may be a general-purpose option, but it is not always the best choice. Tooth count, tooth geometry, kerf width, and blade material influence cutting speed, finish, heat, and the stock a blade can handle. A blade designed for fast framing cuts may leave a rougher edge in a finished panel. A fine-tooth blade can give a cleaner edge in appropriate sheet goods but feed more slowly.
| Blade choice | Typical purpose | What to check |
|---|---|---|
| General-purpose carbide | Mixed lumber and occasional panels | Diameter, arbor, and material rating must match. |
| Higher tooth count | Cleaner crosscuts in appropriate panels | Feed steadily; a finer cut may progress slowly. |
| Framing or ripping blade | Fast cuts in construction lumber | Expect a utilitarian edge; inspect for pitch and damage. |
| Specialty blade | Materials such as metal or fiber cement when approved | Use only an explicitly rated blade and follow tool and material instructions. |
Do not assume a circular saw can safely cut every material that fits beneath its shoe. Some materials produce harmful dust or require dedicated equipment, extraction, or a different blade speed. Review the material manufacturer’s guidance, use suitable dust protection, and do not cut masonry, metal, plastic, or fiber cement unless the saw and blade are rated for that use.
Keep blades clean and sharp. Resin buildup can increase heat and encourage the operator to push harder. A damaged, bent, missing-tooth, or improperly installed blade should not be used. Follow the blade maker’s guidance for cleaning and replacement rather than attempting a repair without the right equipment. The kerf is the strip removed by the blade, so mark the waste side of a layout and account for that loss. For repeated parts, make a test cut and measure before cutting the entire batch.
Corded or cordless?
Corded saws provide continuous power while connected to a suitable outlet, which can help during long sessions. They avoid battery-runtime planning and can be economical when you do not own a battery ecosystem. Their limitations are dependence on a safe power source and the need to route a cord behind the tool, away from the cutting path and walkways.
Cordless saws are convenient on rooftops, in yards, and in rooms where an outlet is inconvenient. Tradeoffs include runtime, charge time, battery cost, and the battery’s added weight. Runtime depends on battery, blade, material, cut, temperature, and technique; a capacity number is not a guarantee of a fixed number of cuts. If you own compatible batteries, check whether the bare-tool price is sensible and whether your packs suit the work.
Compare the complete system cost. A kit may include batteries, charger, case, and blade; another listing may sell only the tool. Check exact components and compatibility rather than assuming similar voltage labels mean packs interchange. For extended sessions, plan for a spare battery or corded option, and charge and cool batteries as directed. For corded tools, use only a cord rated for the tool and conditions, keep connections dry, and never pull the saw by its cord.
Features worth comparing
Shoe rigidity and adjustment
The shoe should stay flat and resist twisting as you guide the saw. A loose or distorted shoe can produce an angled cut even when the bevel scale reads zero. Check the base, depth and bevel locks, and whether a flat reference edge works with a guide. Adjustments should lock securely and remain accessible without moving a hand near the blade.
Bevel range, sightline, and light
Bevel adjustment tilts the blade relative to the shoe. Treat the scale as a starting point; verify the setting with a square or test piece when a joint must fit closely. Blade position may block the line depending on how you hold the saw. Check that you can see the cut while maintaining a stable two-handed grip. A work light helps in dim conditions but does not replace clear layout marks or safe lighting.
Dust management
Some saws direct dust toward a collection port or away from the operator. A vacuum hose must not pull the saw off course or create a trip hazard. Wear eye protection and respiratory protection appropriate to the material; dust ports are not a substitute for protective equipment. Keep bystanders away from the dust path.
Brake, guard, and ergonomics
An electric brake may stop a blade more quickly after release, depending on the tool. It does not make it safe to set the saw down immediately or touch the blade. Wait until the blade stops and the guard returns. Test the guard and trigger lockout as described in the manual. A hook can keep the saw off the ground between cuts but should be used only where the tool cannot fall onto people or materials. Handle shape, balance, and weight matter during long cuts; try a saw with its battery installed if possible.
Guide compatibility
Verify whether the saw fits a manufacturer’s track, a clamped straightedge, or an aftermarket guide. Check clearance for the motor and guard, whether the shoe slides smoothly, and how far the blade sits from the guide edge. Scale markings can speed setup but may not be exact. For a precise width or bevel, measure and test on scrap.
Set up for accurate, clean cuts
Accuracy begins before the saw starts. Measure from a consistent reference edge, mark the waste side, and account for kerf. If the finished dimension matters, test on scrap of the same thickness. Check that the blade is square to the shoe for a 90-degree cut and that bevel matches the plan.
Support the work so the offcut can fall without pinching the blade while the retained piece stays stable. Large panels may need foam insulation board, sacrificial material, or several supports positioned to keep the cut open. Never hold a small workpiece in one hand while cutting with the other; clamp it and keep both hands on the saw. The material should not shift when the offcut separates.
For long cuts, clamp a straightedge or compatible guide. Measure the offset from blade to shoe edge, then position the guide. Make a short test cut before cutting an expensive panel. Keep the shoe flat and move steadily. Forcing the saw can burn the edge, stall the motor, or deflect the blade.
Reduce tear-out with a suitable blade, support on both sides, and the panel maker’s advice about which face should be up. Options may include a fine-tooth blade, masking tape where appropriate, sacrificial backing, or a guide designed for the tool. Test first. Sheet goods can be awkward: plan supports before lifting, ask for help when needed, and agree with a helper where each person will stand. A helper should never reach near the blade or pull the offcut in a way that closes the kerf.
Safe operating habits
Read the manual for the exact saw and blade. Wear safety glasses or goggles, hearing protection when needed, and respiratory protection appropriate to the material. Tie back long hair, secure loose clothing, remove jewelry that could catch, and keep bystanders clear. Secure the workpiece and make sure cord, hose, and offcut have a safe path.
- Disconnect power or remove the battery before changing the blade, adjusting the saw, or inspecting a jam.
- Check that the blade faces the correct rotation direction and is secured with the specified hardware.
- Test the lower guard. It should move freely and cover the blade when the saw is lifted from the work.
- Start and enter the cut as directed by the manufacturer, with the blade clear of the stock until at speed.
- Keep both hands on the handles and stand to one side of the blade’s line rather than directly behind it.
- Let the saw do the cutting. If the blade binds, release the trigger, wait for a full stop, disconnect power, and correct the cause.
- Do not reach underneath the work, pull the saw backward through a cut, or lift it while the blade is moving.
Kickback can occur when the blade is pinched, stalls, or binds. It can throw the saw toward the operator or cause loss of control. Stable support, suitable depth, an aligned guide, a sharp blade, and controlled feed reduce common causes but cannot eliminate risk. If a cut is uncertain, stop and ask someone experienced or choose a safer method.
Do not disable or hold open the blade guard. Never cut above shoulder height or from an unstable ladder. Keep the cord behind the tool; if it crosses the cut, stop and reposition it. Disconnect before clearing offcuts near the blade. For unfamiliar materials or work that could expose wiring, plumbing, lead paint, or hazardous dust, investigate before cutting.
Do not wear gloves that can become entangled near a rotating blade. Keep loose sleeves, drawstrings, and dangling items away. Never defeat a trigger lockout or use a saw whose switch does not work correctly. Do not carry it by the trigger. When moving between work areas, disconnect power and wait for the blade to stop. If the cut begins to bind, do not yank or twist the running tool free; release, wait, disconnect, and inspect the setup.
Maintain a clear work area, sufficient lighting, and stable footing. Keep children and untrained people away from the tool and work zone. Do not set the saw down until the blade has stopped and the guard covers it. If a blade stalls, release the trigger and maintain control rather than letting go of the saw. A calm stop and inspection are safer than trying to finish a cut under pressure.
Common circular-saw cuts
Crosscuts
A crosscut goes across the grain of a board. Mark it square, support the board near the cut without trapping the offcut, and use a speed square or guide when repeatability matters. Keep the shoe flat and avoid twisting at the end, when the remaining stock is narrow. Confirm the cut on scrap when the angle will be visible in a finished assembly.
Rip cuts
A rip cut follows the grain. A rip fence or clamped straightedge helps keep it parallel to an edge. Sheet goods can flex and obstruct the operator’s stance. Use enough support, maintain a clear path, and ask for help handling a panel if its size or weight makes solo control difficult. Do not push sideways against a guide; let the saw advance in line with the blade.
Bevel cuts
For a bevel, tilt the shoe to the intended angle and verify on scrap. Bevel cuts reduce depth and can make the base harder to keep flat. Ensure the blade clears the material through the full cut, and position stock so saw and offcut remain stable as the kerf opens. Check that the guard moves freely at the chosen bevel setting.
Plunge cuts
Some saws and applications permit plunge cuts, but the procedure is model-specific and riskier because the blade enters from above. Do not attempt one unless the manual provides a procedure and the workpiece can be secured safely. A jigsaw or another tool may be more suitable for interior openings. Check for hidden utilities before cutting and never improvise by holding the guard open.
Engineered or treated materials
Pressure-treated lumber, composites, laminates, and engineered panels may have specific blade, dust, or disposal requirements. Read the material label and maker’s guidance. Keep dust from spreading into occupied areas and avoid breathing it. If composition is unknown, identify the material first. A blade that works in ordinary lumber is not proof that a saw or setup is appropriate for every product.
Compare models without relying on hype
Use a short checklist. Confirm blade diameter and arbor, then compare cutting depth at 90 degrees and at the bevels you use, shoe material and stiffness, weight in working configuration, and control locations. For cordless tools, include battery and charger in both weight and cost. Inspect the guard, adjustment mechanisms, manual diagrams, replacement parts, and warranty terms. Check the exact kit contents and return policy.
Reviews can identify recurring issues, but read details for the same model and version. Listings sometimes combine tool-only and kit variants or generations. A review count does not prove a tool suits your work. Seek manufacturer specifications and manuals, and test a setup on scrap before relying on it for a precise cut.
Compare the total system rather than the lowest visible price. A lower-cost saw may need a better blade, guide, batteries, or dust collection. A more expensive model may include accessories you do not need. List required items, subtract what you already own, and compare the actual setup cost, including consumables and protective equipment.
Questions before ordering
- Is the included blade suitable for the material, or will I need another?
- Are batteries and a charger included, and do they match tools I own?
- What is the cutting depth at 90 degrees and at my usual bevel angles?
- Can I find the manual, replacement parts, and service information for this model?
- Will my guide or track fit the shoe?
- Does the listing show a bare tool or a kit, and is the return policy clear?
These questions prevent paying for features that do not solve your problem. Many adjustment options help only when they lock securely and are easy to verify. A basic saw can suit occasional repairs; frequent work may justify more durable construction and convenient service support. Choose a tool you can maintain, not just one with the longest feature list.
Care, inspection, and storage
Unplug the saw or remove its battery before cleaning. Brush or vacuum dust from the shoe, vents, and adjustment areas without pushing debris into the motor. Wipe the base clean so it slides smoothly. Do not use solvents or lubricants unless the manufacturer permits them. Store the saw where the blade is protected and the tool cannot fall or get wet.
Inspect the cord, plug, battery contacts, shoe, fasteners, blade bolt, guard, and handles. Replace damaged parts through a qualified service provider or manufacturer. Do not tape over a frayed cord or continue using a saw with a sticking guard. Keep blades in a case or rack where their teeth will not strike other tools. Follow the battery maker’s storage and charging directions.
Before a project, confirm that the blade is correct and undamaged, bevel and depth locks are secure, and the work surface is clear. Wait for the blade to stop before setting the saw down. Clean resin with an approved product and follow the blade maker’s instructions. If a saw overheats, smells unusual, vibrates unexpectedly, or makes a new noise, stop and inspect it rather than completing another cut.
Keep ventilation slots clear and store the tool with the guard closed and blade protected. Keep it away from children and anyone untrained to use it. Store batteries as directed, away from extreme heat and moisture. Do not leave charging equipment in a place where it could be damaged. Put blades, wrenches, and guides in labeled storage so the right parts are available for the next project.
Where a circular saw fits among other tools
A circular saw is flexible, but other tools can be more convenient for particular jobs. A table saw moves material along a stationary blade and can suit repeatable rips when stock is supported properly. A miter saw is often easier for repeated crosscuts at measured angles. A jigsaw handles curves and interior cutouts. A reciprocating saw is generally used for rough demolition, where finish is secondary.
For pruning branches, use a saw intended for that material and working position. A hand-saw guide for gardening explains pruning and folding saw categories; a lumber-cutting circular saw is not a substitute. When a home project involves finishing cabinets, the cabinet paint-sprayer guide can help with the finishing stage, while the circular saw is only one part of the build.
Some projects need multiple tools and a planned sequence. A sheet may be broken down with a guided circular saw and refined on a stationary machine, but each step should suit the workpiece and operator. Choose a setup that keeps material stable and blade controlled; do not transfer a technique from one machine to another without understanding how it behaves. Space matters too: stationary machines need room for both the machine and material moving through it, while a handheld saw can be stored and used at a temporary work area.
Frequently asked questions
What size circular saw should a homeowner buy?
Start with the thickest material and deepest bevel you expect to cut, then check the published capacity. A full-size saw suits common construction stock and sheet work; a compact saw can be easier for thinner stock and lighter tasks. Handling comfort, blade availability, and work support matter as much as nominal diameter.
Is a cordless circular saw powerful enough for framing?
Many cordless saws are designed for construction, but performance depends on the model, battery, blade, material, and cut. Confirm the intended use and use an appropriate battery and sharp blade. For long sessions, plan for charge time or spare batteries. Voltage alone does not predict performance.
How many teeth should a circular-saw blade have?
There is no tooth count for every material and finish. Lower counts often favor faster cuts in suitable stock, while higher counts can produce a smoother edge in suitable material at a slower feed. Blade geometry and rating matter. Match the blade to the stock and follow its instructions.
Can I cut plywood with a circular saw?
Yes, when the saw and blade suit the panel and the sheet is safely supported. A finer blade and guide can improve the edge. Large sheets are awkward to control, so plan supports and ask for help when needed. Follow the panel maker’s cutting guidance and manage dust.
Should the blade be on the left or right side?
Blade position affects visibility and balance, and preferences vary with handedness and technique. Consider where eyes and hands fall relative to the line, whether the offcut is visible, and how the tool feels with its battery or cord. There is no universal side that is best for everyone.
Why does my cut wander?
A cut may wander if the line is hard to see, shoe is not flat, guide is misaligned, stock moves, blade is dull, or the operator pushes too quickly. Check the setup with power disconnected, secure the work, and test on scrap. Stop using a tool with a damaged blade or shoe.
Can a circular saw make a straight cut without a track?
An experienced user can follow a marked line, but a straightedge or track can improve repeatability on long cuts. Account for the offset between blade and shoe edge. Clamp the guide, test the offset, keep the base flat, and do not push sideways against the guide.
How deep should I set the blade?
Set only enough depth to cut the workpiece and any planned sacrificial layer, following the manual. Excessive exposure increases blade below the stock. Disconnect power before measuring or adjusting, then confirm the guard returns freely.
Do I need a special blade for each material?
Use a blade explicitly suited to the material and approved for the saw. A wood blade is not automatically appropriate for metal, masonry, plastic, or fiber cement. Check blade labeling, the saw manual, and material guidance. Some products create hazardous dust or require another tool.
When should I replace a blade?
Replace a blade if it is bent, cracked, missing teeth, badly worn, or otherwise damaged. Burning, slow cutting, or unusual force may mean the blade is dirty, dull, or mismatched. Disconnect the saw before inspection and follow the maker’s replacement guidance. Never use a damaged blade because a project is nearly done.
Can I use a circular saw for finish carpentry?
It can make finish cuts with a suitable blade, stable guide, and careful setup. A miter saw may be quicker for repeated short miters. Test the blade and technique on offcuts from the same material, and check each piece before assembly; a clean-looking edge can still be out of square or undersized.
What should I do if the saw stalls?
Release the trigger, maintain control, and wait for the blade to stop. Disconnect power or remove the battery before investigating. Check whether stock shifted, the kerf closed, blade is dull, or cut is too demanding. Never restart a trapped blade; correct support or choose a safer method first.
Conclusion: choose for the cuts you will actually make
The best circular saws combine suitable cutting capacity with a stable shoe, dependable adjustments, comfortable handling, and a blade suited to the job. Corded models offer uninterrupted operation near a suitable outlet; cordless models provide mobility but require battery planning. Neither format removes the need for a sharp blade, secure support, protective equipment, and deliberate technique.
Before buying, compare cut depth at the angles you use, blade availability, working weight, guard operation, guide compatibility, service support, and kit contents. Test setup on scrap, confirm the saw is square, and adjust depth for the stock. If the cut is beyond the saw’s capacity or you cannot support the work safely, choose another tool or get help. A well-matched saw and careful setup make ordinary projects more predictable.